Installation
↑ Back to top- Download the .zip file from your WooCommerce account.
- Go to: WordPress Admin > Plugins > Add New and Upload Plugin the file you have downloaded.
- Install Now and Activate.
Initial Setup
↑ Back to topAfter activating the extension, go to WordPress Admin panel > WooCommerce > Donation to access the dashboard and create new donation campaigns.
Creating New Donation Campaign
↑ Back to top- Campaign Goal Settings
- Basic Campaign Settings
- Donation Causes
- Recurring Donation
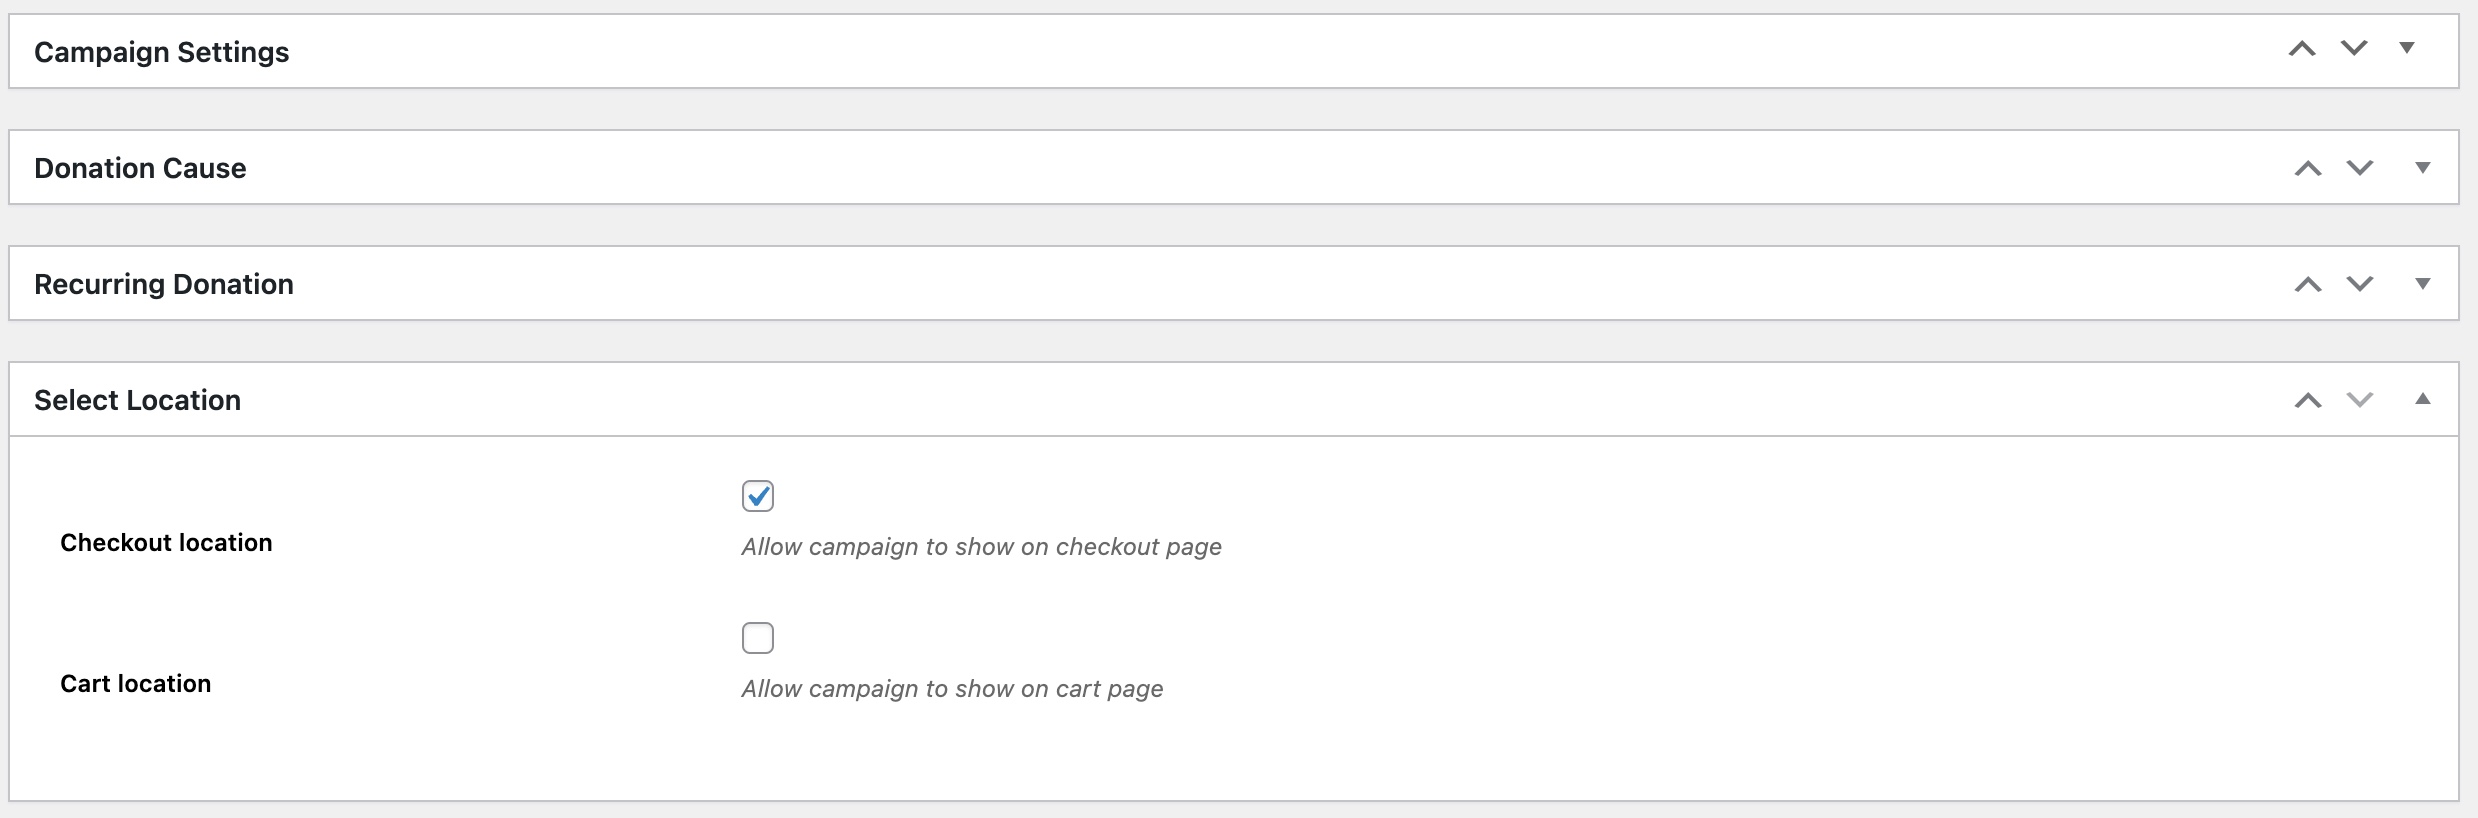
- Location (Cart & Checkout Page)
Campaign Goal Settings
Select Campaign Type: Choose whether the campaign has a target goal amount. When the goal is selected, you can add the amount that you need to collect. Progress Bar: A progress bar can be displayed for campaigns with a goal. You can enable/disable the progress bar and show the progress based on:- Number of donations
- Amount Raised
- Percentage of goal amount raised
- Goal Amount is raised
- On specific date
- After X days
- On X number of donations
Campaign Settings (Donation as Product or Fee)
↑ Back to topDonation as fee
When donation as fee is selected, this appears as a fee on the cart and checkout pages. You can choose to display it on cart or checkout page from the “Location” section.- Add Fee in fixed amount or percentage of cart total.
- Add message to appear with fee
Donation as Product
When donation is added as product, the extension will automatically create a new product in the All Products section. The product will be created using the settings you configure here. Even though a separate product has been created, you will still be able to manage any donation related settings from this campaign NOT from the product page.- Product type: When the donation as product is selected, you can choose to make the product virtual and downloadable.
- Custom Amounts: Select “Add Options” if you wish to add custom amounts that will be displayed on front end for customer to choose from.
- Amount Field: Select “Open Amount Field” checkbox to display an amount field to let customers enter any amount they wish. You can further customize the field options to display it as separate field or show as “Other Amount” option.
- Limit Amount: You can add minimum and maximum donation amount a person can enter and pay using the custom amount field.
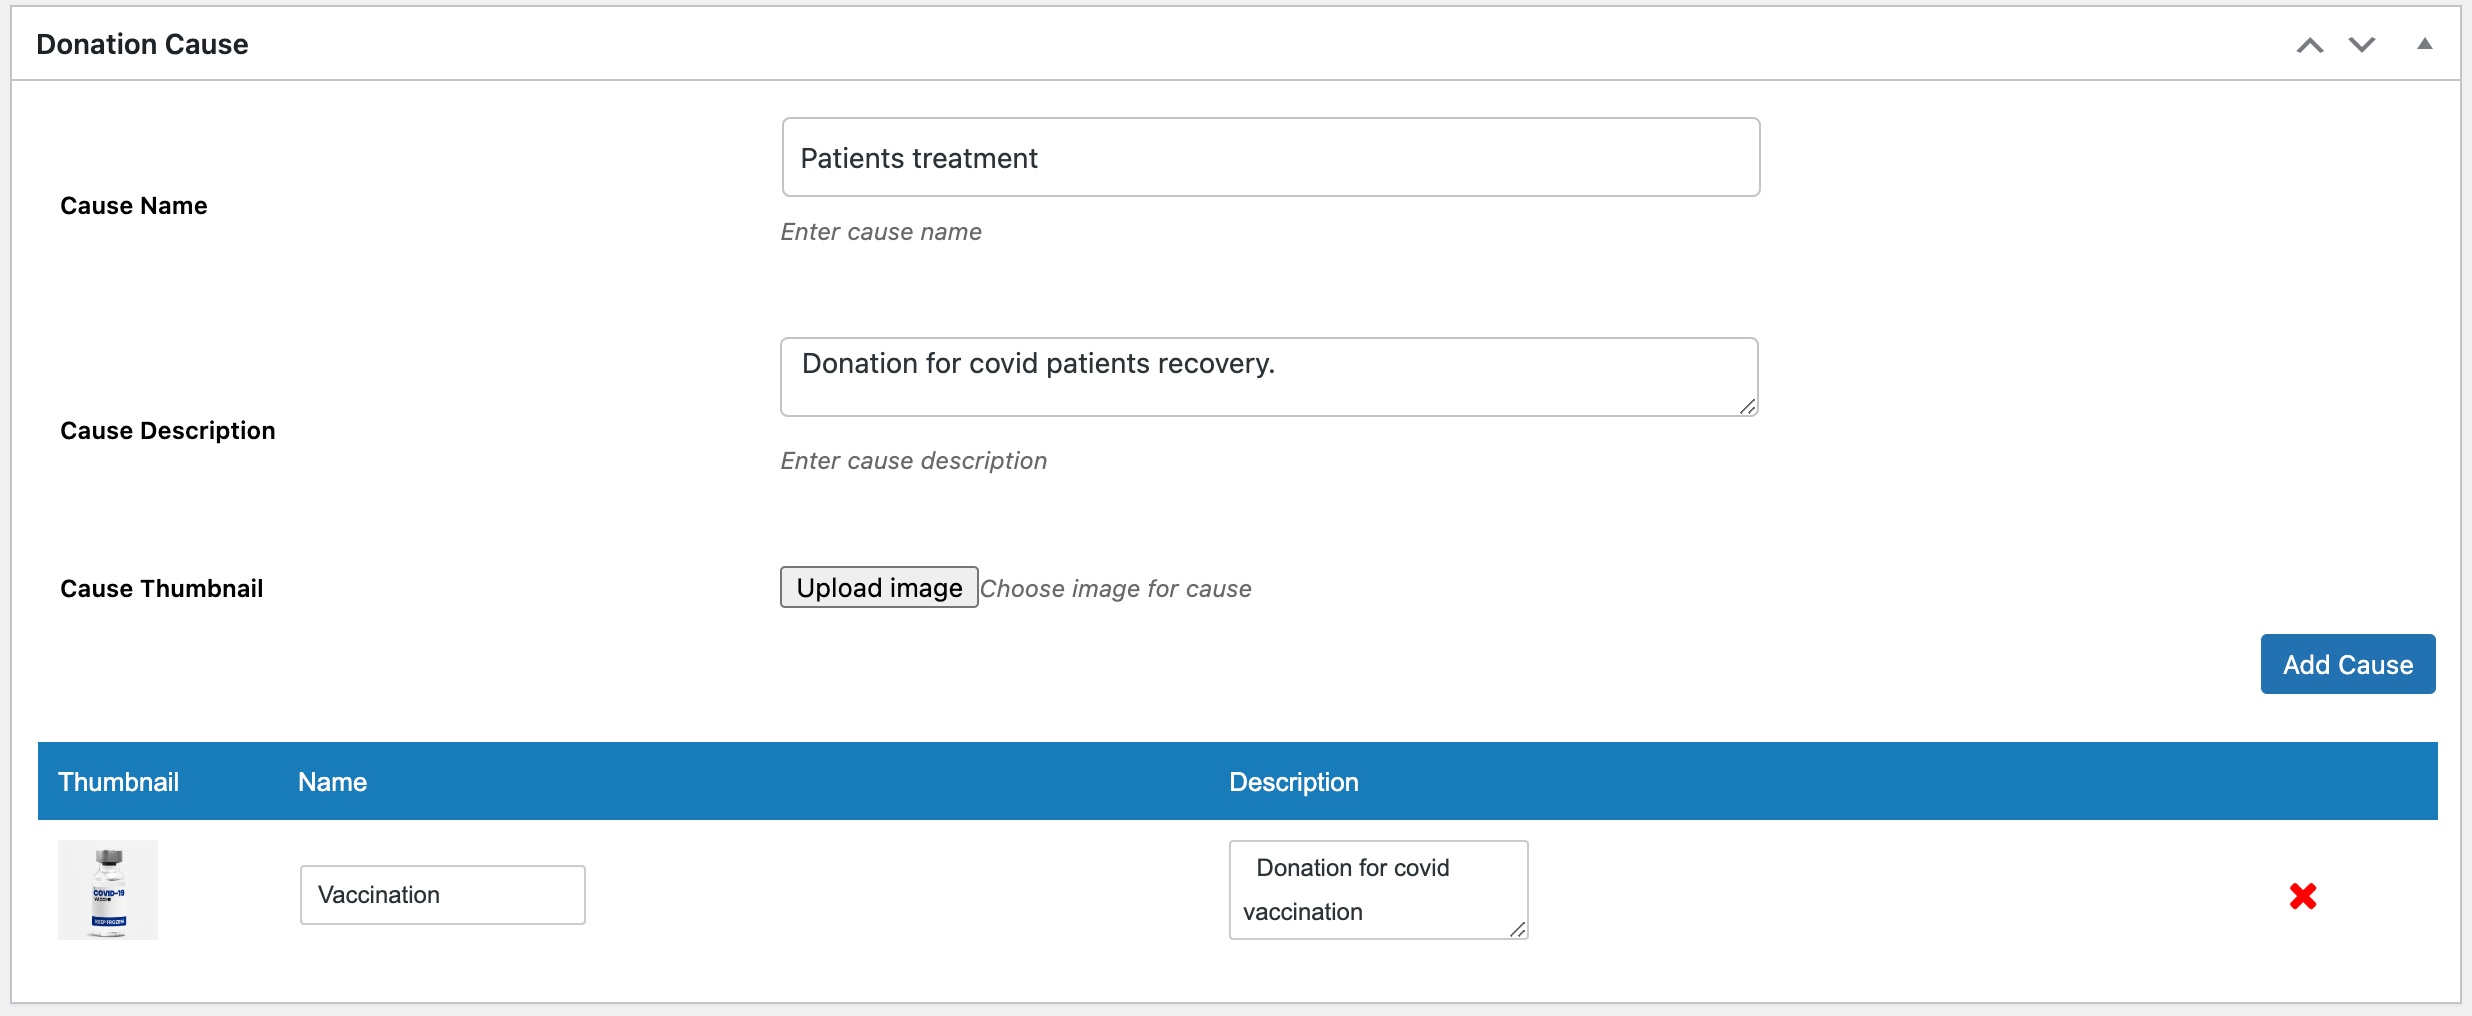
Donation Causes
↑ Back to topYou can choose to add multiple causes for donations if needed to let customers know where the funds might be used.
Recurring Donation (Subscription)
↑ Back to top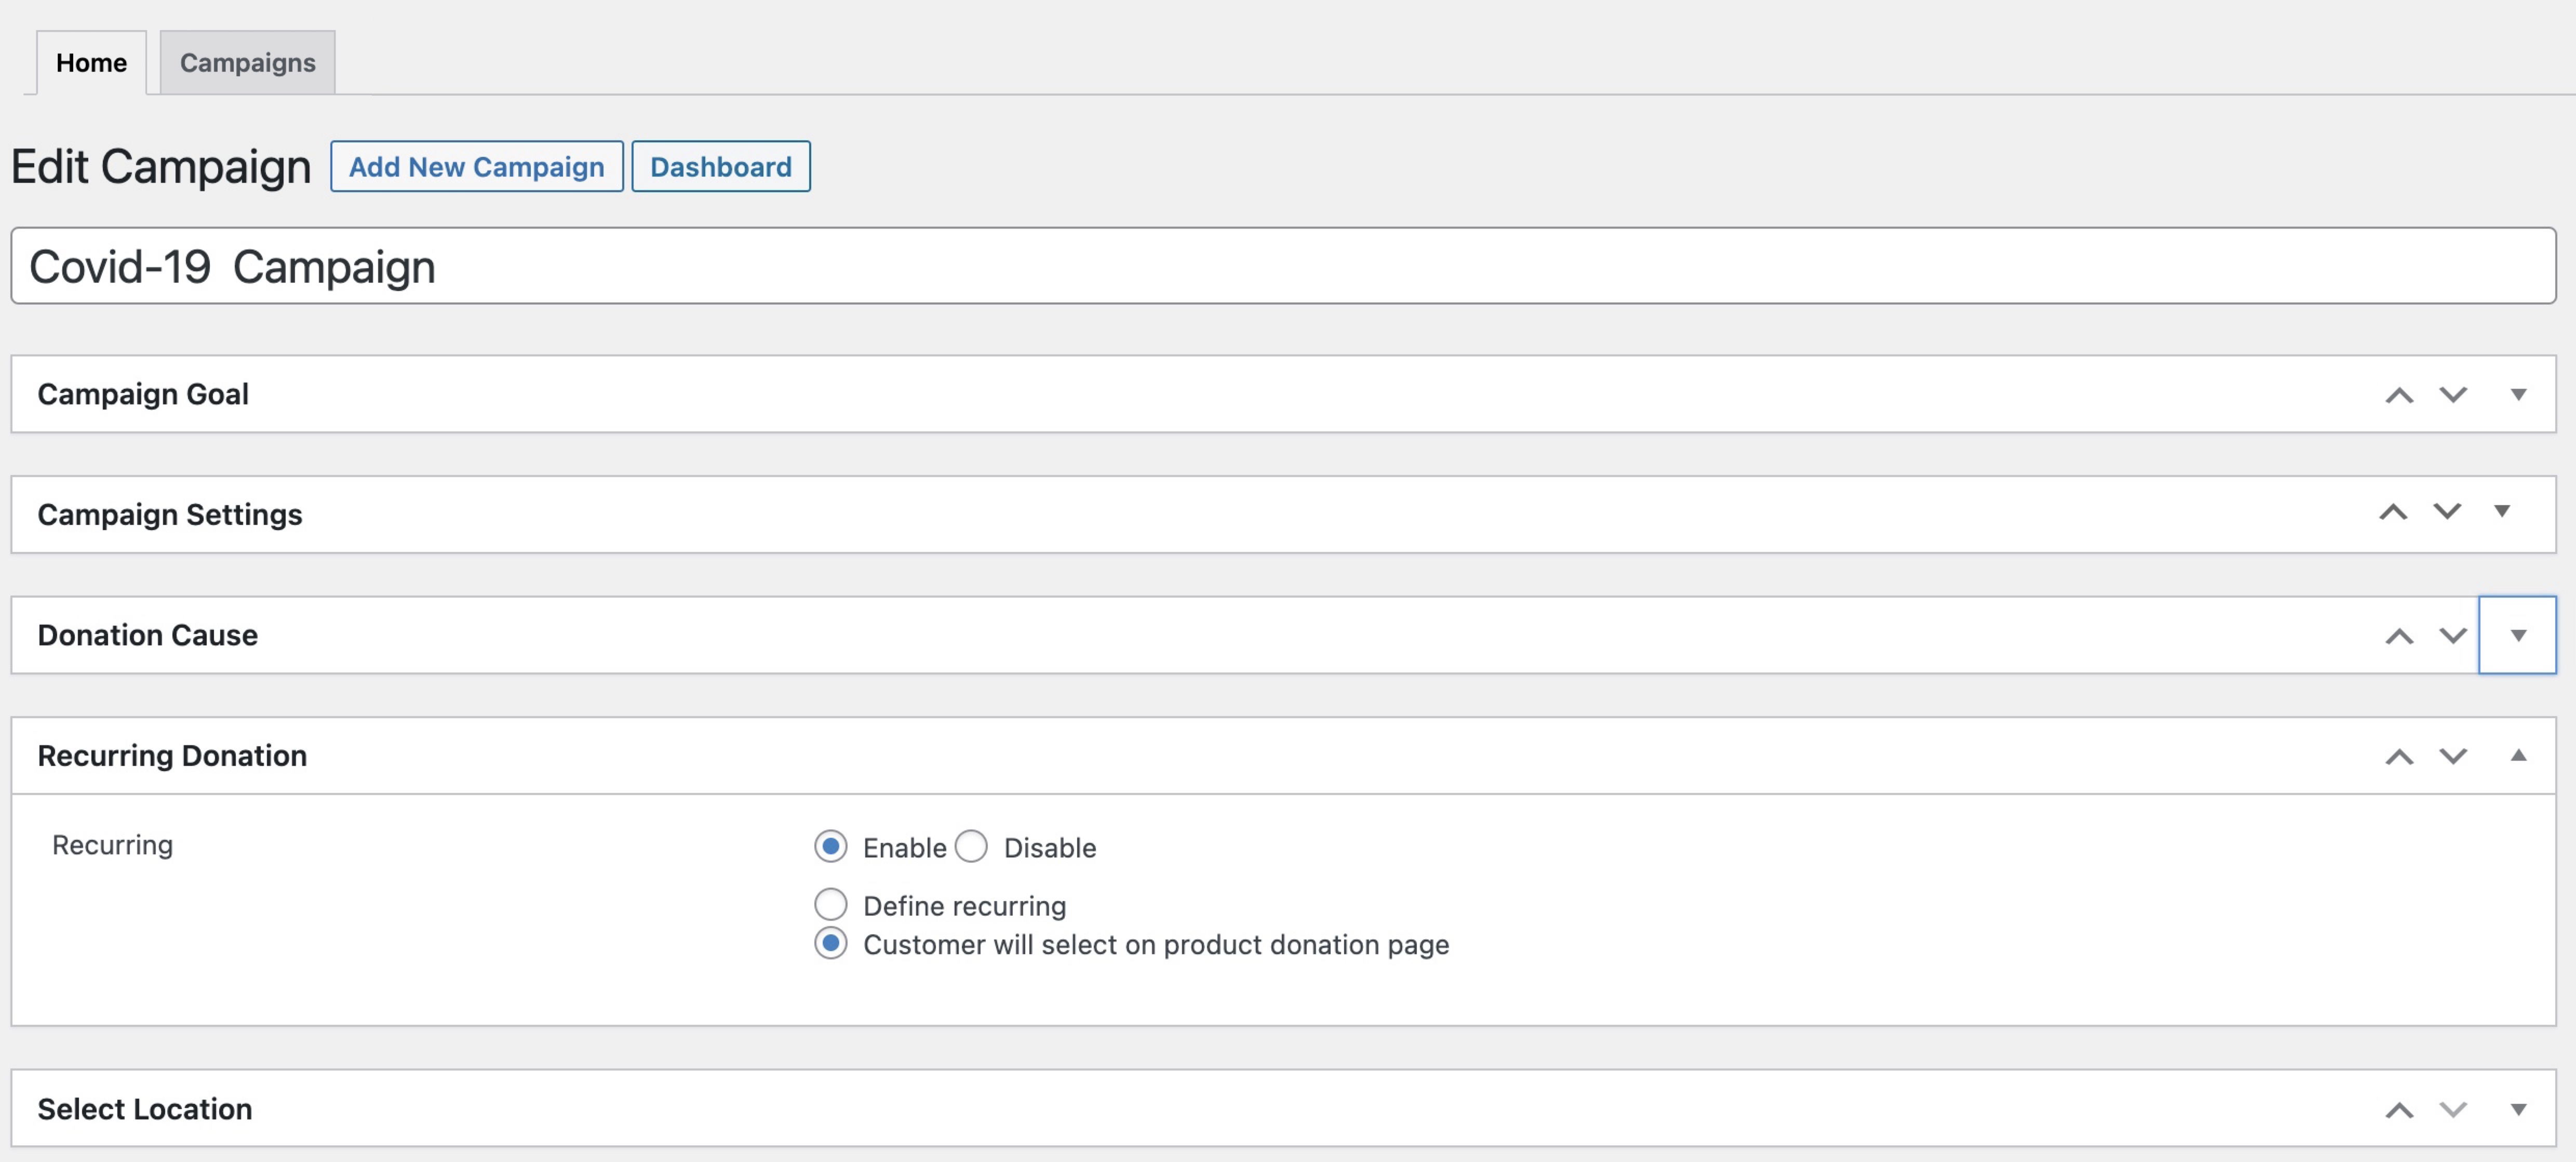
Location (Cart and Checkout)
↑ Back to topYou can choose where to display the donation campaign on the cart and checkout page. The position and layout can be customized from WooCommerce > Settings > Donation > Cart Settings and Checkout Settings.
Managing Donation Campaigns
↑ Back to top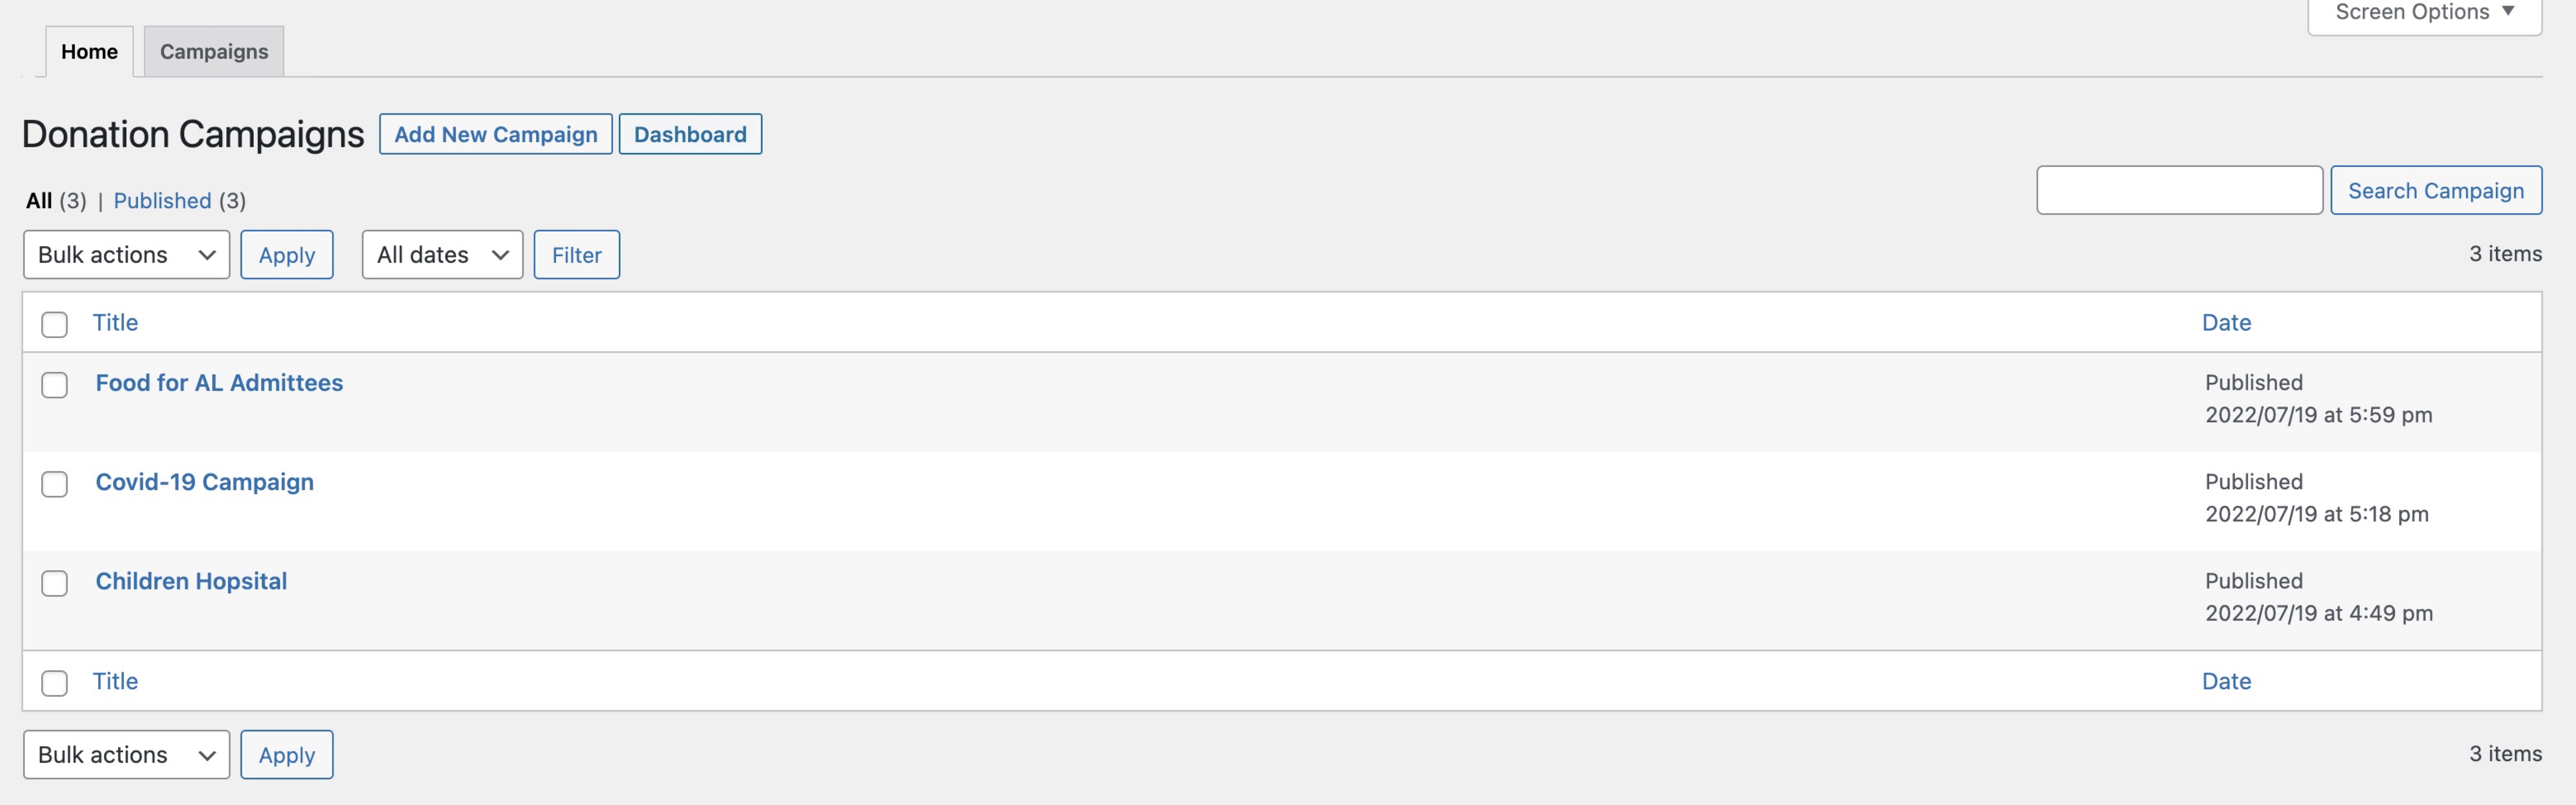
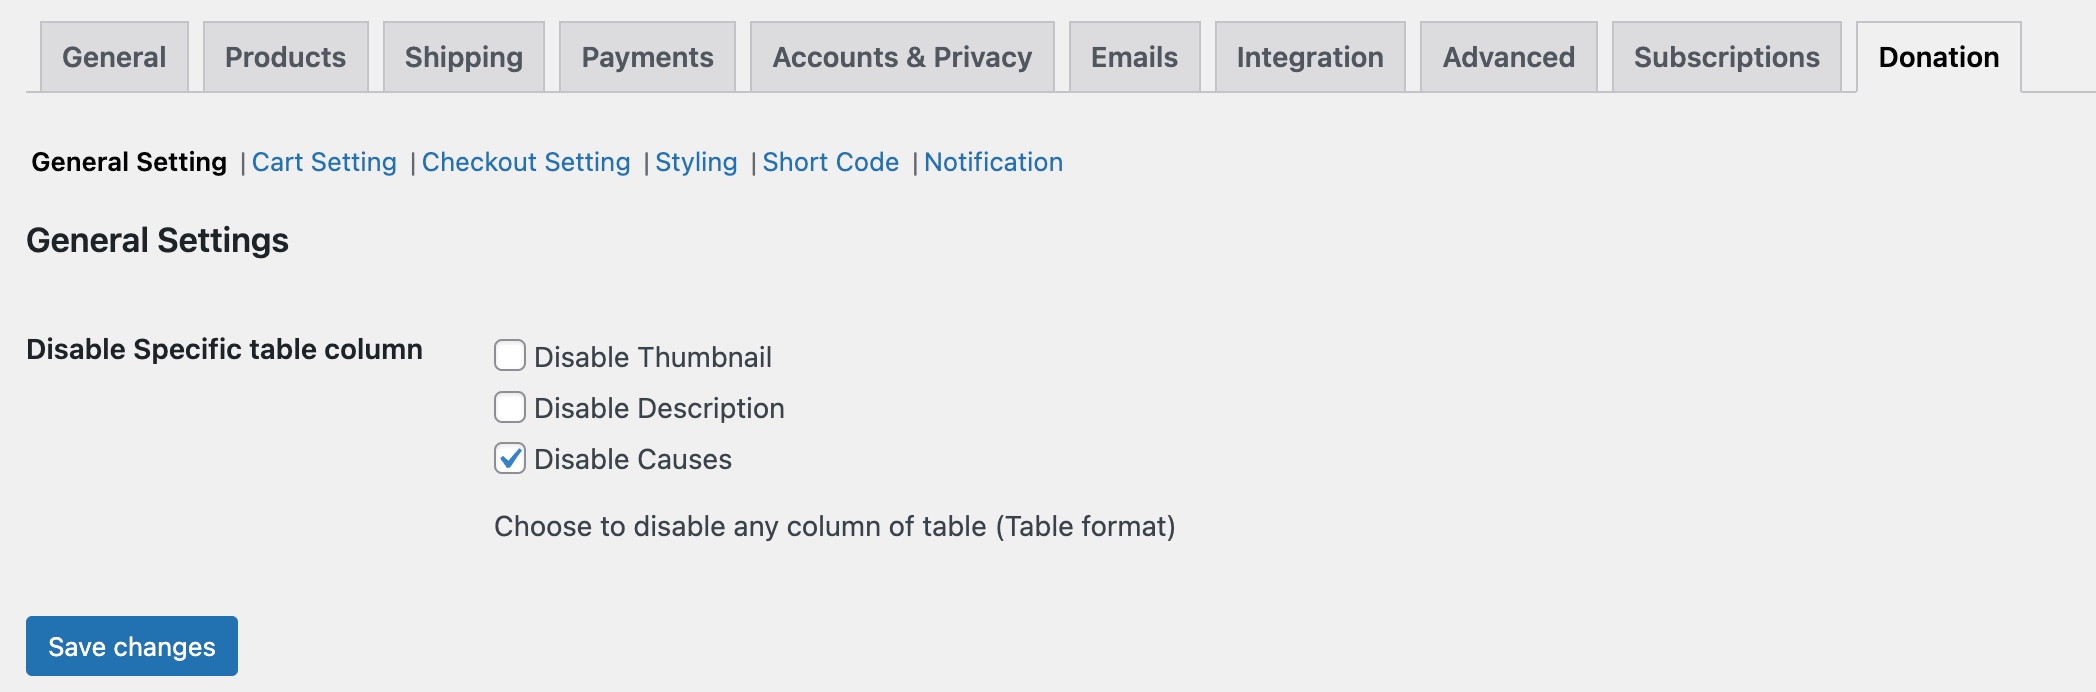
General Settings
↑ Back to top- Disable Thumbnails
- Disable Description
- Disable Causes
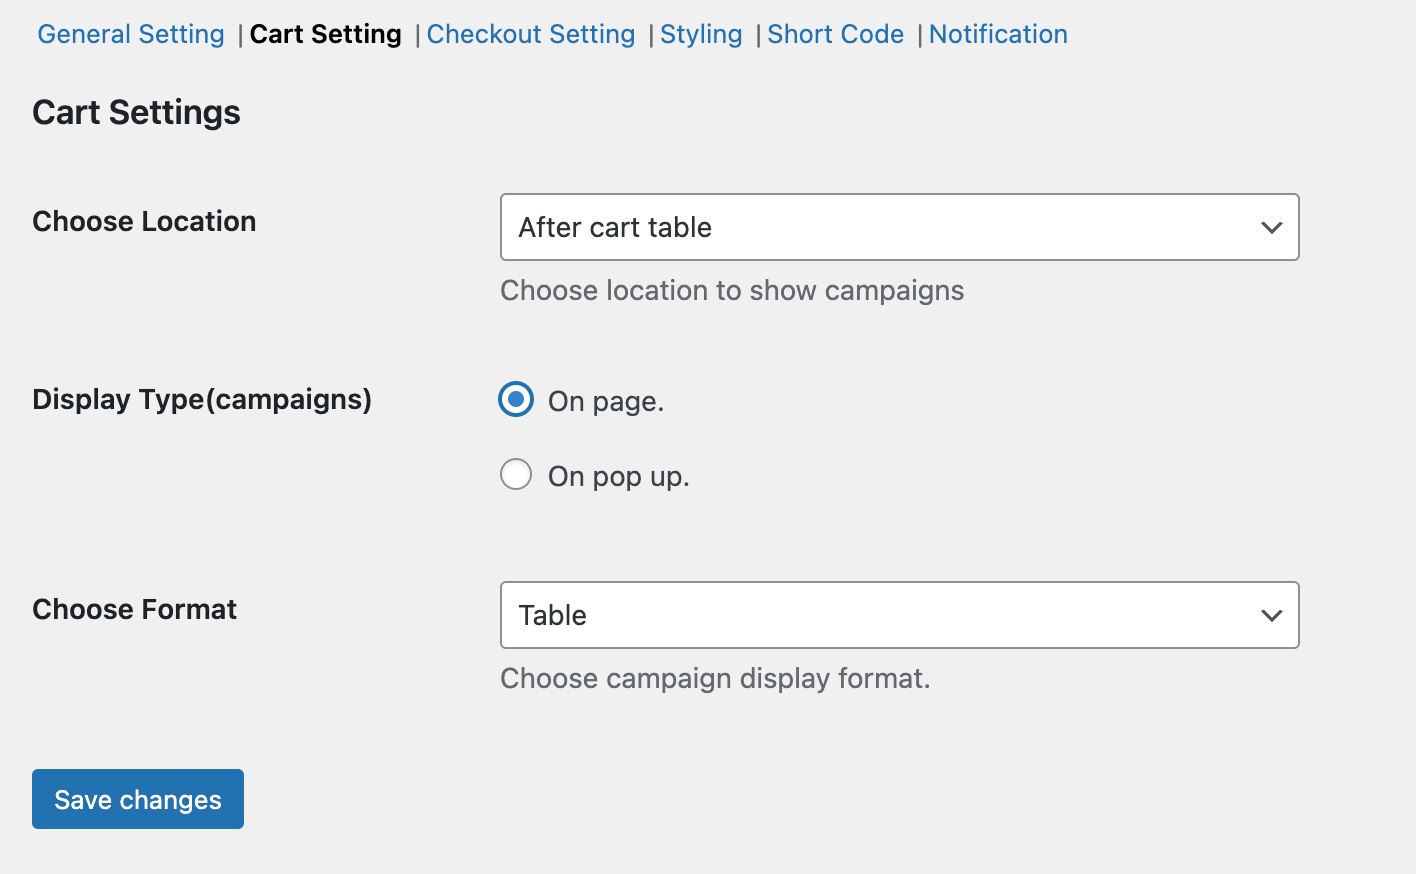
Cart Settings
↑ Back to top- Cart display position (Before or After Cart table or After Cart Total)
- Show as popup or in-page
- Choose display format (Flex, List, Table)
- Auto load popup or add button to load on click
- Custom popup heading and button label
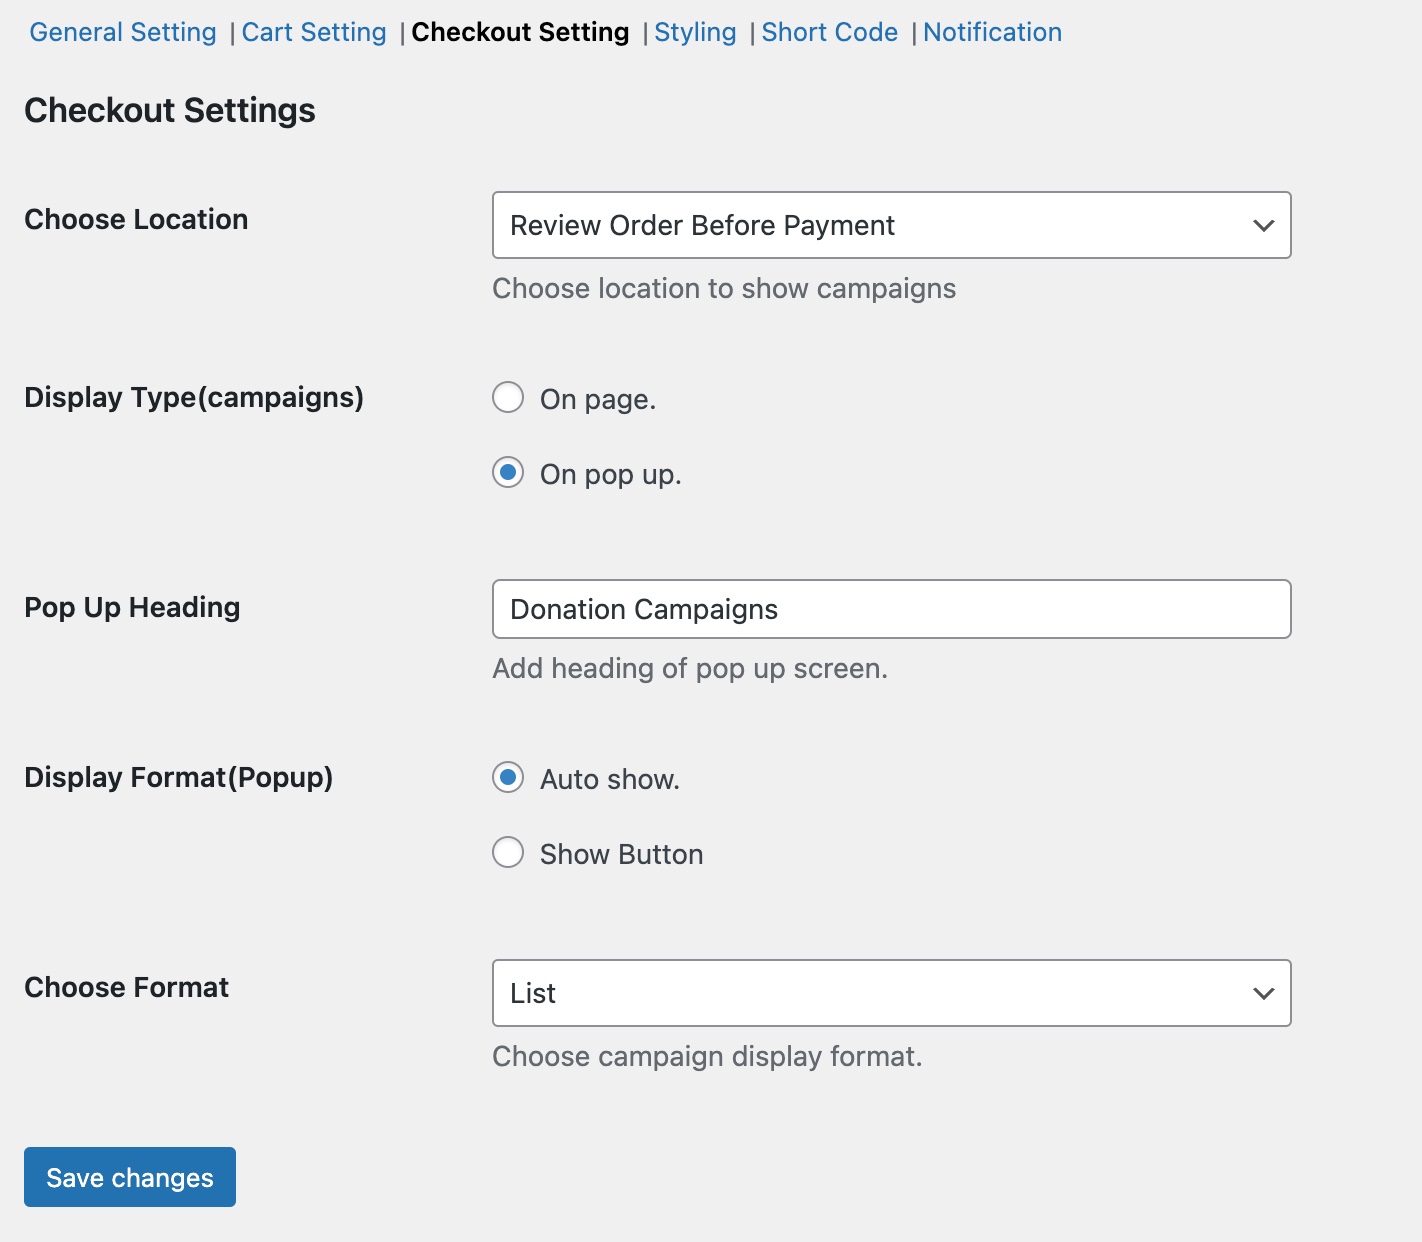
Checkout Settings
↑ Back to top- Checkout display position (After Cart Content or Before Order Button)
- Show as popup or in-page
- Choose display format (Flex, List, Table)
- Auto load popup or add button to load on click
- Custom popup heading and button label
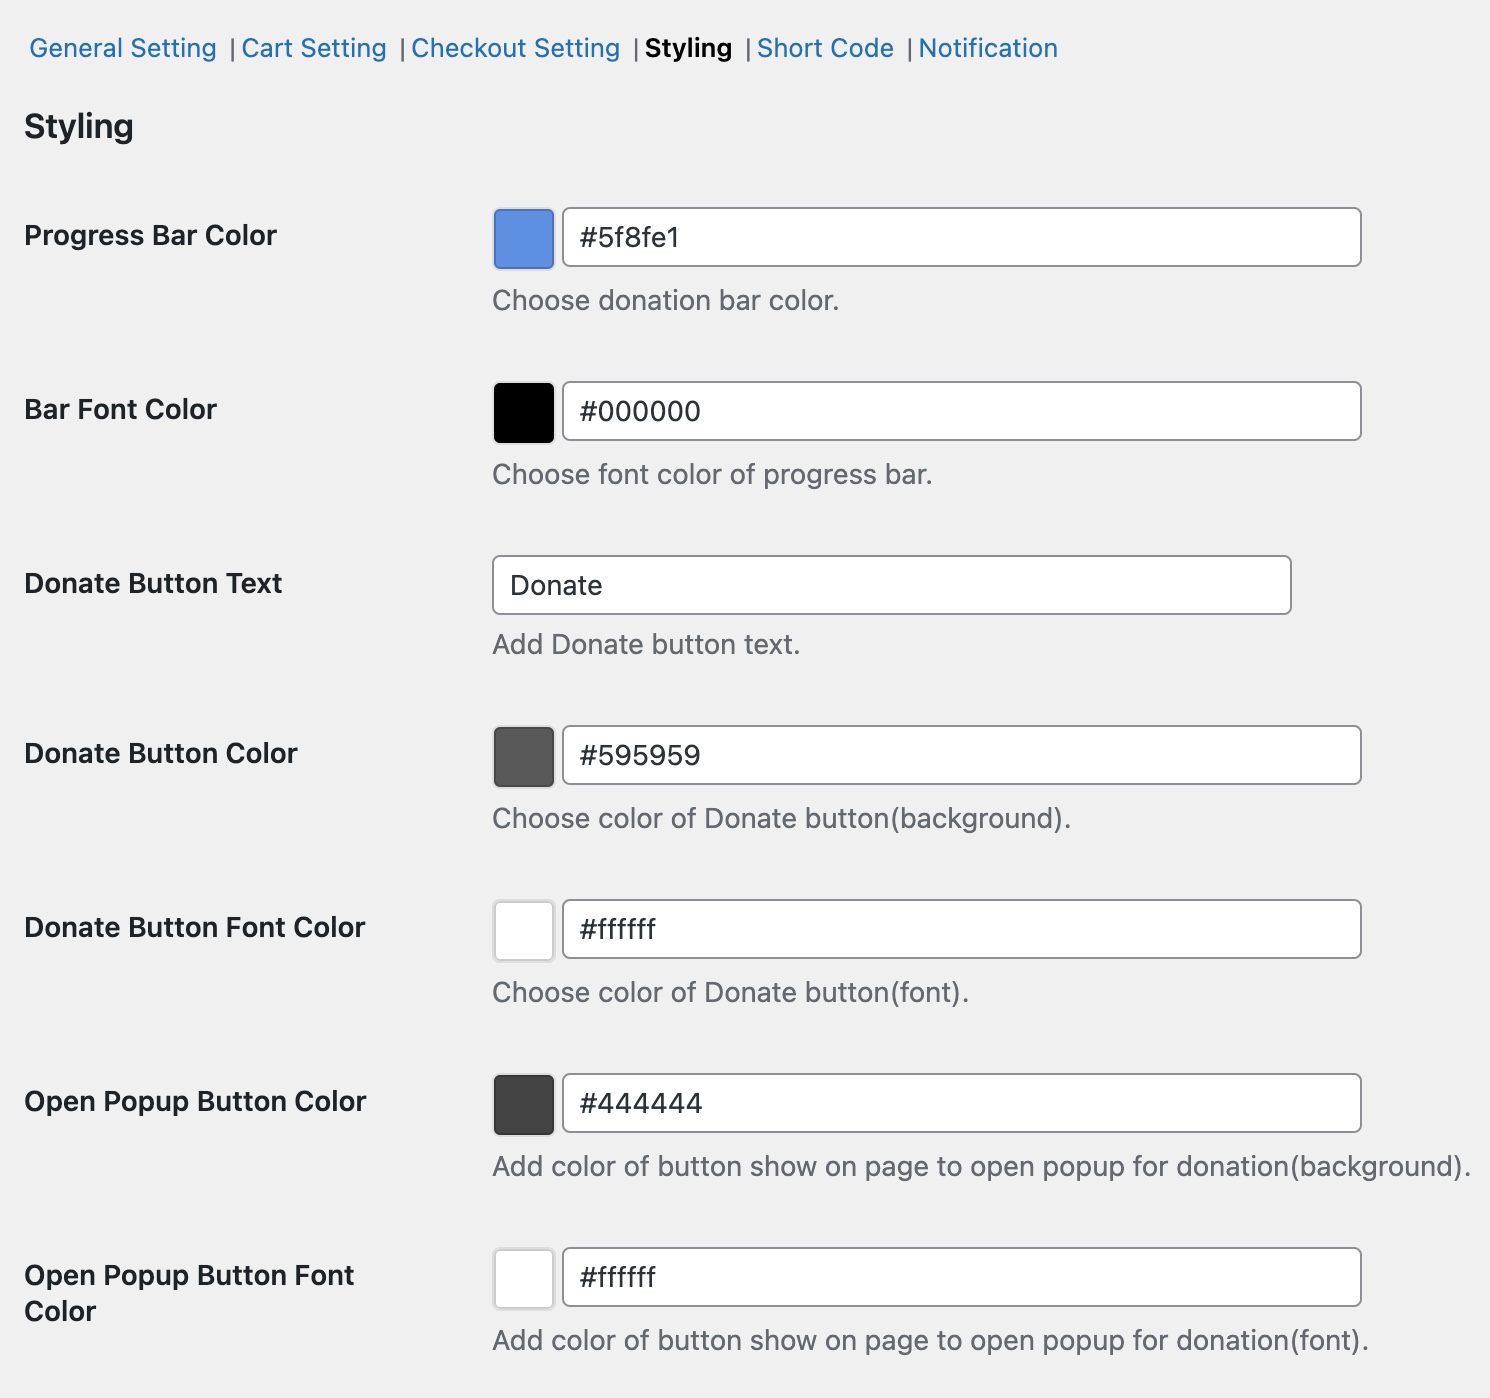
Style Settings
↑ Back to top- Progress Bar
- Donate Button
- Popup Button
Shortcode & Notifications
↑ Back to top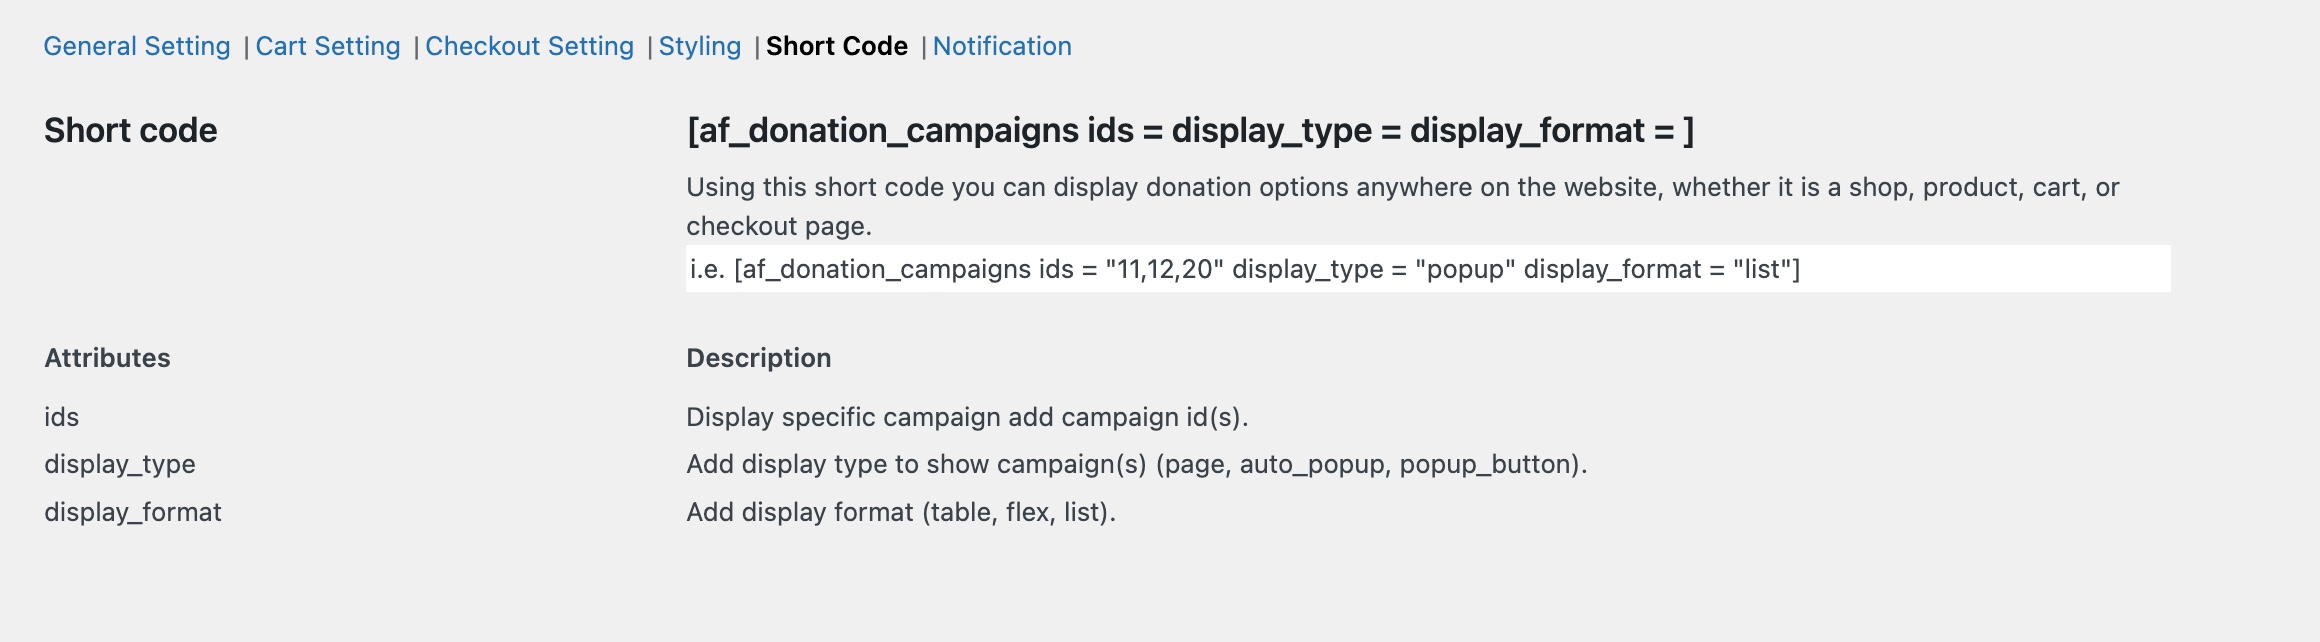
Using the notifications tab, you can customize the notification that appears once the donation product is added to cart.