All the products in your WooCommerce shop have their own Stock Quantity which refers to the available amount of the specific product. WooCommerce enables you to manage this value and automatically decreases the corresponding quantity after a customer purchased one of your products.
If you have set up several shops within one WordPress Multisite environment, each of your shop sites has a separated stock quantity management. Therefore, when a customer buys one of your products from one shop site, the Stock Quantity of the same products of other sites within your multisite will not be updated.
Central Stock for WooCommerce by Inpsyde allows your WooCommerce store to automatically synchronize the stock of products with the same SKU across all your shops in a WordPress Multisite Network.
Installation
↑ Voltar Para o Topo
- Download the .zip file from your WooCommerce account.
- Go to: WordPress Admin > My Sites > Network Admin > Plugins > Add New and Upload Plugin with the file you downloaded with Choose File.
- Install Now and then Network Activate the extension. This will make the plugin active for all sites on the Network.
Requirements
↑ Voltar Para o Topo- WordPress Multisite 4.8+
- PHP 7.0.x or higher
Setup and configuration
↑ Voltar Para o TopoSetup Shops within the Multisite
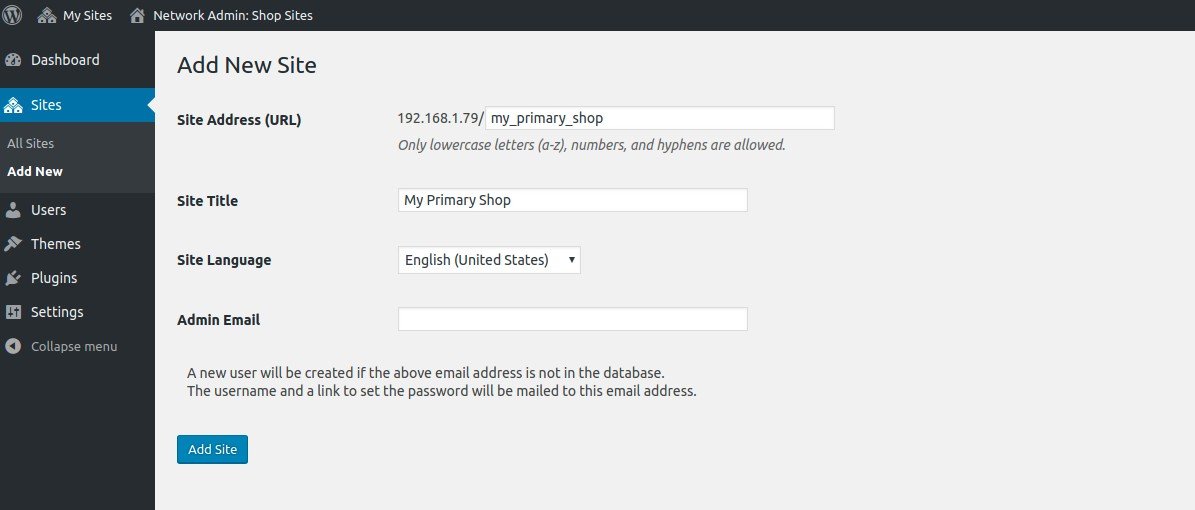
↑ Voltar Para o Topo- Go to: My Sites > Network Admin > Sites and add a new site by clicking Add New.
- Fill in the following information:
- Site Address (URL): This is the URL of your new website.
- Site Title: This is the site title of your new website. It will be shown in your admin menu in the WordPress backend and possibly as well on your site in the frontend.
- Site Language: This is the language for the admin menu of your new site.
- Admin Email: This is the email of the respective site admin. You can choose the one of your main site or create a new user with a new Email address.
- Click on Add Site.
- Create as many new sites as you need for your Multisite shop environment.
Synchronize Stock Quantity of Products
↑ Voltar Para o Topo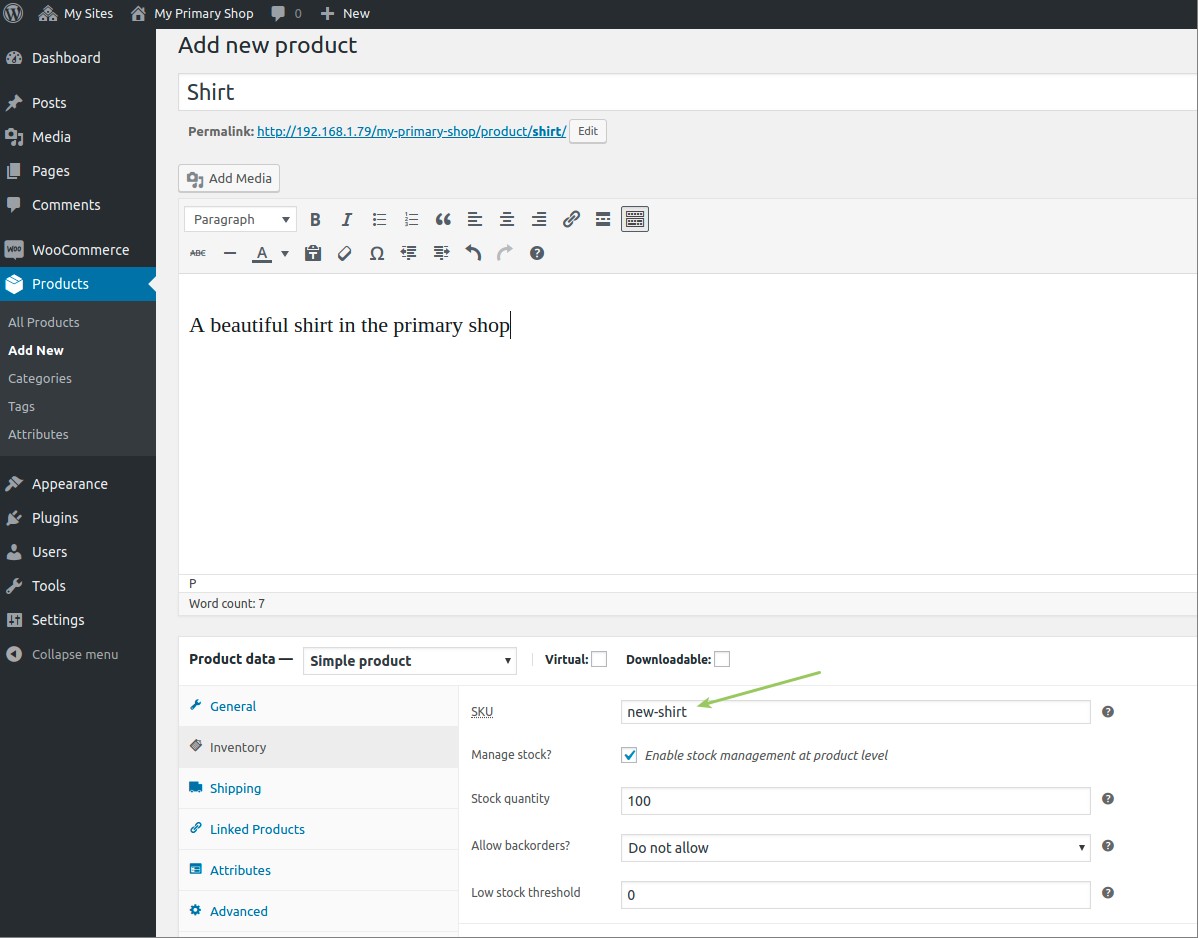
- Go to: My Sites and select the Dashboard of one of your shops.
- Select Products in your admin menu on the left.
- Choose one of your existing products for editing or Add new product.
- Go to: Product data > Inventory
- Set a SKU for the product and remember the value.
- Tick the Checkbox: Enable stock management at product level.
- Save changes by clicking Update.
- Go to: My Sites and select the Dashboard of another shop which contains the same product.
- Like in the previous steps, set the SKU for the corresponding product in this shop. Remember to fill in the same SKU value you set for the product in your other shop before and to Enable stock management at product level
- Save changes by clicking Update.
- Test the functionality by:
- changing the related product Stock Quantity in one of your sites. Performing that action the stock quantity of the corresponding product will update accordingly to the changes across all your shop sites.
- purchasing one of the product items in one of your shops. Performing that action the Stock Quantity of all related products will decrease by the same quantity.
Usage
↑ Voltar Para o Topo