Introduction
Objective of “Preciso Bid-Smart For Merchant” app is to provide its WooCommerce Clients with a tool, that helps to integrate with global level publisher website. This is achieved through its bidder and it gives its store owners same visibility to a potential user, like any big brand.
The app is designed to serve its client by going through 5 steps and Preciso backbone bidder will take care of rest from finding user to buying best placement for you.
“Preciso Bid-Smart For Merchant” needs the following 5 steps to be completed, to have your first successful campaign after visiting the app.
Registration & Setting Budget [You have done this, to reach within the App]
Login [You have done this; only first time login, refer email for credentials, auto-login from next time]
Creating your banners
Make your Payment
And Start Bidding
- Dashboard
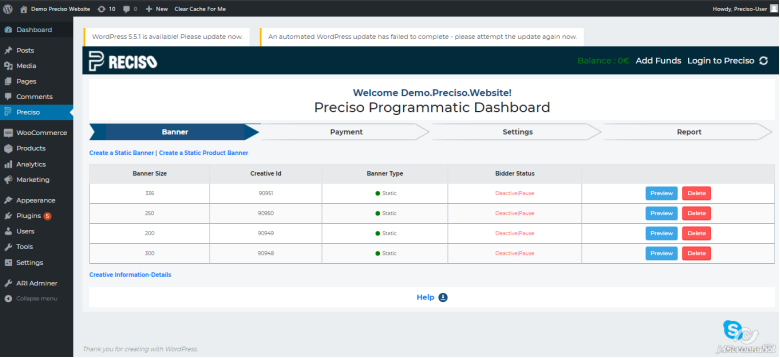
On successful login, you will be redirected to app dashboard. The dashboard have following tab. (Banner, Payment, Setting,Report). The direction of Arrows shows the configuration. After the banners are set, you can make the payment using next tab; if you don’t have funds or you want to add further funds. Using settings tab next, you can further tune and when ready to bid, you can change the Bidding status to Active. The details of bidding will start showing up on Reports section at an appropriate time based on bidding. On the dashboard headers, the balance shows the balance in real-time based on bidding which gets refreshed every 5 mins, the reports show the data as the data collection happens(every 30 minutes).
1. Banner section to add/update/delete/pause existing static banners
2. Payment section to see offers, add fund and check history of payments
3. Setting section to modify your campaign’s daily Budget/Total Budget & to run the campaign
4. Report section to view report and know the performance of your campaign.
Banner Tab
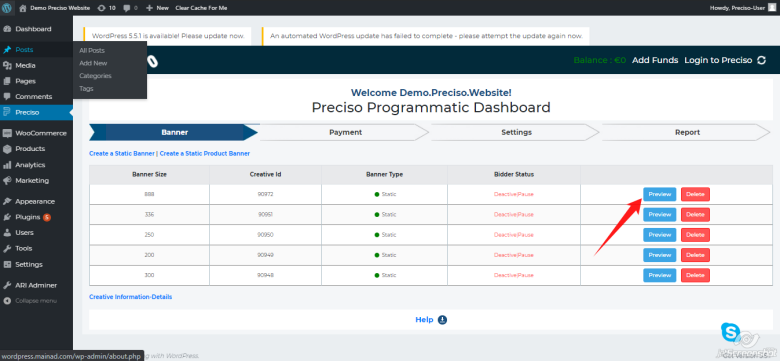
The banner section shows the banners that were created by the store user. The store user can create static banner by clicking create banner link on top. Preview and Delete Option are provided as well.
Delete :- Delete a banner that you don’t like, by clicking on the corresponding delete button
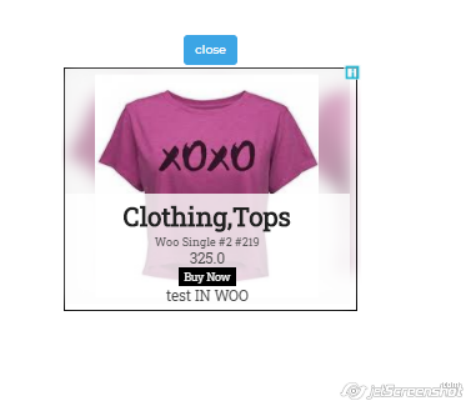
Preview :- Clicking on any banner’s preview will open up the preview this way:

Create a Static Banner Clicking on create a Static Banner, you will be taken to a screen on Preciso, to create a static banner (here the banner size, Landing Page has to be entered. Click on Choose File and click on Upload, to Upload the Banner Image). The other parameters can be left at defaults or you can modify them.
Other Possible sizes if you want to create, you can click on Include Possible Sizes. All the compatible sizes will be shown here. Keeping the keyboards control button pressed you can click left mouse button on the sizes that you want. When all are selected to your satisfaction, un-press the control button of keyboard and click on Done. If you don’t want to do any operation at this page, click Cancel button. The banner preview will show the banner.
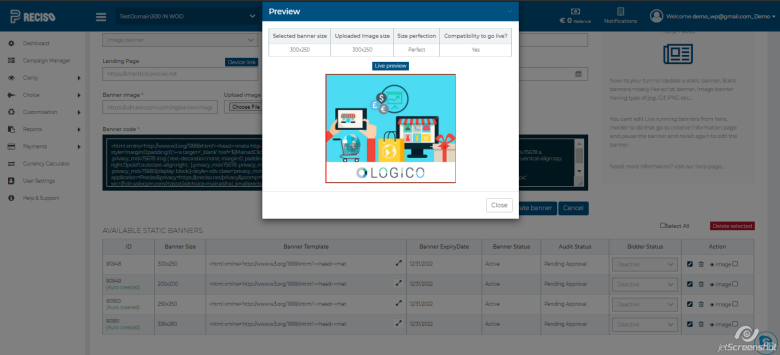
If you are ready to create the banner, click on “Save”. This will create a banner that will go through the review process before it will come up for bidding in a short while.
For updating an existing banner, on the Action column you will find the edit, delete, Image button. Clicking on the edit icon will help you edit the banner again. After all the changes are done you can click on “Update Banner” to update the existing banner. Delete button will help you to delete the banner.
Create Static Product Banner (888) Clicking on create a Static Product Banner will show all the products that are listed on your store like below screenshot.
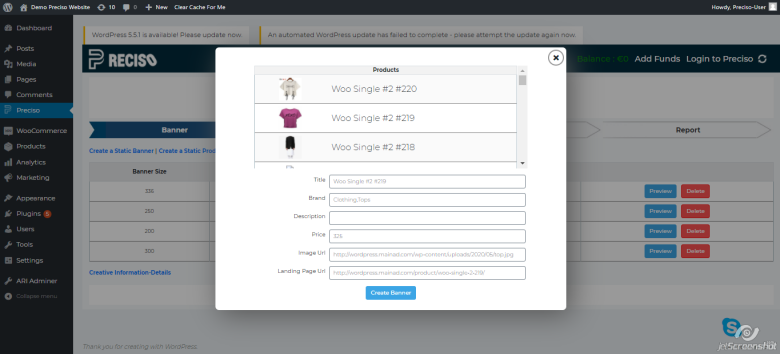
By clicking on any product, it will autofill the contents of the product(you can customize if you want by editing the text boxes). When you are ready, click on “Create Banner” here to create the 888 size banner. The created banner will appear on the top of the banners that are listed in the table.The banner will go through the review process before it will come up for bidding in a short while.
Clicking on preview will show the preview as below:
999 Banners:
999 banner is a static but dynamic banner created with your product list to closely match the purchase habits of your users. 999 banner will auto show any 2 products that are most apt to be shown. This also has an advantage of being able to take on any sizes that are available for bidding. However 999 banners for the first time will take at least couple of hours to appear on your store
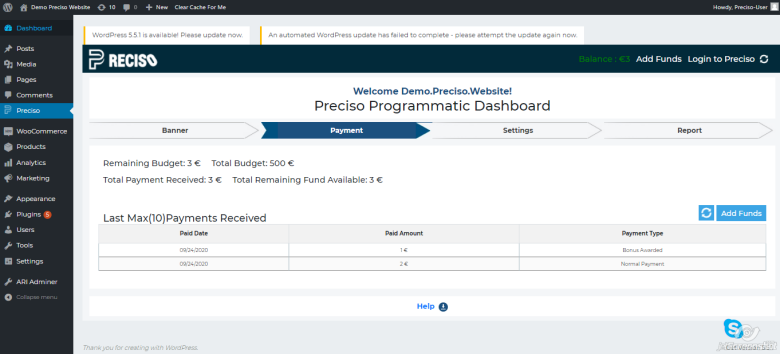
Payment Tab
Shows the Total Budget that you have decided for this store. The Remaining Budget will show how much is remaining out of the “Total Budget”. The Total Payment that’s received and the total remaining fund balance will show the values based on the Payments you have made.
The balance on the top will show the data based on the remaining Budget (or balance that you have in your account).
The tabular data below will show the last 10 payments received from you. The refresh button can be used to refresh the page
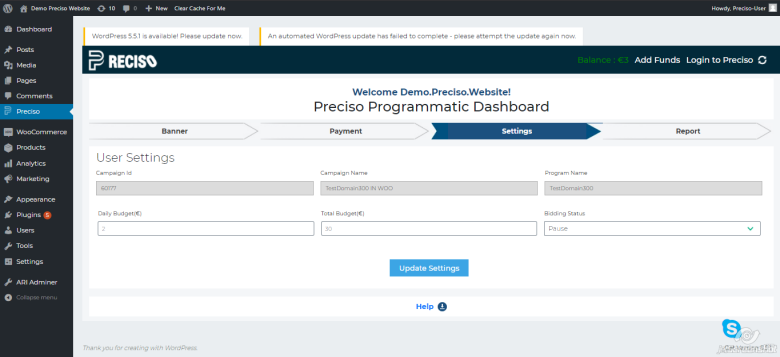
Details: Setting Tab
Tab is used to modify data entered in registration process and as well to manage campaign; by default greyed fields will be filled with default value as per your registration entry. Daily Budget and Total Budget can be changed if you want to revisit them.
Bidding Process:
When the above steps are done i.e., Creation of Banners, Making Payment and doing the Settings of how much should be your daily Budget and Total Budget; It is time to start your Bidding Process.
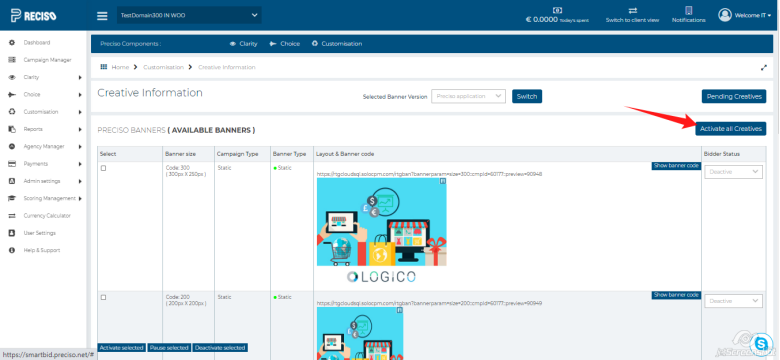
Ensure you also checked, if your banners got approved by clicking on “Creative Information” from Banners Tab, to see the banners under Preciso Banners. If there are any banners in Pending Creatives, it means it is yet to be approved. Banners that are not yet approved, would be approved shortly and you would be able to Bid.
You can turn on your bidder from plugin, by going to Settings Tab. Turn the Bidding Status to “Active” and click on “Update Settings”. Then in Preciso turn the “Activate all Creatives” to turn the creatives to “Active” state for Bidding.
At any time if you want your Bidding to stop, you just need to go to Settings Tab and turn the Bidding Status field to Pause and click on “Update Settings”
Report Tab
This tab shows the Campaign’s daily performance on the left hand side, 7 day performance on the right hand side and the performance of each day, of the last 7 days in graphical form in the center.

Sample of report tab when data exists
Enjoy using Preciso Plugin! For any help, contact Preciso Customer Support by email :
By Email: support@preciso.net