Enquiry Form is a valid WooCommerce extension that adds an enquiry button to every page on your website. It allows potential customers to inquire or request a quote for a product they want. You can quickly turn hesitant buyers into loyal customers by addressing customer inquiries or quote requests!
Installation
↑ Revenir en haut- Download the Enquiry Form .zip file from your WooCommerce account.
- Go to WordPress Admin > Plugins > Add New and Upload Plugin.
- Click on Choose File to upload the file you downloaded.
- Install Now and Activate extension
Configuration
↑ Revenir en hautAfter you have installed and activated the Enquiry Form extension, you can configure the following settings.
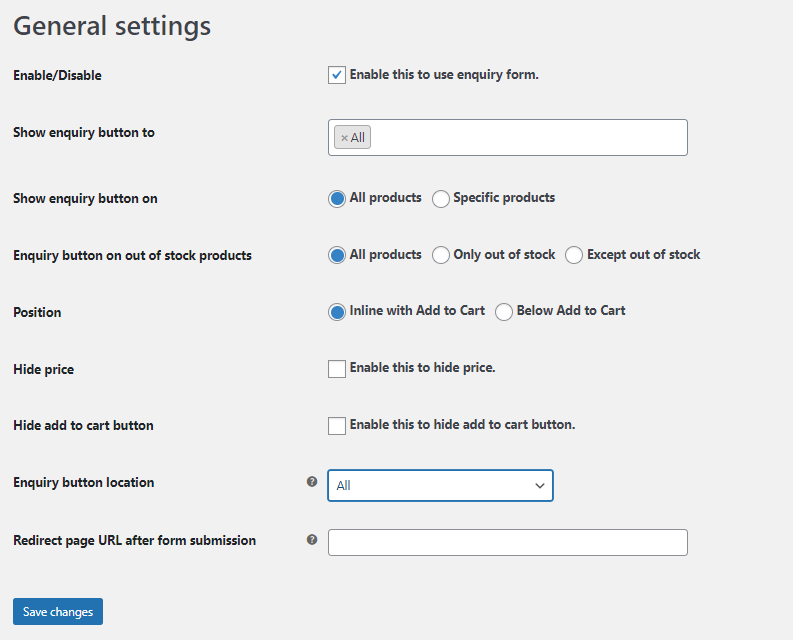
General Settings
↑ Revenir en hautUnder general settings, you can change the following settings.
- Enable/Disable: Click the checkbox to enable or disable the Enquiry Form extension
- Show Enquiry Button To: Choose to whom you want to show the Enquiry Form button. You can choose the following:
- All
- Logged In Users
- Guest Users
- Administrators
- Editor
- Author
- Contributor
- Subscriber
- Customer
- Shop Manager
- Show Enquiry Button On: Select which product you want to display the enquiry form button. You can select either All Products or Specific Products.
If you select Specific Products the following further settings will appear:
- Select Option: Select if you want to include or exclude selected products.
- Include/Exclude by: You can include or exclude based on products or categories.
- Include/Exclude Products: Select the products you want to exclude or include.
- Include Categories: Choose the categories that you want to exclude or include.
- Enquiry Button On Out-of-Stock Products: Select the settings of the enquiry button for the out-of-stock products. You have the following options:
- All Products
- Only Out of Stock
- Except Out of Stock
- Position: Select the position of the enquiry form button. You can choose the position of the button as:
- Inline with Add to Cart
- Below Add to Cart
- Hide Price: Click the checkbox to hide the price of products.
- Hide Add to Cart Button: Check to hide the “add to cart” button.
- Enquiry Button Location: Select the pages where you want to add the “Product Enquiry Form” button. You can select:
- All
- Product Page
- Shop Page
- Cart Page
- Redirect Page URL After Form Submission: Enter the page URL where you want to redirect the customer after the enquiry form is successfully submitted.
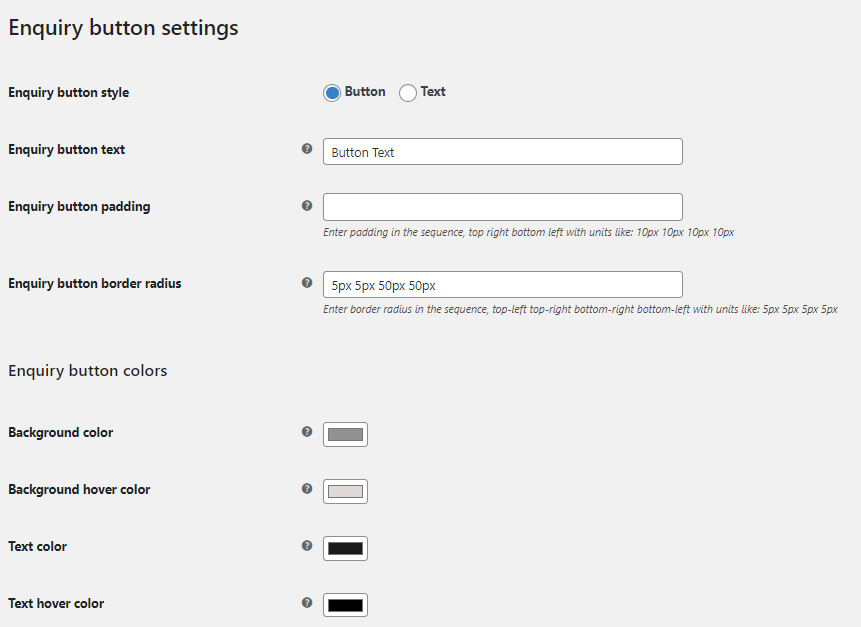
Display Settings
↑ Revenir en hautIn this tab, you can configure the display settings of the product enquiry form button.
- Enquiry Button Style: Choose the style for the product enquiry form button. You have the two options:
- Button
- Text
- Enquiry Button Text: Enter the text for the product enquiry form button.
- Enquiry Button Padding: Enter the padding for the product enquiry form button.
- Enquiry Button Border Radius: Set the border radius in pixels for the product enquiry form button.
Enquiry Button Colors Settings
↑ Revenir en haut- Background Color: Choose the background color of the enquiry form button.
- Background Hover Color: Select the background hover color for the button.
- Text Color: Select the text color on the enquiry form button.
- Text Hover Color: Choose the color of the text on hover.
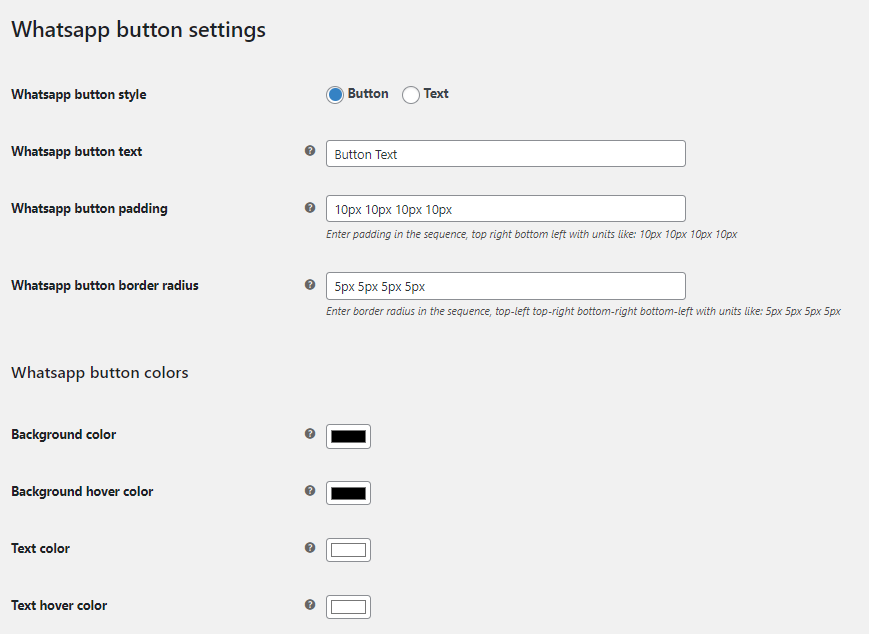
WhatsApp Button Settings
↑ Revenir en haut- WhatsApp Button Style: Choose the style for the WhatsApp button. You can select either “Button” or “Text”.
- WhatsApp Button Text: Enter the text you want to display on the WhatsApp button.
- WhatsApp Button Padding: Set the padding for the WhatsApp enquiry button.
- WhatsApp Button Border Radius: Enter the radius of the WhatsApp enquiry button.
WhatsApp Button Color Settings
↑ Revenir en haut- Background Color: Choose the background color of the WhatsApp button.
- Background Hover Color: Select the background hover color for the WhatsApp button.
- Text Color: Select the color of the text on the WhatsApp button.
- Text Hover Color: Choose the color of the text on hover.
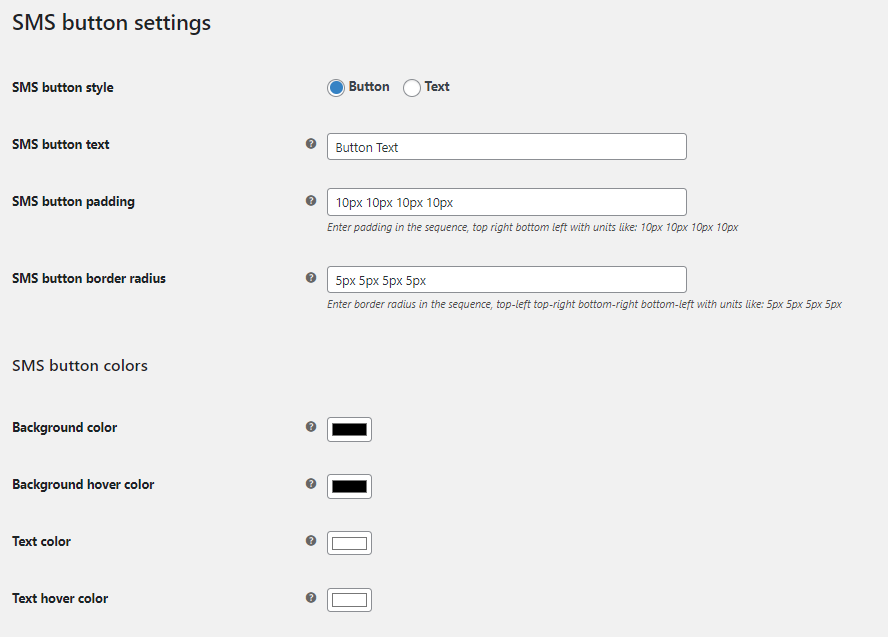
SMS Button Settings
↑ Revenir en haut- SMS Button Style: Choose the style for the SMS button. You have the two options:
- Button
- Text
- SMS Button Text: Enter the text for the SMS button.
- SMS Button Padding: Set the padding for the SMS enquiry button.
- SMS Button Border Radius: Enter the radius of the SMS enquiry button.
SMS Button Color Settings
↑ Revenir en haut- Background Color: Choose the background color of the SMS button.
- Background Hover Color: Select the background hover color for the SMS button.
- Text Color: Select the color of the text on the SMS button.
- Text Hover Color: Choose the color of the text on hover.
Popup Display Settings
↑ Revenir en hautHere you can configure all the display settings for the popup form.
Display Settings
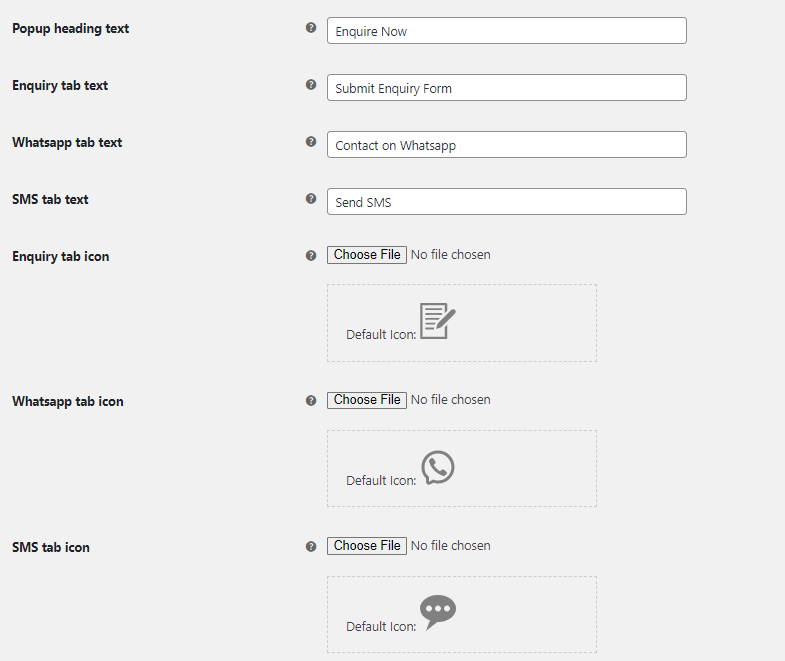
↑ Revenir en haut- Popup Heading Text: Enter the text you want to show in the popup heading.
- Enquiry Tab Text: Input the text that you want to display in the enquiry tab.
- WhatsApp Tab Text: Enter the text that will appear in the popup WhatsApp form tab.
- SMS Tab Text: Add the text that will appear in the popup SMS form tab.
- Enquiry Tab Icon: Upload an icon for the enquiry tab, or use the default icon.
- WhatsApp Tab Icon: Select the icon for the WhatsApp tab. Upload an icon of your own or choose the default one.
- SMS Tab Icon: Upload a custom icon for the SMS tab or select the default icon.
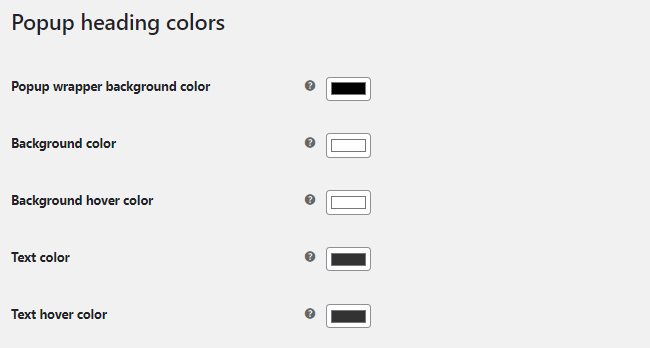
Popup Heading Colors Settings
↑ Revenir en haut- Popup Wrapper Background Color: Select the color to apply to the popup form wrapper background window.
- Background Color: Select the background color for the popup.
- Background Hover Color: Choose the background hover color for the popup enquiry form.
- Text Color: Using the color picker, choose the color of the text.
- Text Hover Color: Select the color of the text when hovering.
Popup Tab Colors
↑ Revenir en hautSimilar to the previous section, you can configure the “Popup Tab” color settings. These settings include:
- Border bottom color
- Border bottom hover color
- Text color
- Text hover color
- Tab active border bottom color
- Tab active text color

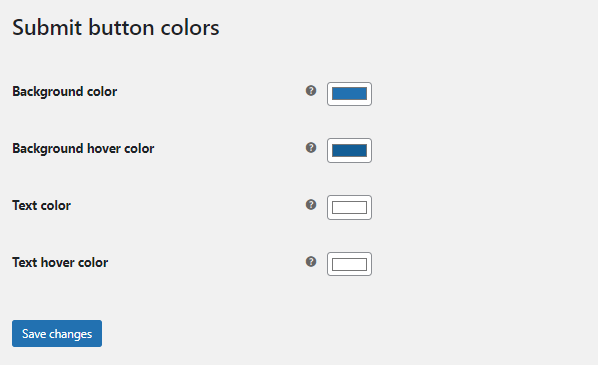
Submit Button Colors Settings
↑ Revenir en hautIn this section, you can configure the color settings for the popup submit button. These settings include:
- Background color
- Background hover color
- Text color
- Text hover color
Enquiry Form Settings
↑ Revenir en hautHere, you can configure the settings for the product enquiry form. These settings are:
- Add a reCAPTCHA to the Default Form: Click the checkbox to add a reCAPTCHA to the default form.
- Choose the reCAPTCHA Version: Select the reCAPTCHA version you want. You can select from:
- v2
- v3 – Invisible
- Site Key: Enter the site key in the field.
- Secret Key: Add the secret key in the text field.
- Enquiry Form Fields: The table shows you all the enquiry fields. You can edit the following settings of the form:
- Add a new field to the form by clicking the “+ Add Field” button.
- Edit or Delete the previously created fields.
- Search by using the search bar.
- Export the form in Excel, CSV, PDF, or Print.
- Change the status of any field.
- Make fields required.
- The table includes the following columns:
- Sort Order
- Field Name
- Field Type
- Field Label
- Required
- Status
- Action

Email Settings
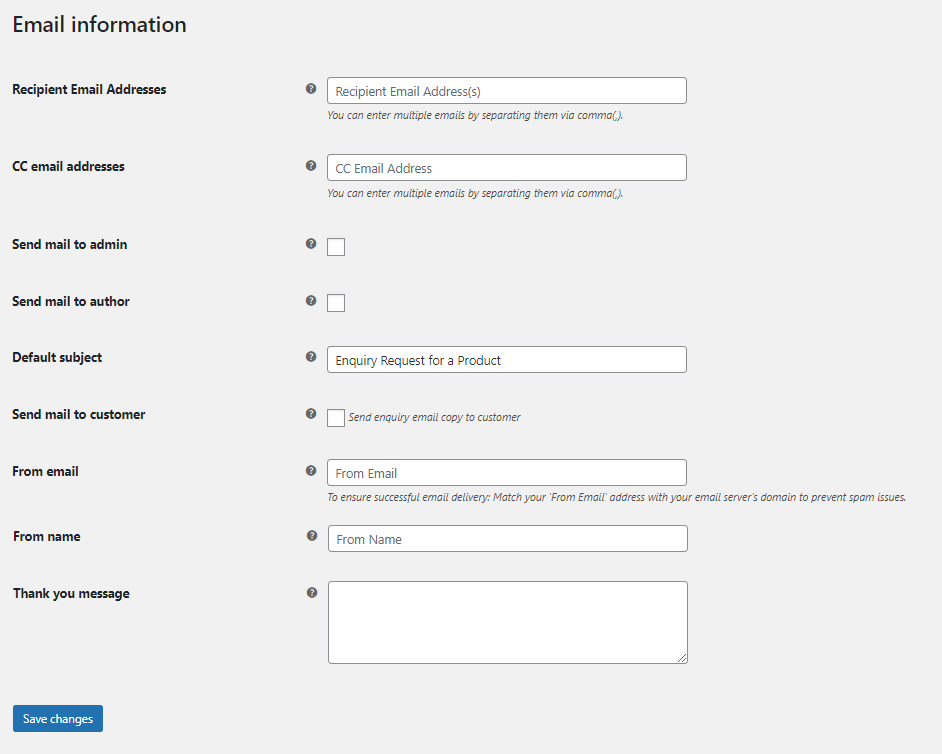
↑ Revenir en hautIn this tab, you will find the settings related to email. These settings include:
- Recipient Email Addresses: Enter the email address of the recipient. You can add multiple addresses separated by commas.
- CC Email Addresses: Add the email addresses for “CC”. You can also add multiple email addresses separated by commas.
- Send Mail to Admin: Click on the checkbox to send the enquiry emails to the admin.
- Send Mail to Author: Enable the checkbox to send the mail to the author.
- Default Subject: Enter the default subject line for the email.
- Send Mail to Customer: Click the checkbox to send a copy of the enquiry email to the customer.
- From Email: Add the email address you want to send the emails to.
- From Name: Enter the name of the person sending the email.
- Thank You Message: Enter the thank you message you want to display after an enquiry.
WhatsApp Settings
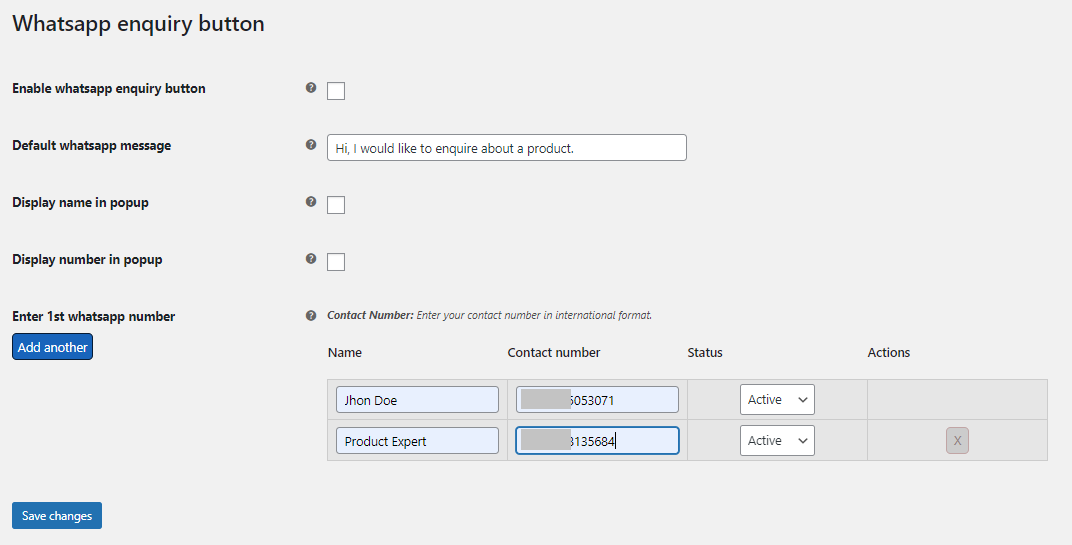
↑ Revenir en hautThis section lets you configure the settings for the WhatsApp enquiry button.
- Enable WhatsApp Enquiry Button: Click the checkbox to enable the WhatsApp enquiry button.
- Default WhatsApp Message: Enter the default message displayed when a user clicks the WhatsApp contact button.
- Display Name in Popup: Click the checkbox to display the name of the WhatsApp user in the popup.
- Display Number in Popup: Enable the checkbox to display the WhatsApp number in the popup.
- Enter 1st WhatsApp Number: Enter the name, contact number, and status of the WhatsApp agent.
P.S: If you want to add more than one number, click the “Add Another” button and fill in the required details.
SMS Settings
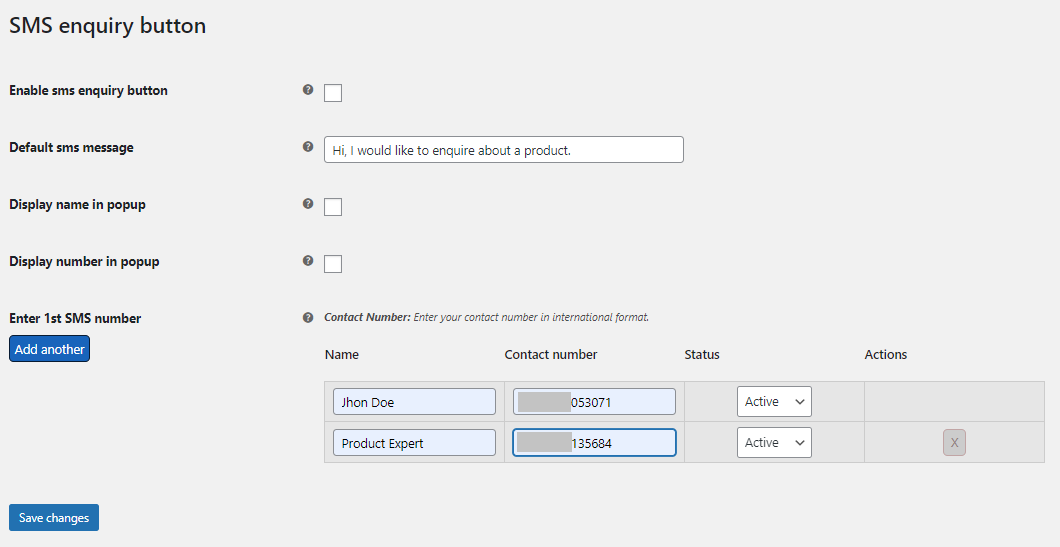
↑ Revenir en hautIn the SMS settings section, you can enable, configure, and add multiple numbers for SMS.
- Enable SMS Enquiry Button: Enable the checkbox to enable the SMS enquiry button.
- Default SMS Message: Enter the default message displayed when a user clicks the SMS contact button.
- Display Name in Popup: Enable the checkbox to display the name of the SMS user in the popup.
- Display Number in Popup: Click the checkbox to display the SMS number in the popup.
- Enter 1st SMS Number: Enter the name, contact number, and status of the SMS agent. If you want to add more than one number, click the “Add Another” button and fill in the required details.
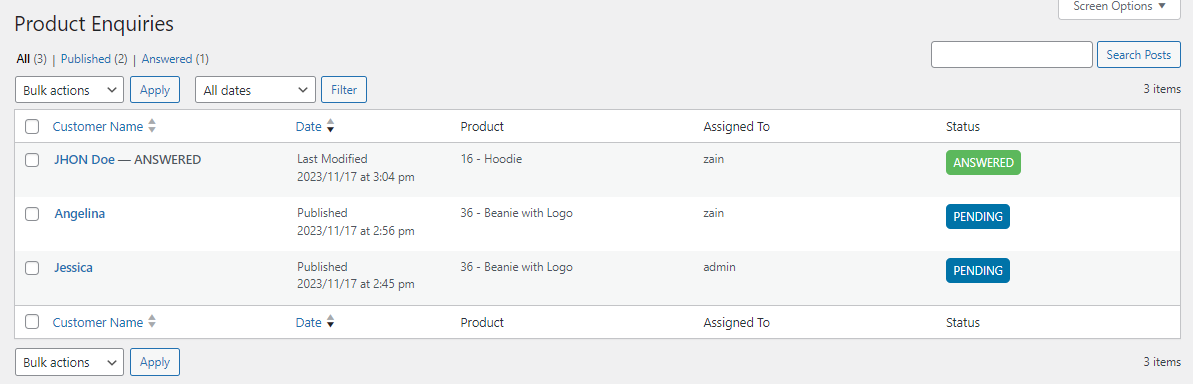
Manage Product Enquiries
↑ Revenir en hautThe admin can view all the submitted enquiry forms in the product enquiry forms section. Go to WooCommerce > Product Enquiry Forms and here you will see all the enquiry forms and quote requests submitted by customers. You will find the following information for the forms:
- Customer Name
- Date
- Product
- Assigned To
- Status