Setting Up and Installing Product Page Accordion FAQ by POWR
Setting Up and Installing Product Page Accordion FAQ by POWR
POWR’s FAQ is a powerful tool for creating an FAQ section on your website. You can reduce support requests and convert better by displaying answers to common questions right on your site. Here are some of the things you can do with FAQ:
Add questions and answers and present them in an easily scannable accordion layout.
Customize the spacing between entries, choose from a selection of question icons, and add any custom content – such as links, images, videos, etc. – to your answers.
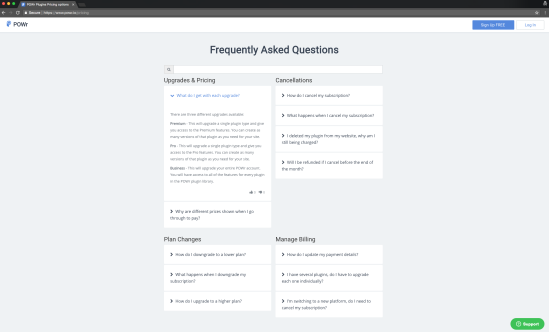
Organize content in categories and arrange sections side-by-side
Add a search bar to let users search through your content
Let users tell you which answers are helpful and which ones could use some improvements (Pro features)
↑ Volver al principioFind out which of your answers are helping users find solutions in your FAQ by enabling Voting. Follow these steps:
In the POWR Editor, go to Settings.
Toggle on Add Voting Button to Answers.
Save your changes.
Each end-user can then add one upvote/downvote per answer.
How to Install POWR FAQ on WooCommerce
Find POWR FAQ in the WooCommerce Extensions Directory and click Install.
Download the files.
Go to Plugins > Add New > Upload > Select your POWR zip
Click on Activate Plugin
You will automatically be authenticated on POWR. Approve access to continue.
You will now see a POWR Plugins item in the left-hand navigation and you will be able to access all POWR Plugins for WooCommerce.
How to Add POWR Plugins to WooCommerce
In the POWR Plugins navigation menu, click on your chosen plugin:
Create your plugin in the POWR Editor.
When you’re ready, click the blue ‘Add to Site’ button on the top right of the POWR Editor.
Copy the HTML snippet and paste it wherever you would like to add your POWR plugin.
How to Add your POWR Plugin to WooCommerce Products
Option 1: Adding to Product Data
You will see a new section appear under Product data called POWR Plugins.
Click POWR Plugins and you will see a default form.
At the top of the form preview on the right-hand side you can select whether to display the form above or below your product, or not display it at all:
To edit the content of the form, click on Edit Form Builder.This will open the POWR Editor in a pop-out window where you can make any necessary changes:When you’re happy with your changes, close the POWR Editor.Click Update in the Publish panel on the top right :To check how it looks, click Preview Changes.Option 2: Adding to Text Sections
Go to Products.
Select your product and click Edit.
You will now see an option to add POWR plugins in all sections that contain a text editor. Select your preferred plugin and the code snippet will be added to the text sections automatically.
Click Update and then Preview Changes on the right-hand side.Customize your plugin live on your site!🎉Congratulations on installing your POWR plugin on WooCommerce! 🎉


 To edit the content of the form, click on Edit Form Builder.
This will open the POWR Editor in a pop-out window where you can make any necessary changes:
To edit the content of the form, click on Edit Form Builder.
This will open the POWR Editor in a pop-out window where you can make any necessary changes:
 When you’re happy with your changes, close the POWR Editor.
Click Update in the Publish panel on the top right :
When you’re happy with your changes, close the POWR Editor.
Click Update in the Publish panel on the top right :
 To check how it looks, click Preview Changes.
Option 2: Adding to Text Sections
To check how it looks, click Preview Changes.
Option 2: Adding to Text Sections
 Click Update and then Preview Changes on the right-hand side.
Customize your plugin live on your site!
🎉Congratulations on installing your POWR plugin on WooCommerce! 🎉
Click Update and then Preview Changes on the right-hand side.
Customize your plugin live on your site!
🎉Congratulations on installing your POWR plugin on WooCommerce! 🎉