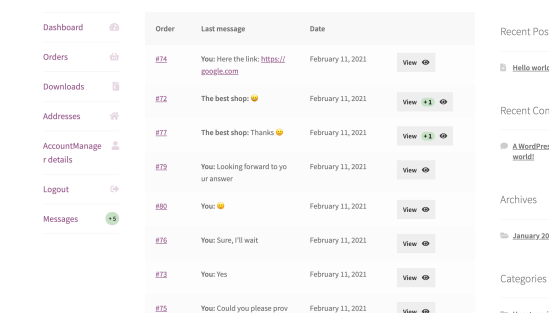
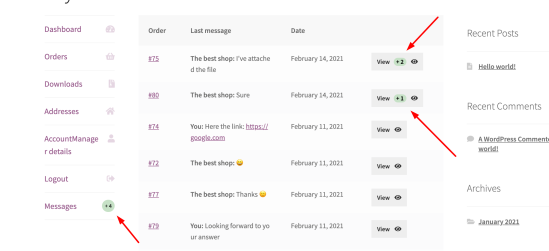
↑ Volver al principioThe plugin creates a new tab at a customer’s account with the most recent messages. Messages are ordered by the date of sending. The table includes 4 columns:
Order – link to tied order
Last message – the last letter in a dialog. If the letter is a status change, it will show “Status was changed.”
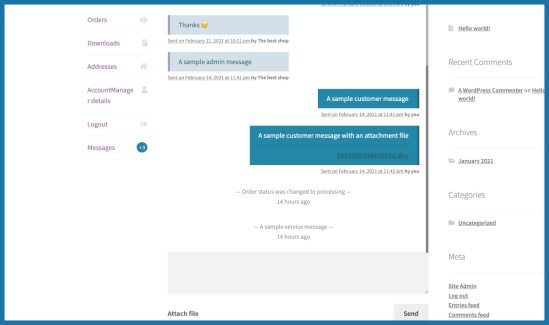
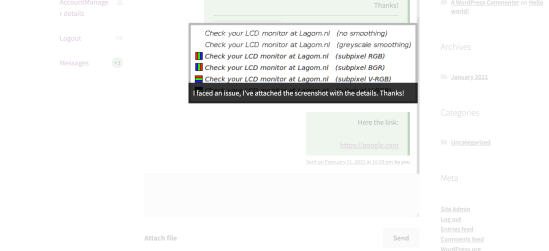
↑ Volver al principioThis is the main page where a customer can communicate with a shop administrator. The messenger page contains a list of messages and the sending message form. Users are allowed to attach a file with their message (You can disable the possibility of sending messages as well as restrict it to some specific filetype & limit file size – see settings section).Customers cans send messages via Ctrl + Enter.Please note that sending files requires a text message. The user is not allowed to send an empty message with an attached file.If a sent file is image type, the users will be able to preview it in a lightbox:
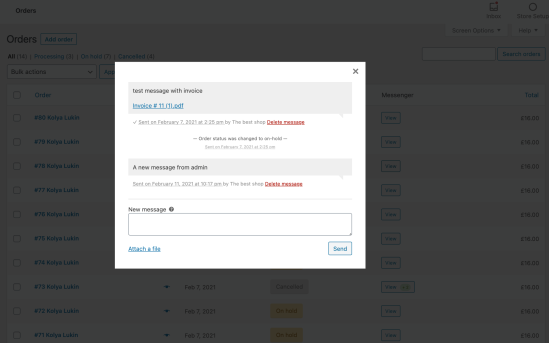
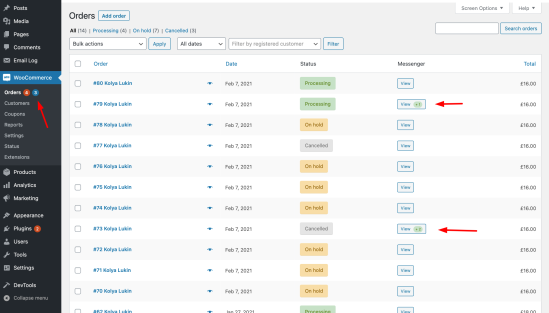
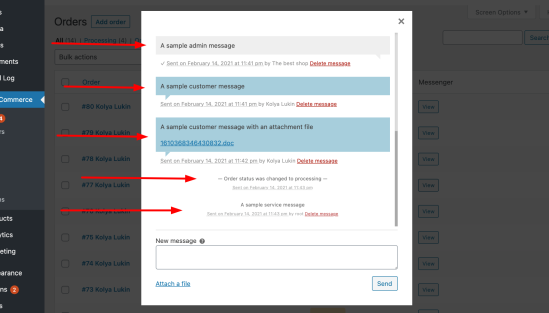
↑ Volver al principioThe plugin adds a new column, “Messenger,” that will open the chat related to an order in a modal box, so you can quickly respond to client’s messages:Modal box:
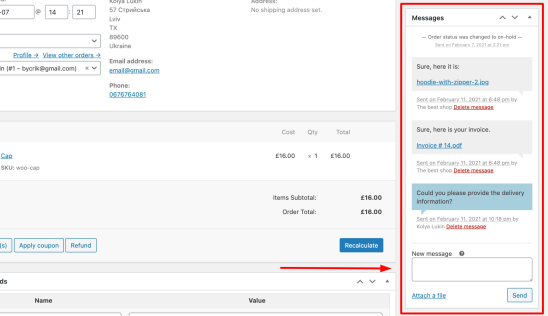
↑ Volver al principioYou can communicate with your customers on the specific order page as well. The page contains a new metabox, “Messenger.” You can check order details and easily view message history and respond to your customers:
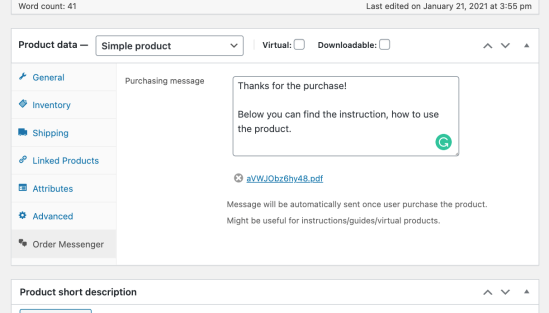
↑ Volver al principioThe new “Order messenger” tab on the product page allows you to set a “purchasing message” that will automatically send when the customer purchases the product.It can be applicable in many other ways. E.g., there is often some information you would want to share with your customers: manuals, additional software, electronic warranty card, etc. This section allows setting a message tied to a product, which will be sent to the client when purchasing the product.\At the settings, you can choose the “purchase” trigger. Chose whether the message sends when payment is successful or when an order is placed.
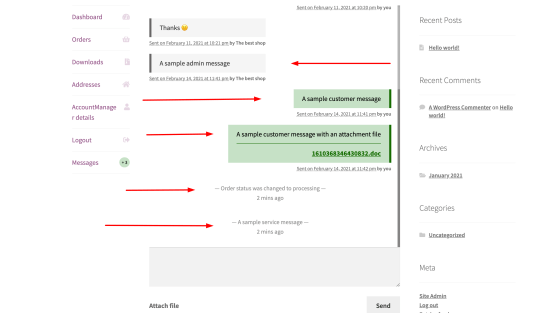
↑ Volver al principioThere are 4 standard types of messages. Below you can see how they look for customers & admins:Admins:Customers:All messages are stored in the database. An admin can permanently delete them.
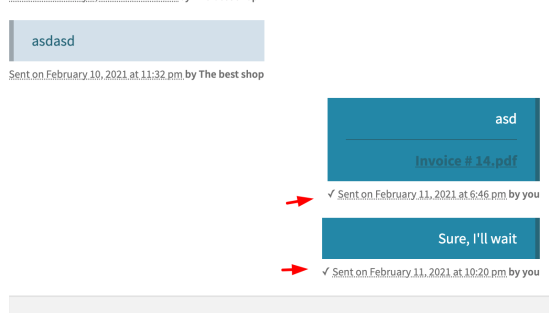
↑ Volver al principioRegular messages go with: a sent date, a message content, an optional attachment file, and read status. If the is a little checkmark near a message – the message was read. If you hover it, it will show an exact date of reading. (This can be disabled for the frontend chat room at the settings, so your customers won’t see if you read a message or not).
↑ Volver al principioThis message is being sent when an order changes its status. It makes tracking the order process more comfortable.The messages do not trigger notifications and can be completely disabled at the plugin’s settings.
↑ Volver al principioMany plugins push some order-related information, such as delivery info or payment status, to order notes. The plugin creates service messages as soon as a customer order note is added. That makes the order process history consistent.The service messages can be disabled at the settings.
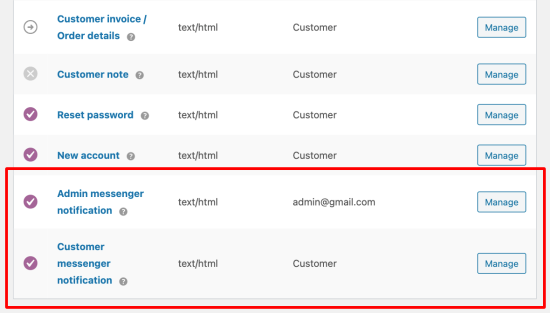
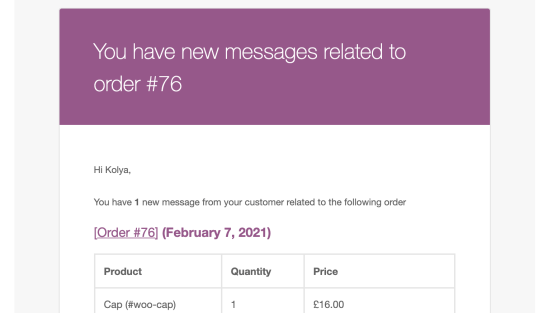
↑ Volver al principioThere are two types of emails that ship with the plugin: Customer and Admin Notification.They help to don’t miss important messages. Email notifications are sent with 10 minutes delay and group on all unread messages related to an order. It helps to reduce emails amount.Below you can find how they look:Admin:Customer:Within each email, you can:
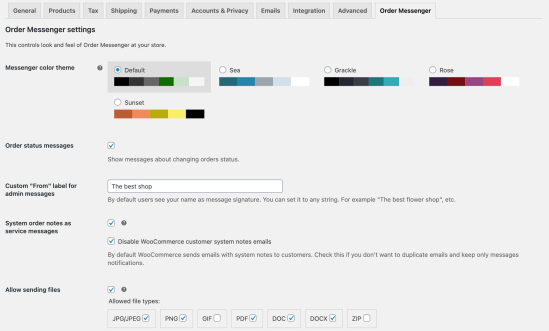
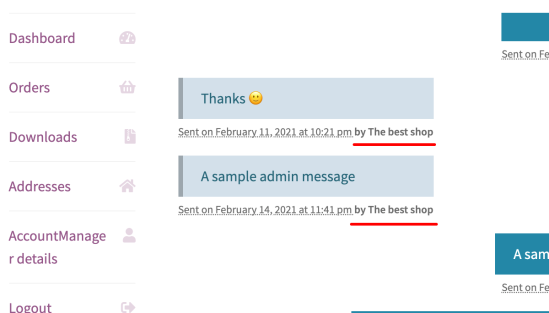
↑ Volver al principioBy default, admin messages would sign with the sender’s name. The custom signature option allows you to set an alias that will be used for messenger.E.g., “The best shop”
↑ Volver al principioThis option controls order status changing messages at your store. Disabling this option will turn off order status messages (including existing ones).
↑ Volver al principioThis option controls system messages at your store. Disabling this option will switch off the system messages (including existing ones).By default, WooCommerce sends emails with system notes to customers. Check “Disable WooCommerce customer system notes emails” if you want to keep only message notifications.
↑ Volver al principioThe “Sending files” option allows you to control whether you want the customers to be able to send you files or not. You’re able to limit accepted file types as well as the maximum allowed file size. Please note that the largest file size that cannot be higher than your WordPress installation is configured.
↑ Volver al principioThe messenger preloads some amount of messages and loads the rest if a user scrolls to the top. This option controls how many messages will be preloaded.
↑ Volver al principioA little check mark near the message date indicates that message was read. You can disable this feature for customers, so they will not see if admins read a message or not:
Each template order-messenger-for-woocommerce/views/frontend/{template_name} can be overridden at your theme by the following path: {your_theme}/order-messenger-for-woocommerce/{template_name}
Every plugin template goes through the “order_messenger/template/location” filter, so you can easily substitute the template path.
↑ Volver al principio“order_messenger/settings/available_file_types” filter allows you to add a custom plugin supported file type.The type will be shown under the setting and can be enabled/disabled.Example:add_filter( ‘order_messenger/settings/available_file_types’, function ( $availableFileTypes ) {// Add MP3 audio to supported file types$availableFileTypes[‘mp3’] = array(‘title’ => ‘MP3 audio’,‘mime’ => ‘audio/mpeg’);return $availableFileTypes;}, 1, 10 );
↑ Volver al principio“order_messenger/settings/available_themes” filter allows you to add a custom plugin theme.The theme will be shown under the setting and can be enabled/disabled.Example:add_filter( ‘order_messenger/settings/available_themes’, function ( $availableThemes ) {// Add custom theme$availableThemes[‘Sunset’] => array(‘–om-primary-color-darker’ => ‘#bb5d33’,‘–om-primary-color’ => ‘#f08a5d’,‘–om-secondary-color-darker’ => ‘#b9ab0e’,‘–om-secondary-color’ => ‘#f9ed69’,‘–om-primary-text-color’ => ‘#000000’,‘–om-secondary-text-color’ => ‘#000000’,);return $availableThemes; } );
 If a sent file is image type, the users will be able to preview it in a lightbox:
 Modal box:
 At the settings, you can choose the “purchase” trigger. Chose whether the message sends when payment is successful or when an order is placed.
 Customers:
 All messages are stored in the database. An admin can permanently delete them.
 They help to don’t miss important messages. Email notifications are sent with 10 minutes delay and group on all unread messages related to an order. It helps to reduce emails amount.
Below you can find how they look:
Admin:
They help to don’t miss important messages. Email notifications are sent with 10 minutes delay and group on all unread messages related to an order. It helps to reduce emails amount.
Below you can find how they look:
Admin:
 Customer:
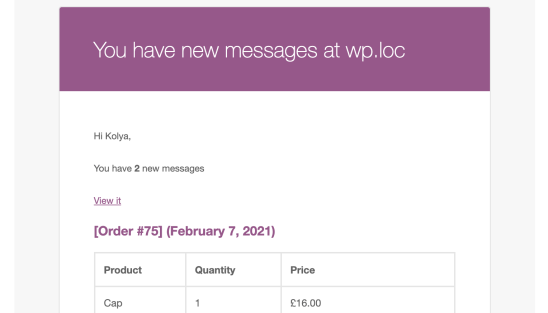 Within each email, you can: