- Download the .zip file from your WooCommerce account.
- Go to: WordPress Admin > Plugins > Add New and Upload Plugin.
- With the file you downloaded in step 1, Choose File.
- Install Now and Activate Plugin.
More information at
Install and Activate Plugins/Extensions.
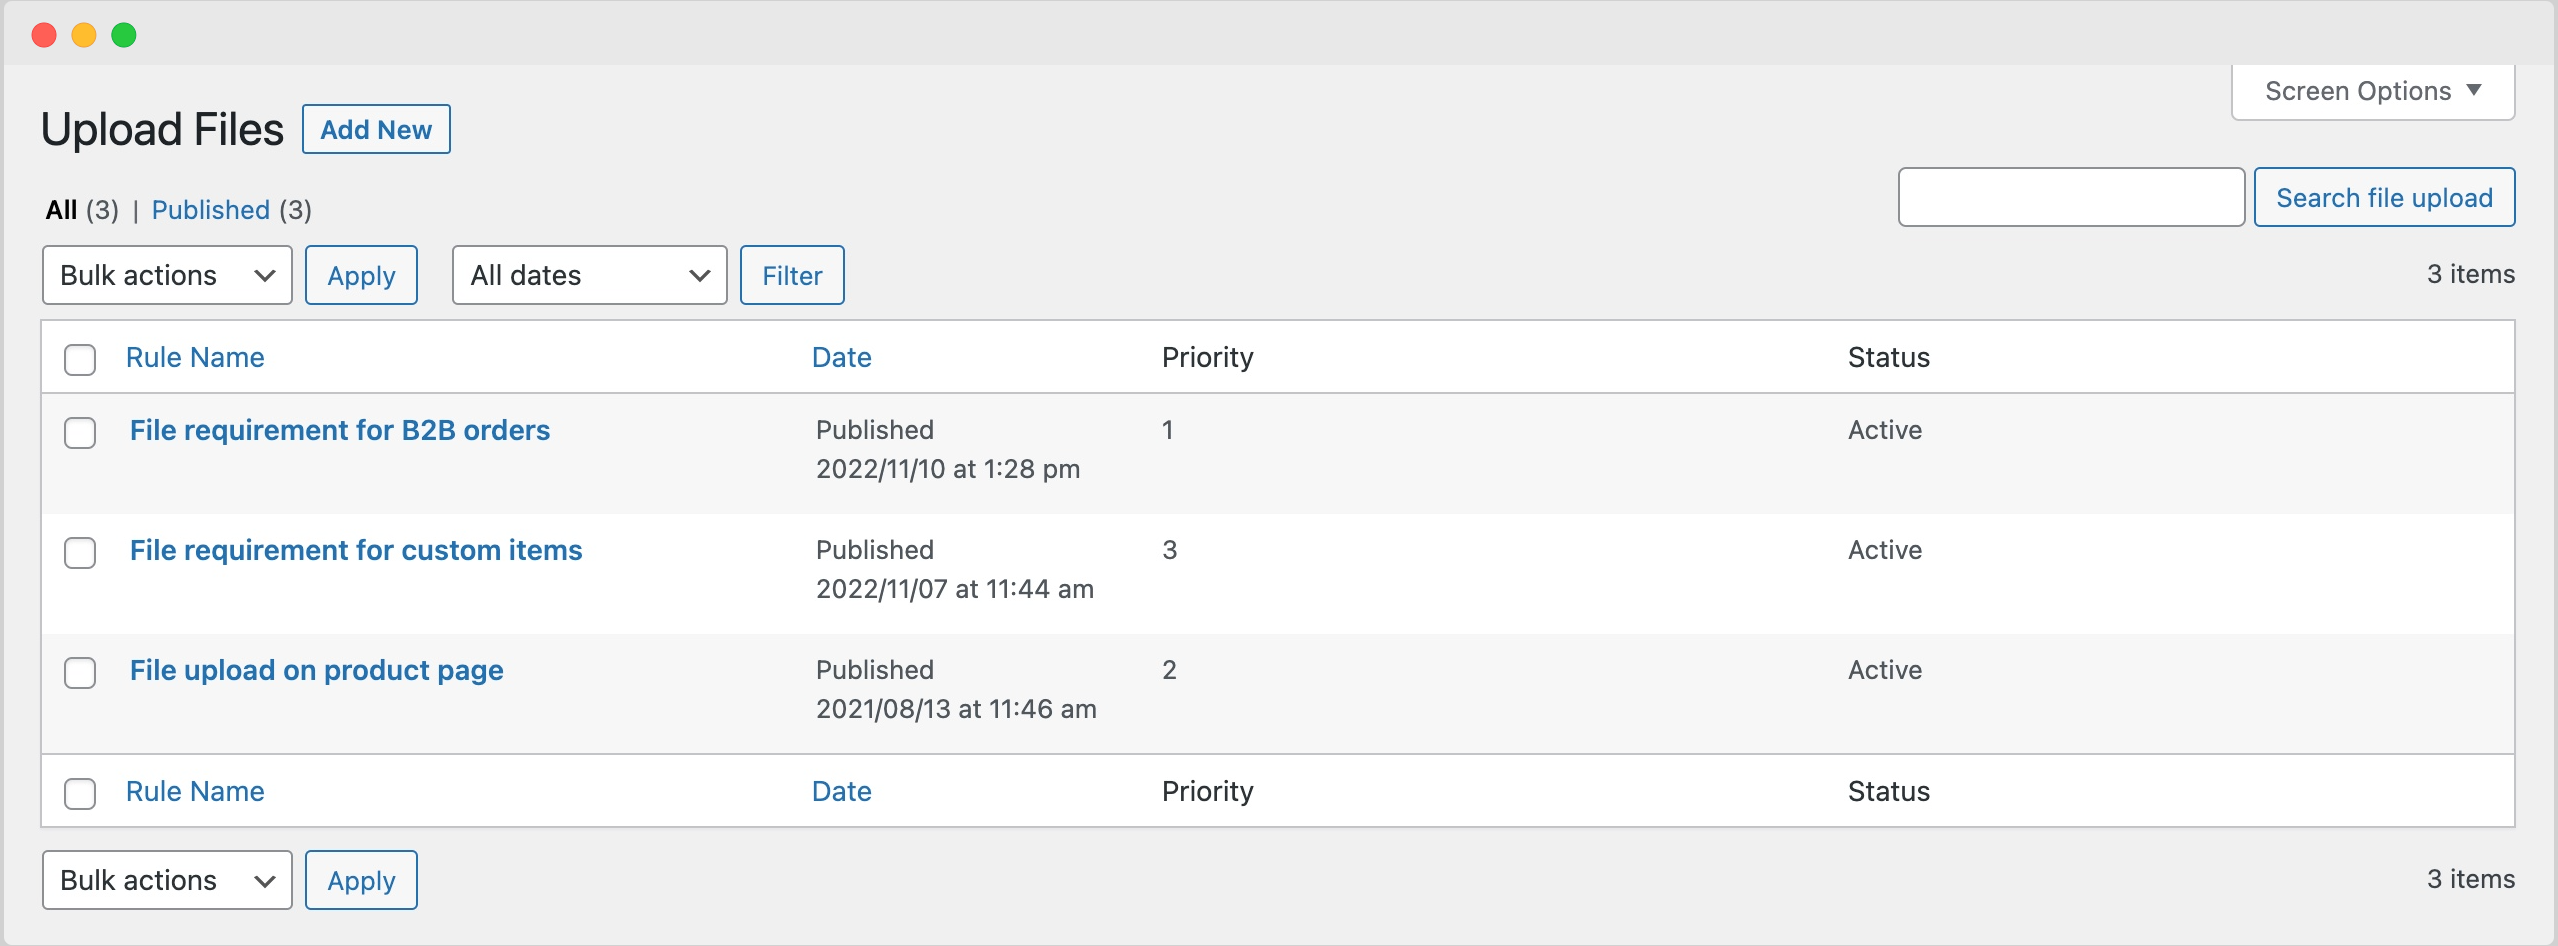
Once the extension is installed and activated, you can create and access rules under
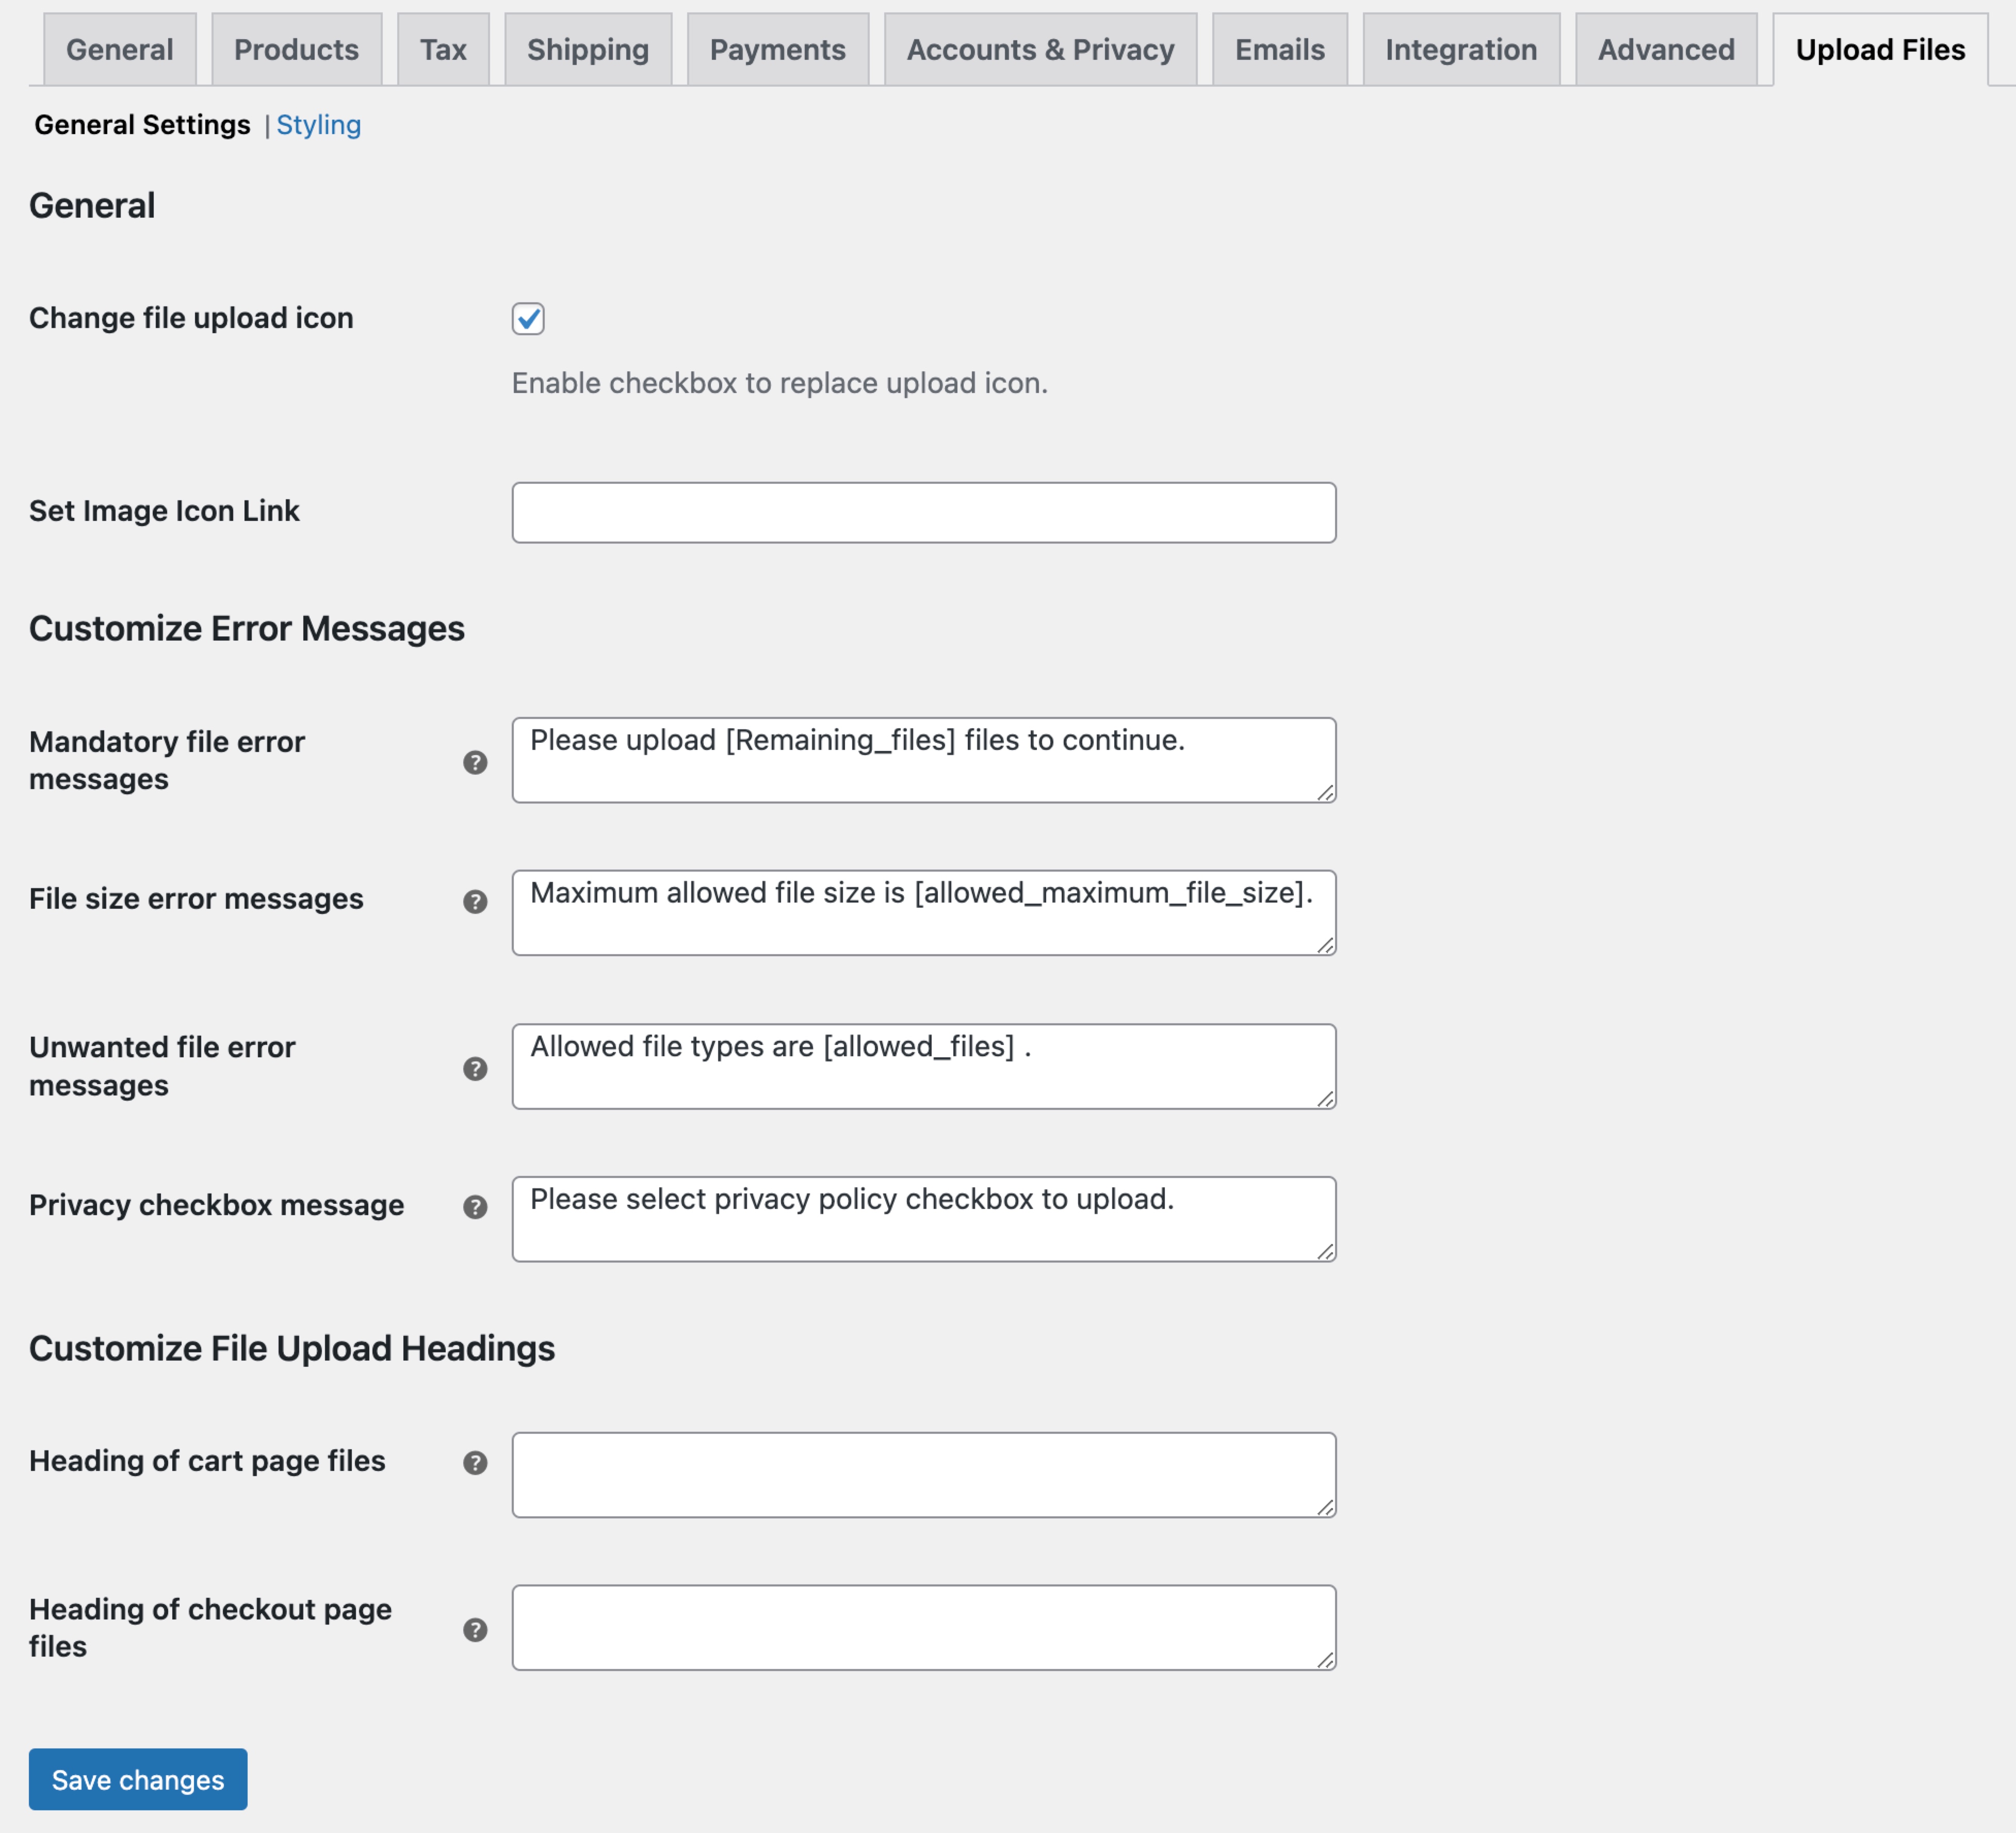
WooCommerce > Upload Files. General plugin settings can be accessed from
WooCommerce > Settings > Upload Files tab.
The extension allows you to create multiple rules to enable file upload option for specific products, categories, user roles, order statuses and more.

While creating a new file upload rule, you can customize the following options:
- Rule priority – Set a rule priority where 1 is highest priority and 100 is lowest.
- General settings – the following options are available:
- Enable rule
- Add rule title for future reference
- Enable description to add file upload instructions
- Add comma separated allowed file formats
- File Size Restrictions – When multiple file uploads are allowed, you can add combined file size restrictions.
- User Roles Restrictions: Option to display file upload button for specific user roles only – leave empty to show file upload button for all users.
- File Upload Message (Customer): You can enable this option in order to display a description box allowing customers to add notes upon file upload. Customize heading and maximum character limit for description.
- Privacy Policy: Display a privacy policy checkbox when users upload a file. Add a custom message and link to privacy policy page to remain GDPR complaint. The checkbox appears when the file is uploaded.
- Display File Upload: When creating rules, you can choose to enable the file upload button on the product, cart and checkout pages. You can also add a maximum file upload limit for each page. The extension offers 3 default file upload positions on cart page along with a short-code to display it anywhere on the cart page.
- File visibility After upload: Once the file is uploaded you can choose to display the file on the Cart & Checkout, Thank you and Order Detail Pages. Additionally, you can allow users to edit (delete or upload new files) files from the “My-Account” page for specific order statuses.
- Additional Fee: You can charge a separate fee for product, cart and checkout page file uploads. When setting up the additional file upload fee you can:
- Charge fee in fixed or percentage amount
- Charge single fee or per file when multiple files are uploaded
- Mandatory Files: You can make the file upload field mandatory requiring customers to upload a minimum file count in order to complete checkout.

You can customize the file upload icon by adding a direct icon URL. Additionally, you can customize error messages for mandatory file, size, format and more. While drafting the error messages, you can access the available variables by hovering over the “?” icon.

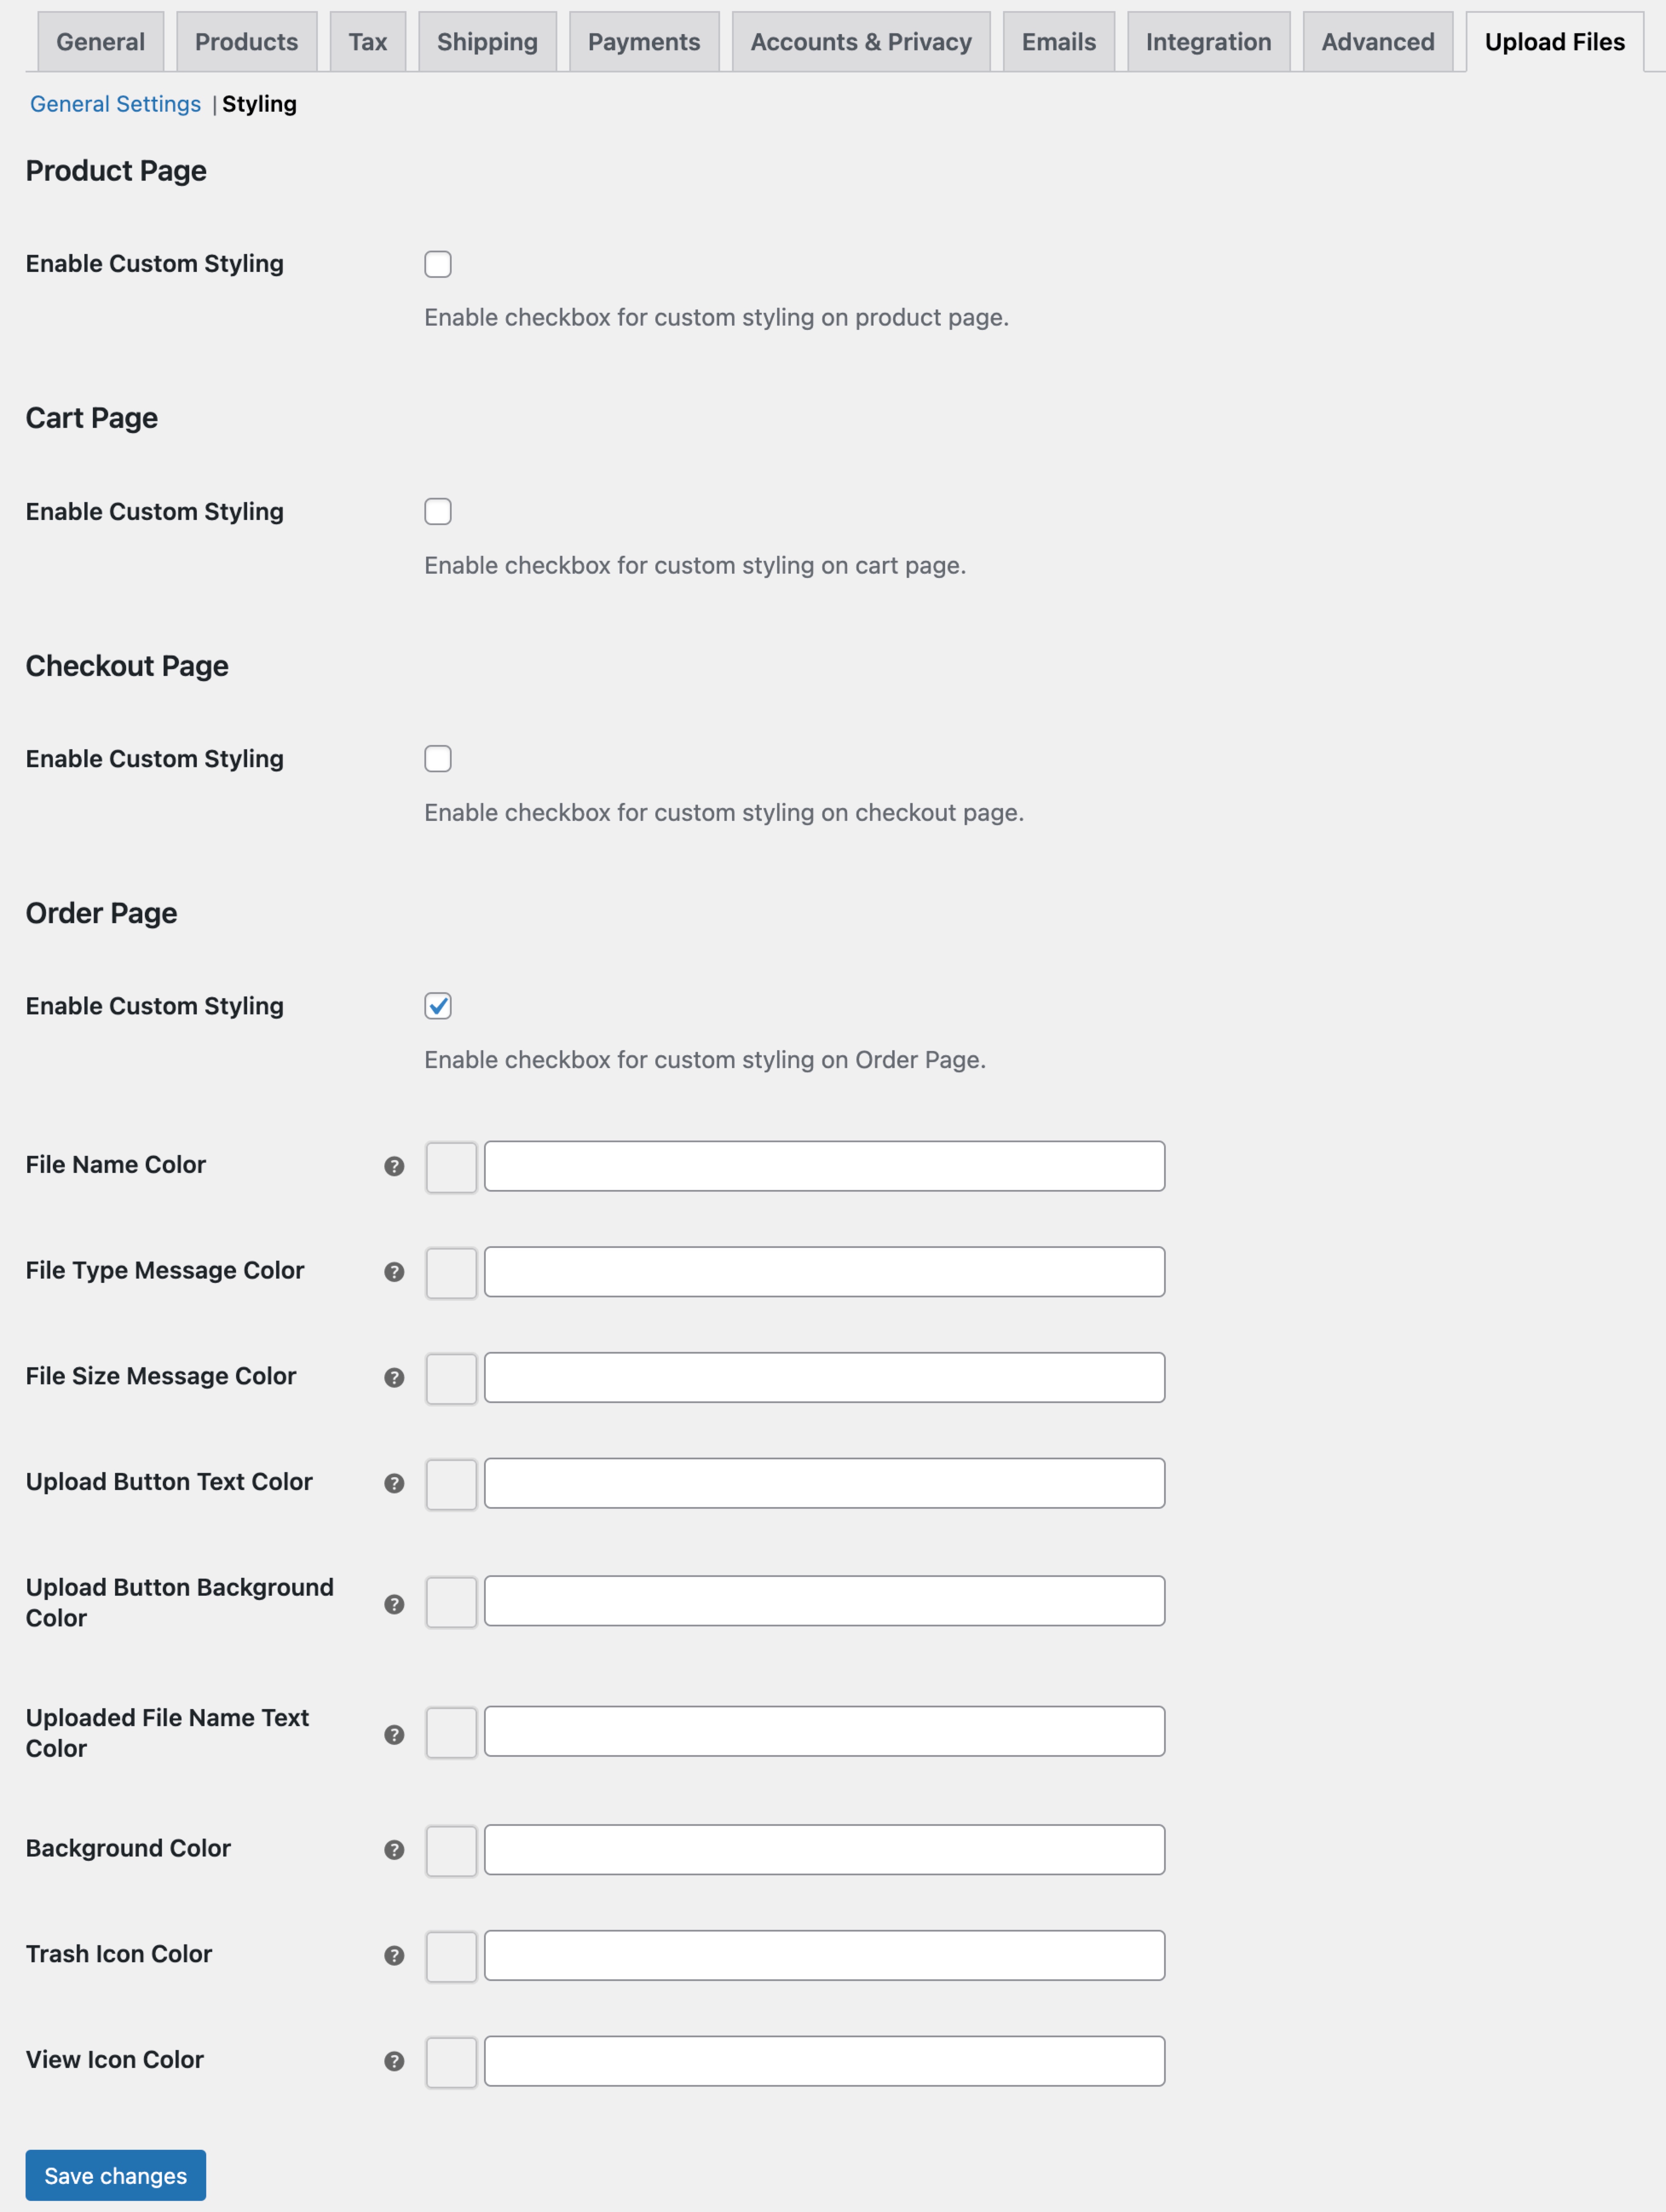
By default, the extension inherits the standard theme layout. However, the store admin can customize the following file upload style options for the Product, Cart, Checkout and Order Detail pages.

 While creating a new file upload rule, you can customize the following options:


