WooCommerce Square offers SAQ-A PCI-compliant payment integration, including 3D Secure verification, and synchronized product inventory, enabling secure online sales across multiple channels.
This documentation will walk you through the process of integrating and configuring the WooCommerce Square Extension seamlessly with your online store. It provides step-by-step instructions, tips, and best practices to ensure a smooth setup and optimal configuration. Let’s get started!
Requirements for the WooCommerce Square Extension
↑ Back to topHere, we outline the necessary components and configurations needed to seamlessly integrate the WooCommerce Square extension with your website. Understanding these requirements will ensure a smooth setup process and optimal functionality for your e-commerce operations.
- PHP 7.4+
- WordPress 5.8+
- WooCommerce 6.8+
- A Square account
- An SSL certificate to use the payment gateway
- Background processing to support automatic product sync
Recommended caching settings
↑ Back to topSquare for WooCommerce v3.0 and newer uses the official Square SDK for API communication with the Square platform. Some API responses are cached to improve performance.
Ensure opcache.save_comments is enabled. This is required for the plugin and product sync to work correctly.
If this setting is disabled and you’re experiencing issues, you may need to contact your hosting provider to change the setting.
Installation of the WooCommerce Square Extension
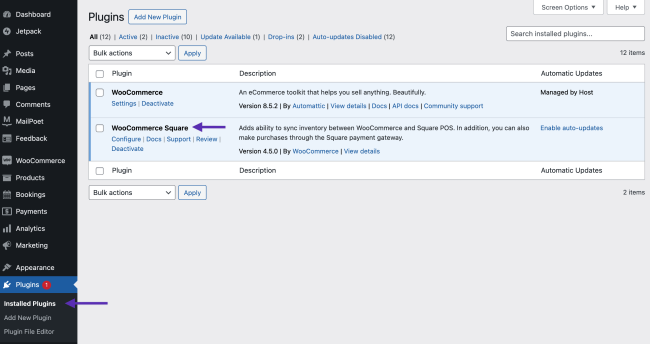
↑ Back to topTo get started with WooCommerce Square, the first step is ensuring that the extension is installed on your website and activated. If you haven’t done so yet, our installation section provides clear instructions on how to seamlessly integrate WooCommerce Square into your website.
Setting up the WooCommerce Square Extension
↑ Back to topAfter successfully installing the WooCommerce Square Extension, it’s crucial to configure it properly to enable your store to:
- Establish secure communication with Square’s servers.
- Accept live payments from customers.
- Sync products
Note: If you have already connected your Square account with WooCommerce, you can begin configuring the extension for Product Sync and/or to receive Payments via Square.
Connect your Square account
↑ Back to top- Now that you have the WooCommerce Square extension installed and active, go to WooCommerce > Settings > Square on your site’s dashboard (WP-Admin) area and click Connect to Square next to the Connection section:
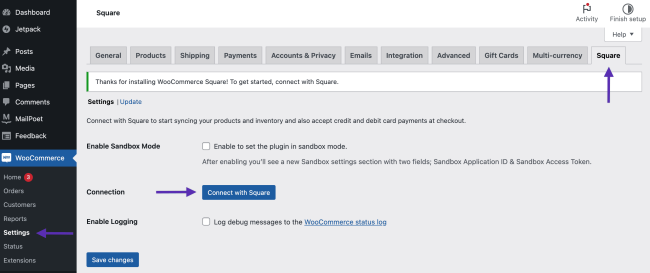
2. The Connect to Square button will take you to the Square website so you can log into your Square account. You must be the owner of the Square account to authorize WooCommerce to connect.
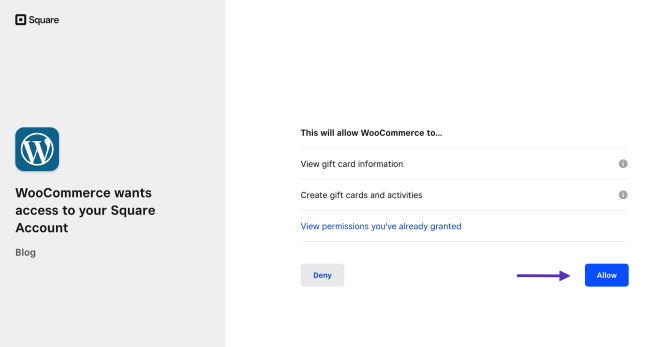
3. Once successfully logged in, you’ll be asked to confirm if you allow the connection, you can click the Allow button.
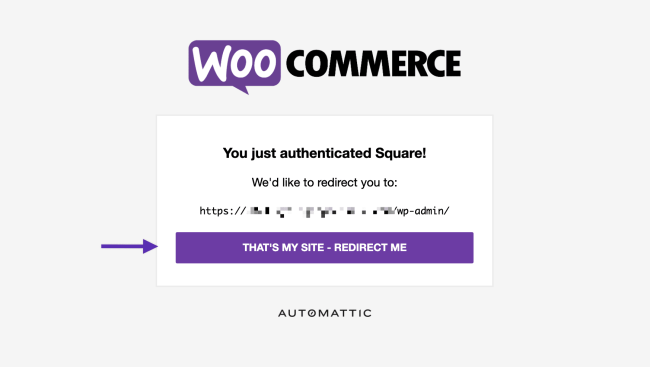
4. When you click allow and the connection is successful, you’ll be asked to go back to your website. Make sure to check you have connected the account to the correct site by checking the URL on this page. If everything looks good, click the That's My Site - Redirect Me button and you’ll be redirected back to your website.
5. Once your account is authenticated, fill out the remainder of the fields (such as Business location and Sync settings).
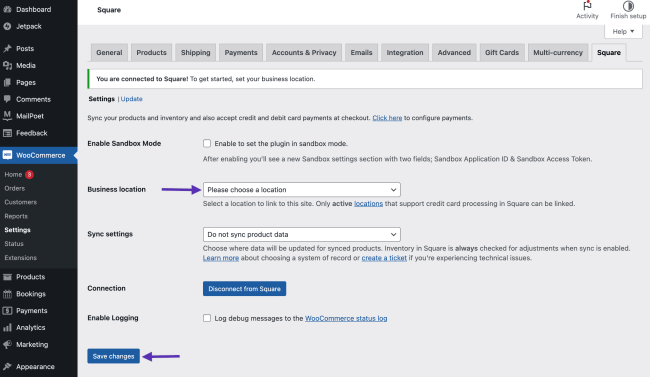
You’re now connected to Square! Now, you can start configuring the settings.
WooCommerce Square can be used for managing inventories and also as a payment gateway. You can configure the extension to use either of them or both!
Having trouble connecting to Square?
↑ Back to topNot able to connect your site to Square? You must be the owner of the Square account to do so. This integration needs access to much of the data in your Square account, and Square only grants these permissions to owners.
If you get an “Unauthorized” error when attempting to connect with Square, please check with Square if you are the owner of the account you’re connecting to.
Configuring the WooCommerce Square Extension
↑ Back to topThe WooCommerce Square extension serves a dual purpose, functioning seamlessly as both a product inventory sync between Square and your WooCommerce website and a payment gateway for receiving payments from customers.
For detailed guidance on setup and configuration, please check the documents provided below.