WooCommerce is already translated into a few languages and is translation-ready out of the box. All that is needed is a translation file for your language, which is automatically installed for the languages on this list by changing the site’s language.
On this page you’ll learn:
- How to set up WordPress in your language.
- How to contribute translations to your WooCommerce language.
- How to manually download translations from translate.wordpress.org
- How to create custom translations for WooCommerce
- How to translate text without localization
Set up WordPress in your language
↑ Back to topThe first step to translating WooCommerce is to ensure your site is set to the language you want it translated into. WordPress needs to be told what the default language is and can be done by following these steps:
- From the WordPress Admin dashboard go to Settings > General.
- Change the Site Language setting to the preferred language.
- Scroll down to click Save changes (this immediately changes the navigation menu language as well).
- Go to to Dashboard > Updates.
- Scroll to the bottom and click Update Translations.
The shop now displays in your locale if the language file exists. If it does not, you need to create the language files as per the process explained below.
Contributing your Localization to Core
We maintain translations at our project on GlotPress. If you want to contribute translated strings to your language or wish to start a new translation, register an account at WordPress.org and start translating.
Translating WooCommerce into your language
↑ Back to topWooComemrce Translation is managed by teams in the WooCommerce Translation Project. Stable versions and development versions of WooCommerce are translated there and anyone can contribute.
WordPress looks for an at least 90% complete Stable translation in your language when installing or updating WooCommerce, and then automatically downloads it. If there is a Stable translation, but it’s not at least 90% complete, you can download it manually. We encourage you to contribute to the particular language to get it to above 90% so that all users can benefit.
If you’re new to translating, check out the translators handbook to get started.
Downloading translations from translate.wordpress.org manually
↑ Back to topFollow the steps below to manually download translations from the :
- Go to the WooCommerce Translations Project and find your language in the list.
- Click the title to enter the language’s sub-section.
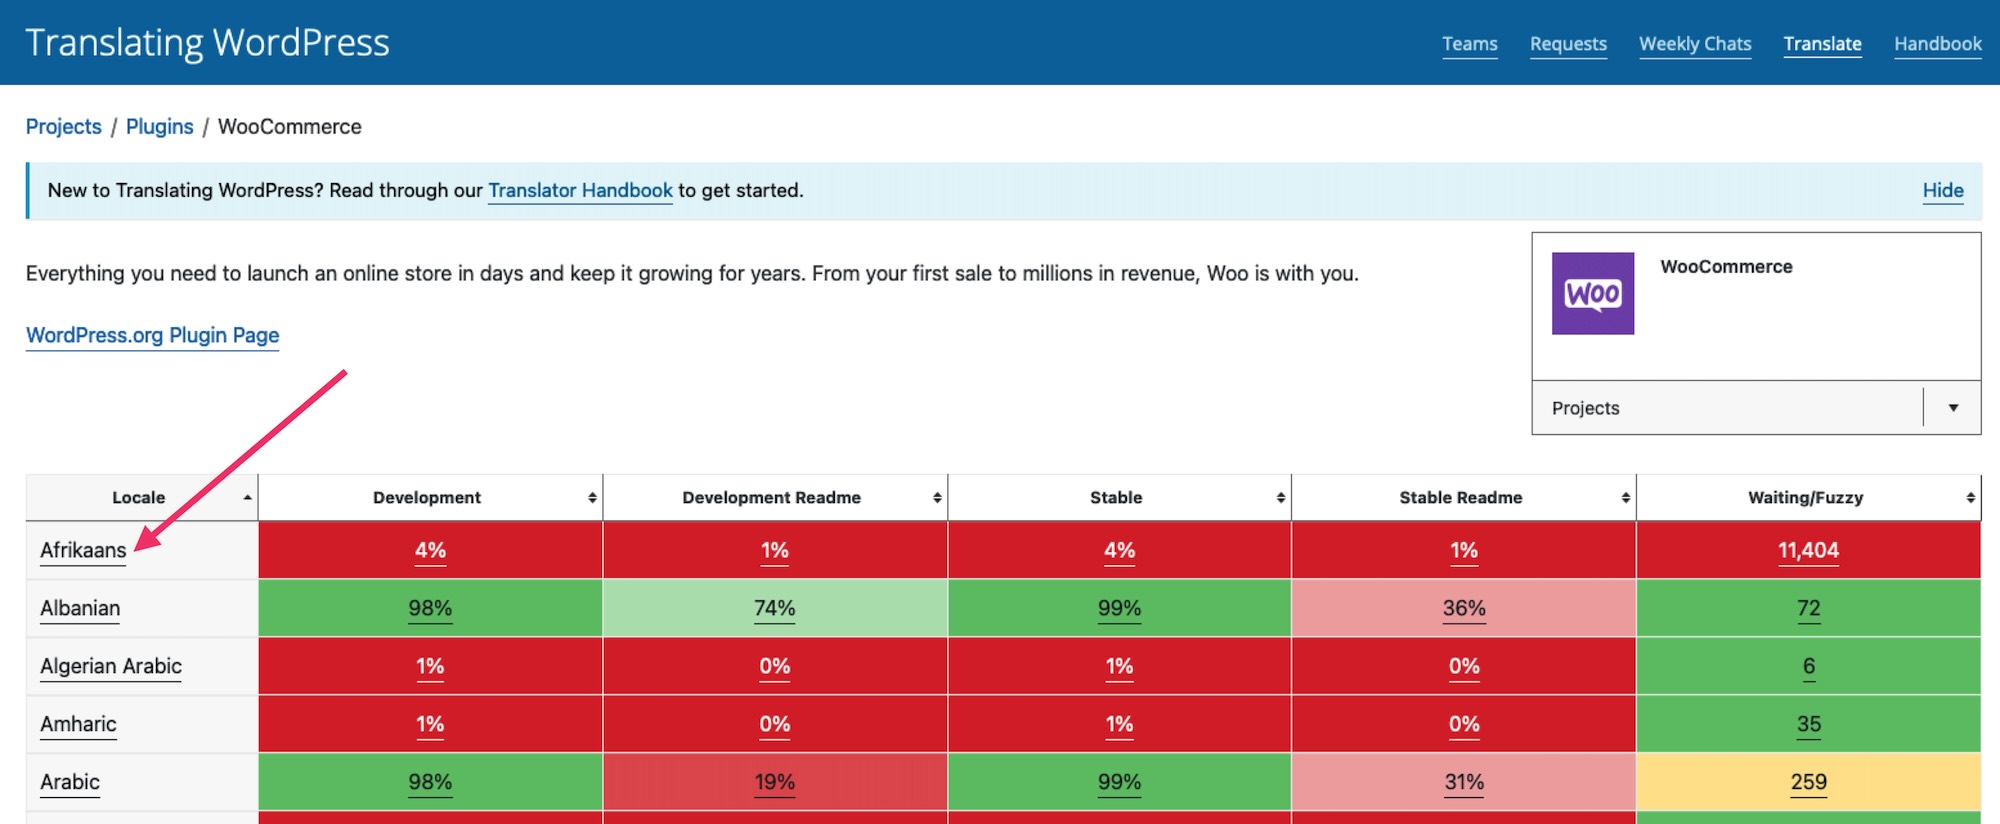
- Click the heading in the Set/Sub Project column to view and download a Stable (latest release) version.

- Scroll to the bottom of that page for export options. Export as a Machine Object Message Catalog (.mo) file for use on your site.

- Rename this file to woocommerce-YOURLANG.mo (e.g., Great Britain English should be en_GB, or Afrikaans would be af).
- Upload the file to your site’s wp-content/languages/plugins/ folder.
- Once uploaded, this translation can be used.
Creating custom translations
↑ Back to topWooCommerce includes a language file (.pot file) that contains all of the English text. You can find this language file inside the plugin folder in woocommerce/i18n/languages/.
Creating custom translations with Loco Translate
- Install and activate the Loco Translate plugin.
- Go to Loco Translate > Plugins and select WooCommerce:
- Click + New Language to add new languages.
- Choose the language to add from the dropdown.
- Select the folder to add the translation files to, we recommend Custom.
- Click Start translating.
Note #1: Loco Translate offers three different locations for where to create the translation. The best choice for your own translation is Custom, not just to prevent custom translations from being undone by updates, but also because it’s needed for strings in extensions like WooCommerce Subscriptions to be properly translated.
Avoid the Author location since it’s inside the plugin and will be overwritten by extension updates, as well as the System location, which could be overwritten by translations from translate.wordpress.org.
Note #2: If you encounter any technical issues while using Loco Translate, please get in touch with the Loco Translate support team.
- Save when finished.
When a new version of WooCommerce is released and updated on your site, you need refresh the .po file to look for new strings. Use the “Sync” button to find any new string to start translating.
Creating custom translations with PoEdit
PoEdit is a more advanced alternative to Loco Translate. This method for translating WooCommerce us recommended for only advanced users or translators.
WooCommerce comes with a POT file that can be imported into PoEdit to translate. To get started:
- Open PoEdit and go to File > New catalog from POT file.
- Choose woocommerce.pot and PoEdit will show the catalog properties window:
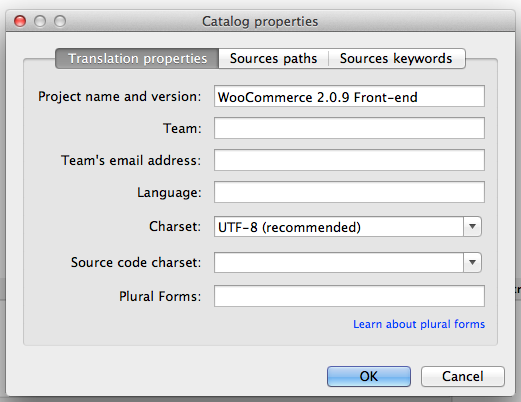
- Enter your name and details, so other translators know who you are, and click ‘OK‘.
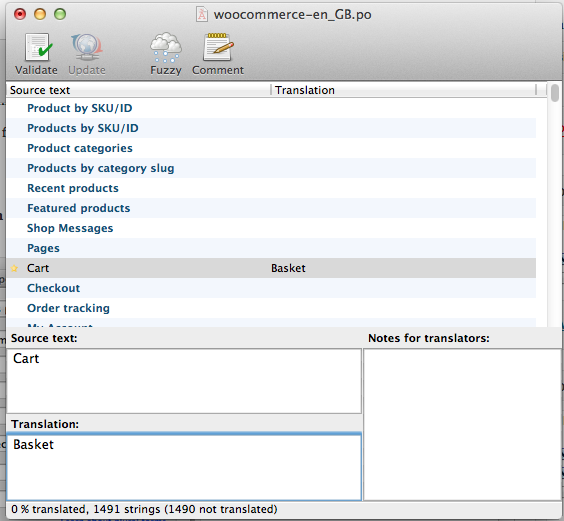
- Save your .po file. Name it based on what you are translating to, i.e., a GB translation is saved as woocommerce-en_GB.po . Now the strings are listed.
- Save after translating strings. The .mo file is generated automatically.
- Update your .po file by opening it and then go to Catalog > Update from POT file.
- Choose the file and it will be updated accordingly.
Making your translation upgrade safe
Note: We are unable to provide support for customizations under our Support Policy. If you need to further customize a snippet, or extend its functionality, we highly recommend Codeable, or a Certified WooExpert.
WooCommerce keeps translations in wp-content/languages/plugins, like all other plugins. But if you wish to include a custom translation, you can use the directory wp-content/languages/woocommerce, or you can use a snippet to load a custom translation stored elsewhere:
Translating text without a localization file
↑ Back to topTranslate or replace default text
↑ Back to topUsing the Say What? plugin can assist if you only wish to translate or change a few words without editing a WordPress theme’s .PO file. Requires no custom code.
When activated, it asks for:
- Original string – text you are translating. View the plugin source code to see the exact string.
- Text domain – woocommerce
- Text you want to display
FAQ
↑ Back to topWhy are some strings on the Checkout page not being translated?
↑ Back to topYou may see on the Checkout page that some of the strings are not translated. For example, in the screenshot below, Local pickup shipping method, Cash on delivery payment method, and a message related to Privacy Policy are not translated to while the rest of the form is indeed translated.
This usually happens when you first install WooCommerce and select default site language (English) and later change the site language to another one. In WooCommerce, the strings that have not been translated in the screenshot, are stored in the database after the initial WooCommerce installation. Therefore, if the site language is changed to another one, there is no way for WooCommerce to detect a translatable string since these are database entries.
To fix it, navigate to WooCommerce settings corresponding to the string you need to change and update the translation there directly. For example, to fix the strings in our case above, you would need to do the following, first for the Local Pickup shipping method:
- Navigate to WooCommerce > Settings > Shipping > Shipping Zones.
- Select the shipping zone where the Local Pickup shipping method is added.
- Open the Local Pickup shipping method’s settings
- Rename the method with the proper translation.
- Click Save the save the setting.
Then, in the case of the Cash on delivery payment method:
- Navigate to WooCommerce > Settings > Payments.
- Select the Cash on delivery payment method.
- Rename the method title, description, and instructions with the actual translation.
- Click Save to save the setting.
And for the message relating to the Privacy Policy:
- Navigate to WooCommerce > Settings > Accounts & Privacy.
- Scroll down to the Privacy Policy section.
- Edit the Registration privacy policy and Checkout privacy policy field with the correct translation.
- Scroll down and click Save settings.
Navigate back to the Checkout page to see the new translations reflected there.
Why do some translated strings not show up as translated on the front end?
↑ Back to topIf some of your translated strings don’t show up as expected on your WooCommerce site, the first thing to check is if these strings have both a Single and Plural form in the Source text section.
If this is the case, then it is necessary to translate both these forms for your translation to work as expected. To do this, please use Loco Translate’s Single and Plural tabs that show up in the translation section towards the bottom of screen, as pictured below.