WooCommerce Square sandbox mode lets you test the extension’s configurations without any real financial transactions happening so that you can make sure everything works correctly before you start selling.
Enabling Sandbox Mode
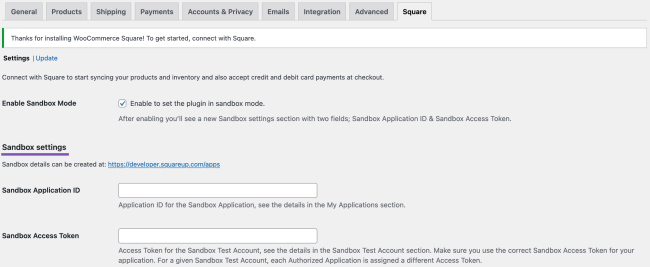
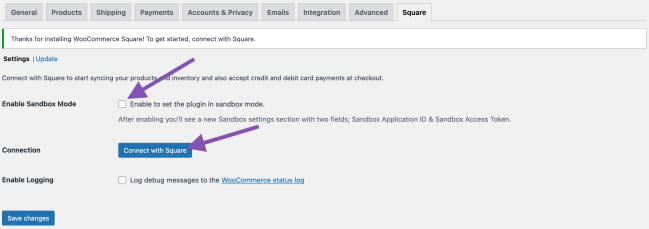
↑ Back to top- In your WooCommerce store’s WordPress dashboard, navigate to WooCommerce > Settings > Square.
- Check Enable to set the plugin in sandbox mode. to enable the Square sandbox mode.
- Save changes. You should now see Sandbox settings.
Accessing the Square Developer Dashboard
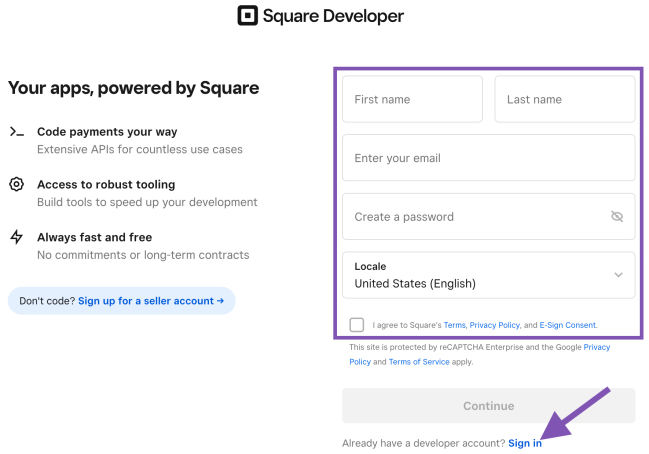
↑ Back to top- Visit the Square Developer dashboard and sign in with your Square account credentials.
- If you don’t have a Square Developer account, sign up for one to proceed.
Creating a New Application
↑ Back to top- When signing up, you will be asked to create a new application. Fill in the necessary details.
- You can also create a new application by clicking on the plus (+) sign on the Stripe Developer dashboard.

Generating Sandbox Credentials
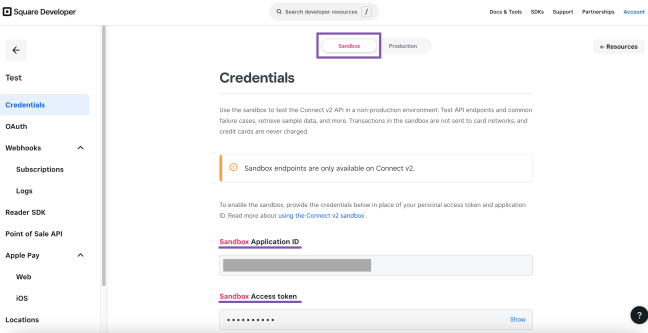
↑ Back to top- Once your application is created, navigate to the Credentials tab of that application.
- Make sure Sandbox is selected.
- Copy the generated Sandbox Application ID and Sandbox Access token.
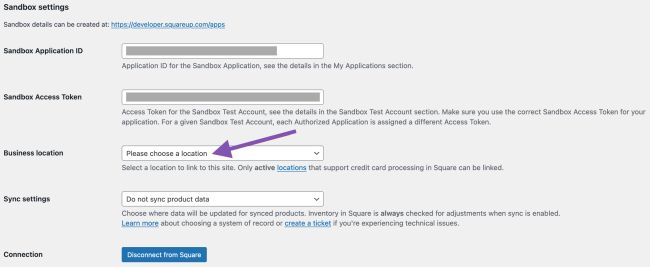
- Paste the Sandbox Application ID and Sandbox Access token obtained from the Square Developer dashboard into the respective fields in WooCommerce Square settings.

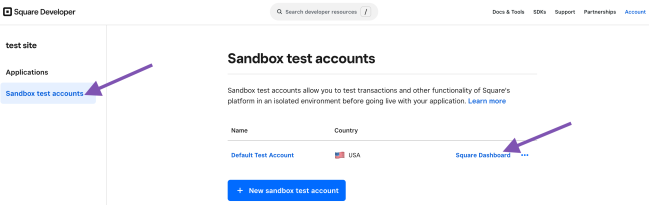
- Save changes. You should now see Business location. Select a test account so that you can view the sandbox transaction data.
- To view this data, go to Sandbox test accounts in the Square Developer dashboard. Click on Square Dashboard next to the account you would like to view.
Testing Payments in Sandbox Mode
↑ Back to top- Navigate to your WooCommerce store and make a test purchase.
- Complete the checkout process, making sure to select Square as the payment method.
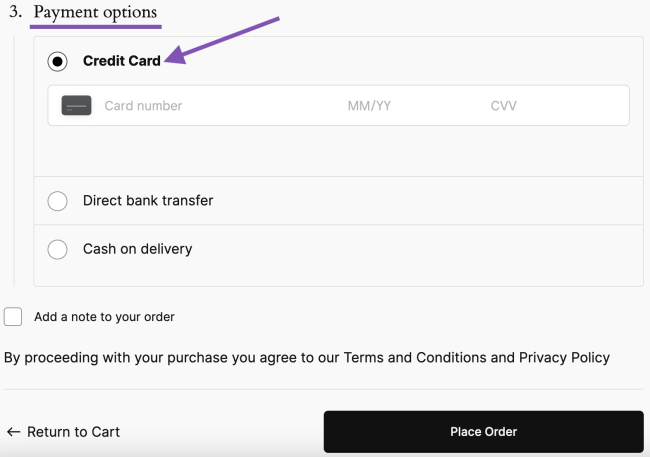
- Use a test card number provided by Square to simulate a transaction
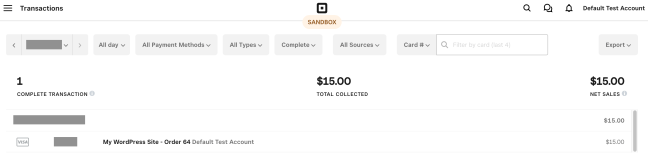
- Complete the payment process and verify that the transaction goes through successfully.

- Check both your WooCommerce > Orders and the Square dashboard to confirm that the test transaction appears in both systems.

Notes on Payment Testing
↑ Back to top- The card expiration date needs to be set to a future month and year.
- Payments in USD (United States), CAD (Canada), or GBP (United Kingdom) require a valid postal code.
- Payments in Japan do not support postal codes.
- The SCA flow requires buyers to provide a code sent to their mobile phone in an SMS message. When testing, use the provided verification code to simulate the code sent using SMS.
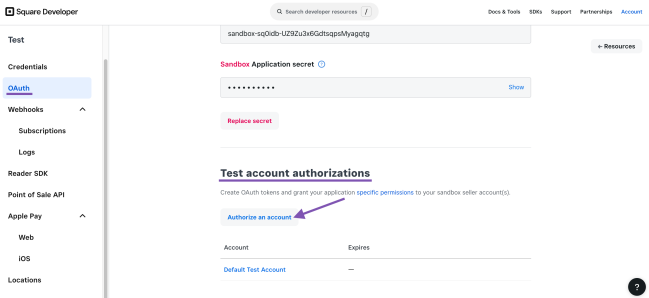
- If the Square test account authorization expires, you can reauthorize by going to the Square Developer dashboard > OAuth > Test account authorizations and clicking on the Authorize an account button.
Transitioning to Live Mode
↑ Back to top- Once testing is successful and you’re satisfied with the integration, you can transition from sandbox mode to live mode.
- Make sure you have activated your Square account.
- Uncheck Enable to set the plugin in sandbox mode. in WooCommerce > Settings > Square. Then, click on the Connect with Square button. Follow the onscreen instructions.
Final Testing and Monitoring
↑ Back to top- Conduct a few additional test transactions in live mode to make sure everything works correctly.
- Monitor your WooCommerce > Orders and Square dashboard for any discrepancies or issues.
- Regularly review transaction logs and monitor for any errors within order notes or abnormalities.
By following these steps, you can effectively test the WooCommerce Square extension in sandbox mode, ensuring a smooth and reliable payment experience for your customers.