Once you connect your Stripe account, you’ll want to make sure that the Stripe WooCommerce Extension on your site and your Stripe account are both communicating properly with each other.
This process is handled by something called “webhooks.” This guide covers how to configure these webhooks so that your Stripe account and your WooCommerce site work together seamlessly.
To start configuring your webhooks, you will need to:
- Find your webhook endpoint.
- Use that endpoint to configure your webhooks in Stripe.
- Add your webhook secret in your Stripe WooCommerce Extension settings.
Find your site’s webhook endpoint
↑ Back to topIn order for Stripe’s servers to properly communicate with your site, you’ll need to add a specific URL to your Stripe settings, which is called the “webhook endpoint.”
To find the webhook endpoint:
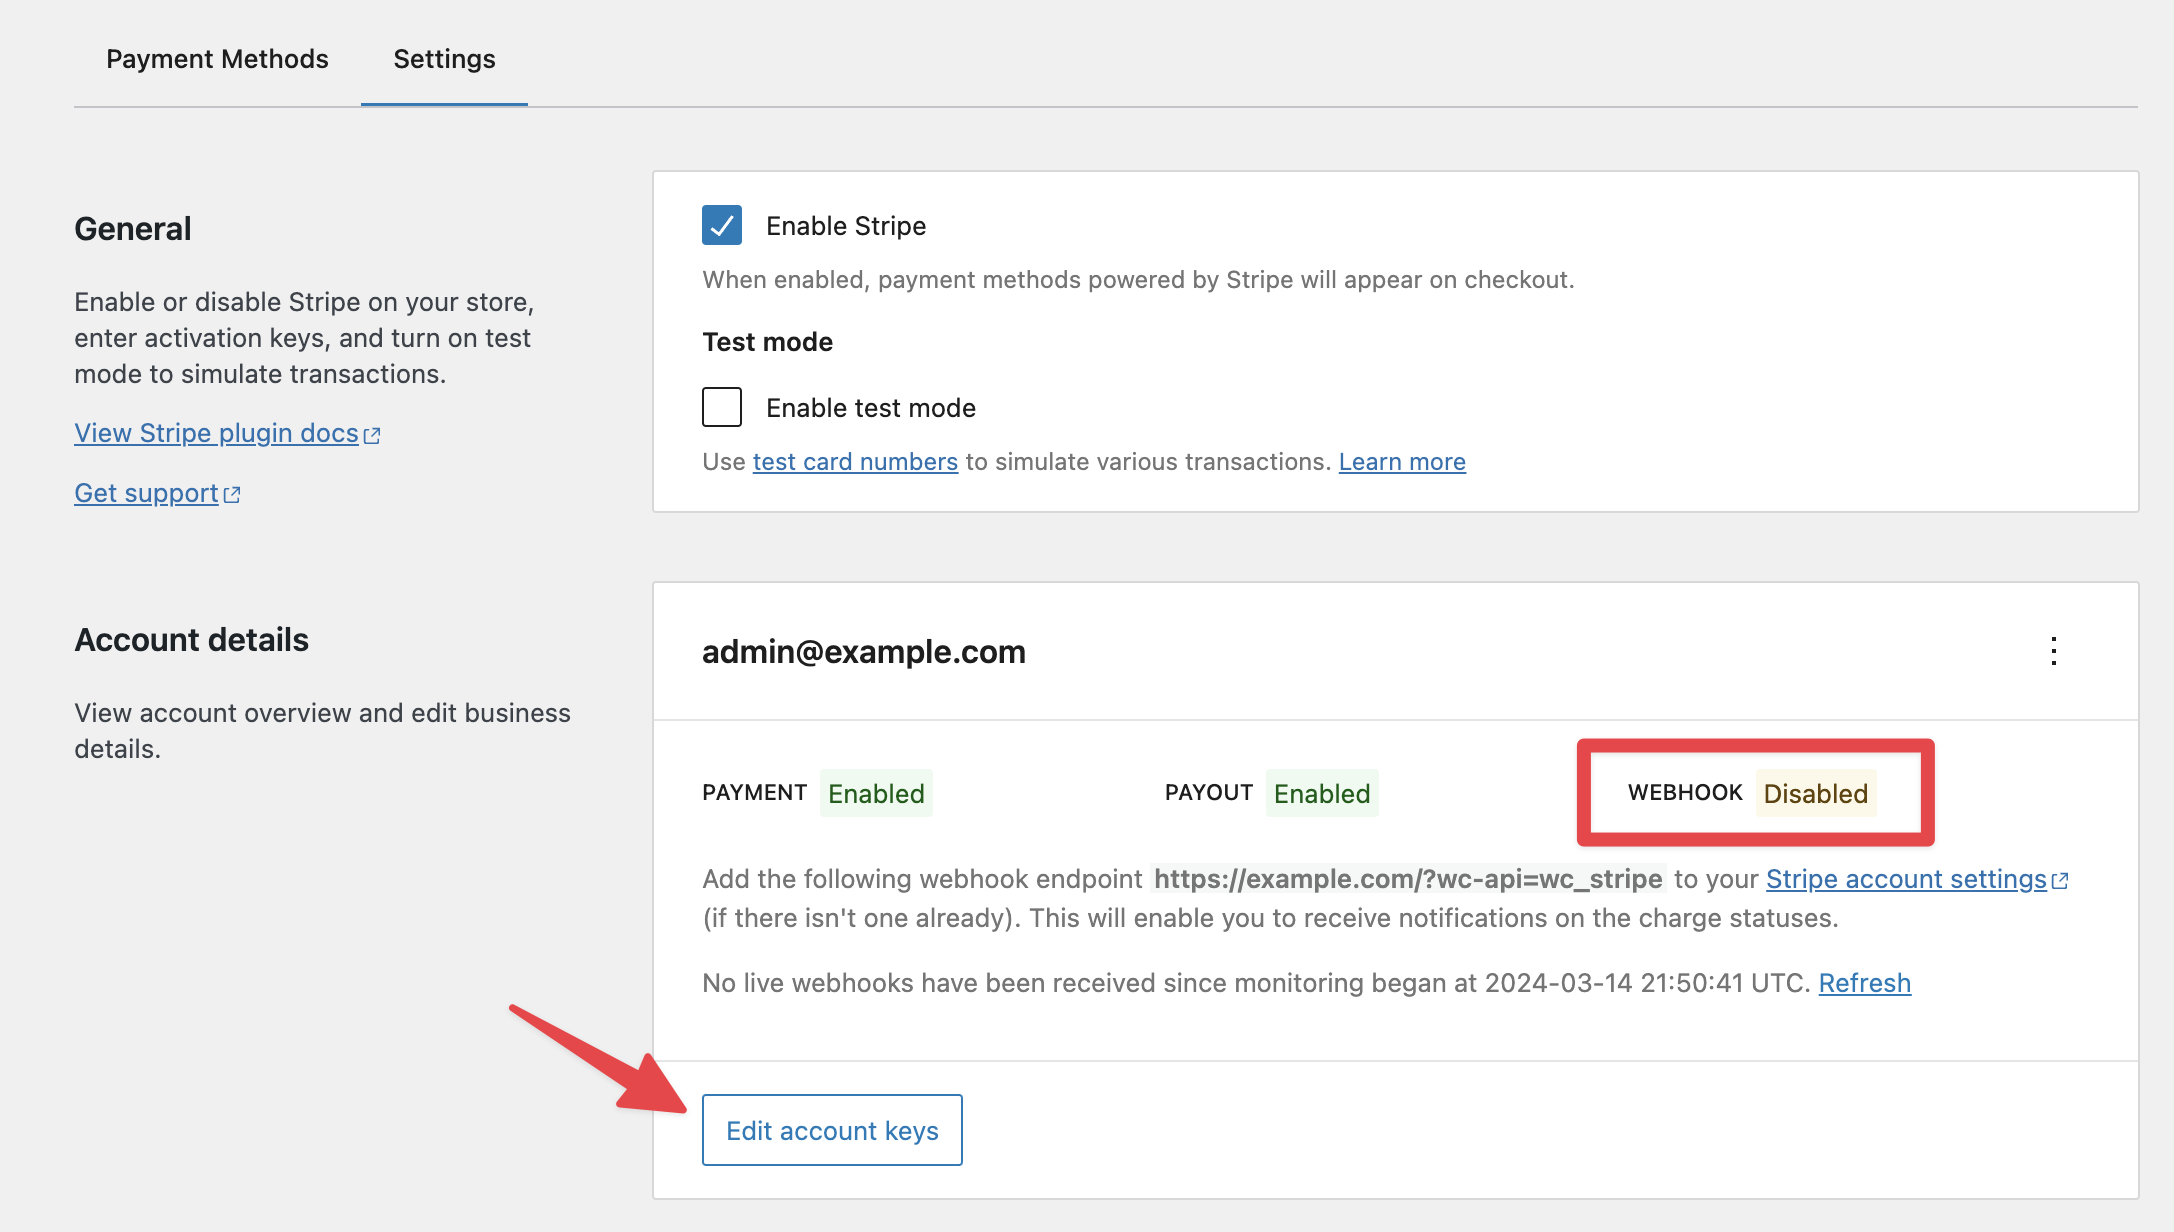
- Navigate to WooCommerce > Settings > Payments > Stripe > Settings from your admin dashboard.
- Once there, select Edit account keys:
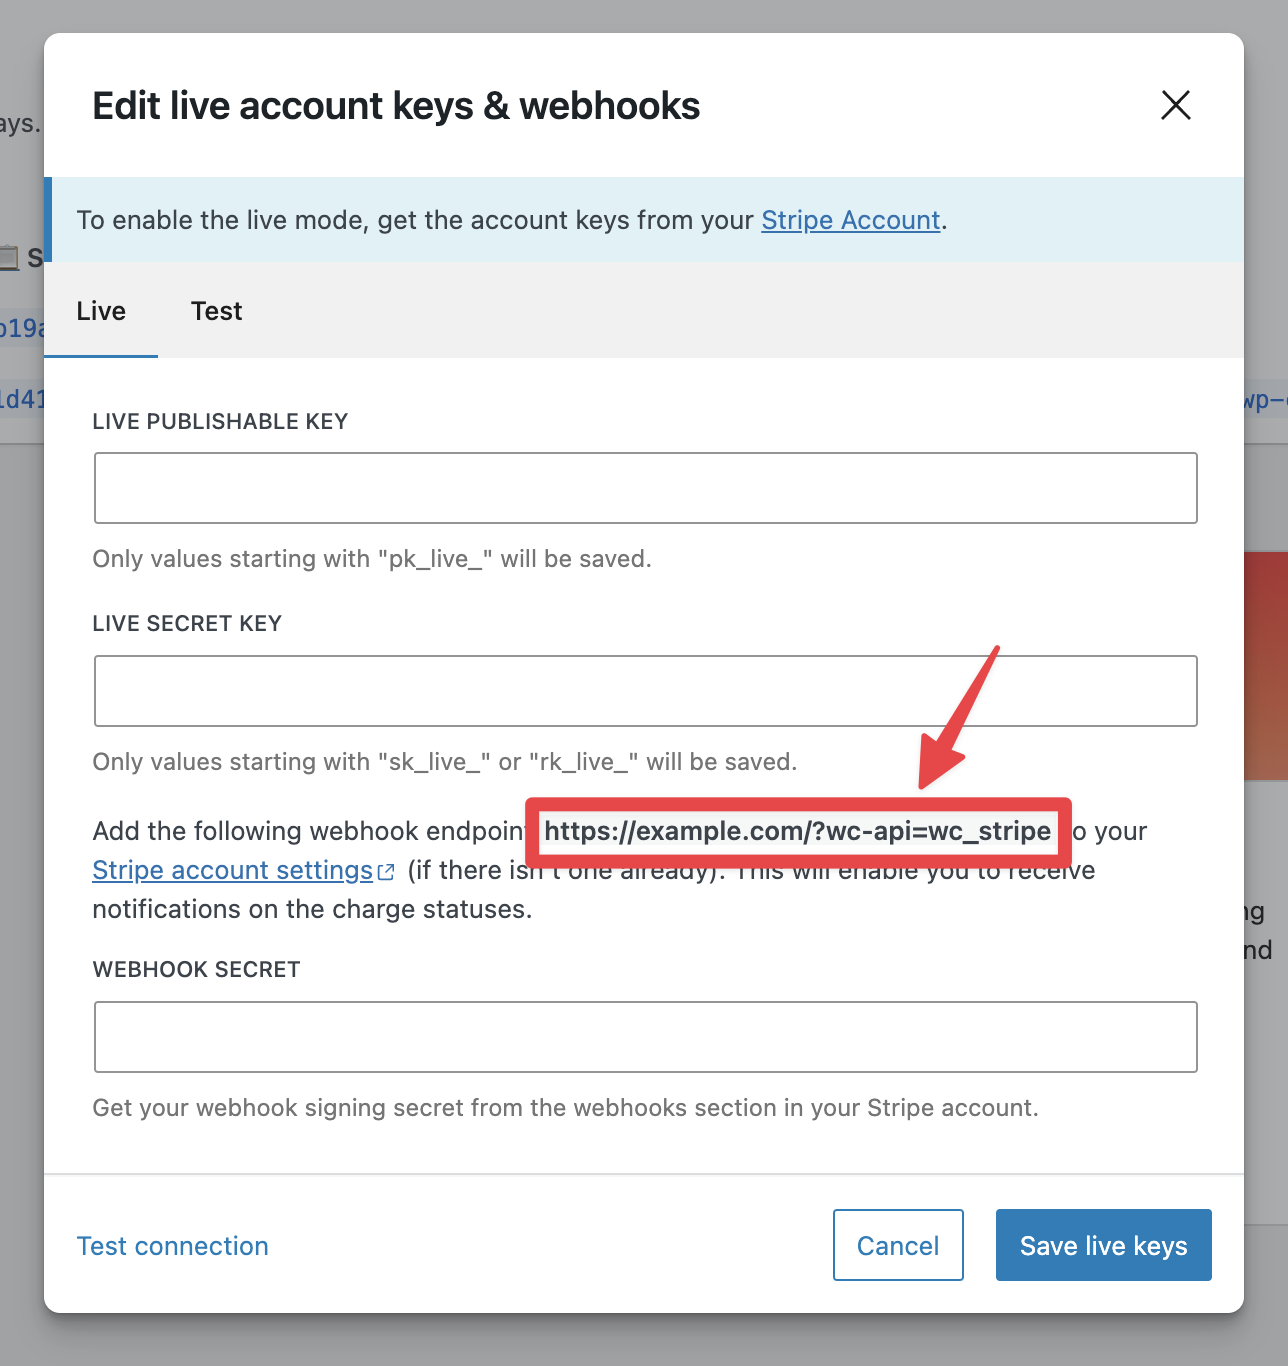
This will bring up a modal titled Edit live account keys & webhooks.
- Highlight the webhook endpoint — which is usually your site’s URL followed by
?wc-api=wc_stripe— and copy it to your clipboard:
Configure webhooks in Stripe
↑ Back to topNow that you have your webhook endpoint, it’s time to bring that information to your Stripe dashboard and configure the types of webhook events that will be communicated between your account and your WooCommerce site via the Stripe WooCommerce Extension.
To do this, you’ll:
- Add the webhook endpoint to your Stripe account.
- Choose which events your WooCommerce site will listen to.
Adding the webhook endpoint
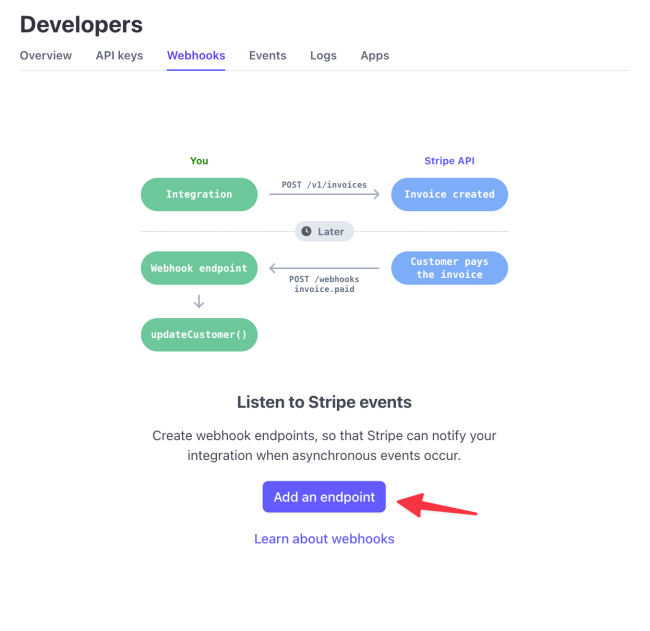
↑ Back to top- Navigate to your Stripe dashboard at dashboard.stripe.com.
- Select the
Developersitem on the top-right of the page. - Select the Webhooks tab on the next page.
- Select the
Add an endpointbutton:
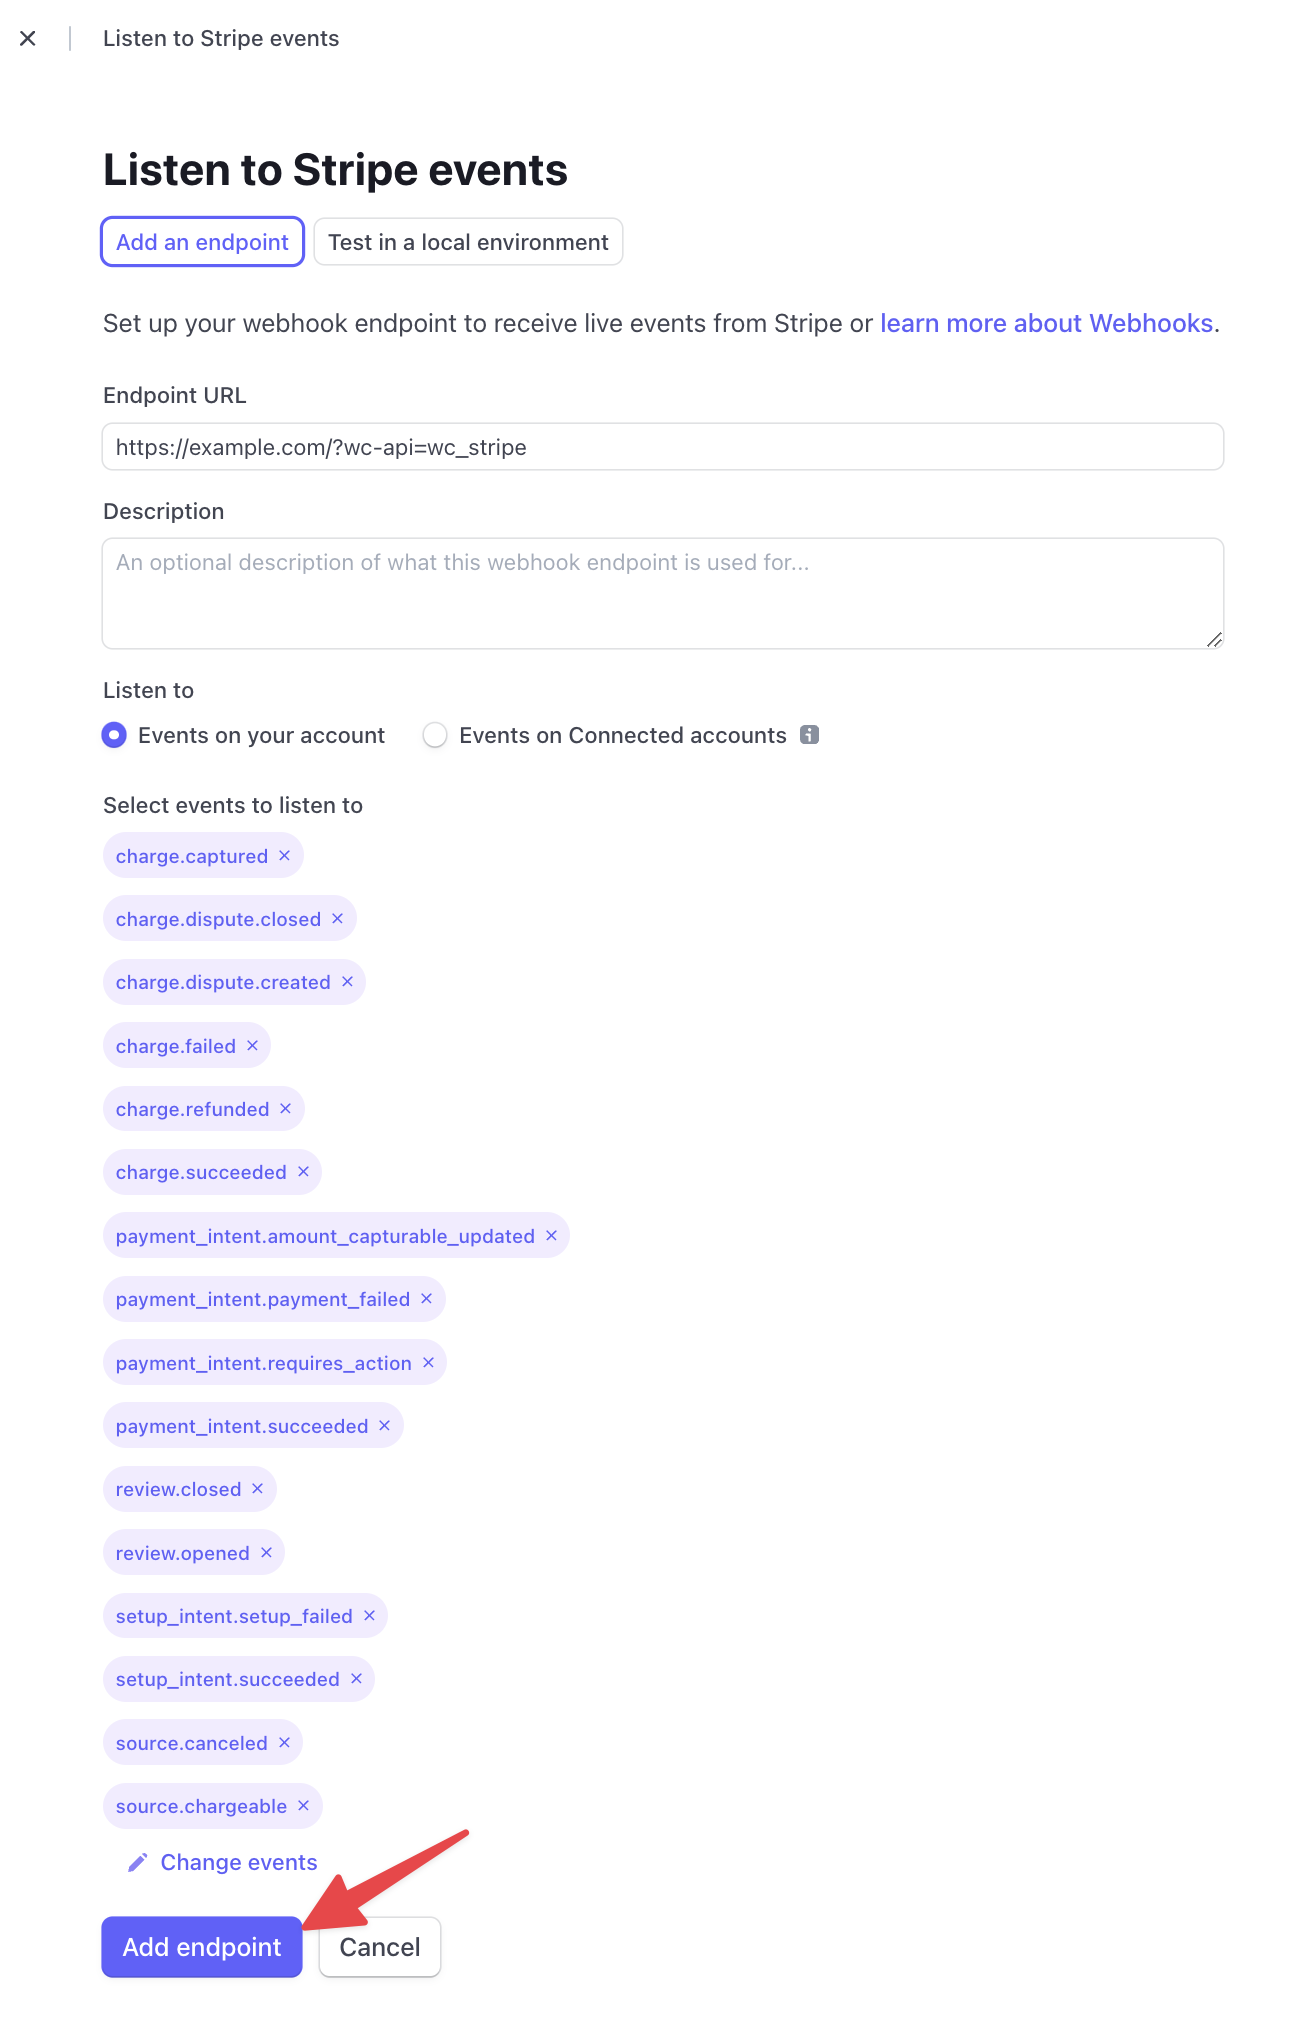
- Paste the webhook endpoint URL you copied previously in the
Endpoint URLfield. - Add an optional description.
Choose which events to listen to
↑ Back to topWith the webhook endpoint in place, we will want to tell Stripe which events to listen for. If information from your WooCommerce site matches the events configured in your Stripe dashboard, then your Stripe account and your site will be in sync.
To choose which events to listen to:
- Select the
Events on your accountoption under the Listen to heading. - Add the events that you’d like to listen to.
- At a minimum, there are 16 events that you will want to listen to. Those are:
charge.capturedcharge.dispute.closedcharge.dispute.createdcharge.failedcharge.refundedcharge.succeededpayment_intent.amount_capturable_updatedpayment_intent.payment_failedpayment_intent.requires_actionpayment_intent.succeededreview.closedreview.openedsetup_intent.setup_failedsetup_intent.succeededsource.canceledsource.chargeable
- At a minimum, there are 16 events that you will want to listen to. Those are:
- Select the Add endpoint button after selecting the desired events:
Adding your webhook secret
↑ Back to topNow that we’ve added the webhook endpoint and determined which webhooks to listen to, you can add the webhook signing secret to your Stripe payment gateway’s settings.
To add the webhook signing secret to your site:
- Navigate to your Stripe dashboard at dashboard.stripe.com.
- Select the
Developersitem on the top-right of the page. - Select the Webhooks tab on the next page.
- Select the webhook you configured under the
Hosted endpointsheading.- The
Hosted endpointssection may have multiple entries. If it does, select the option that corresponds with the WooCommerce site you are currently configuring.
- The
- Select the Reveal option under
Signing secretin the webhook details:
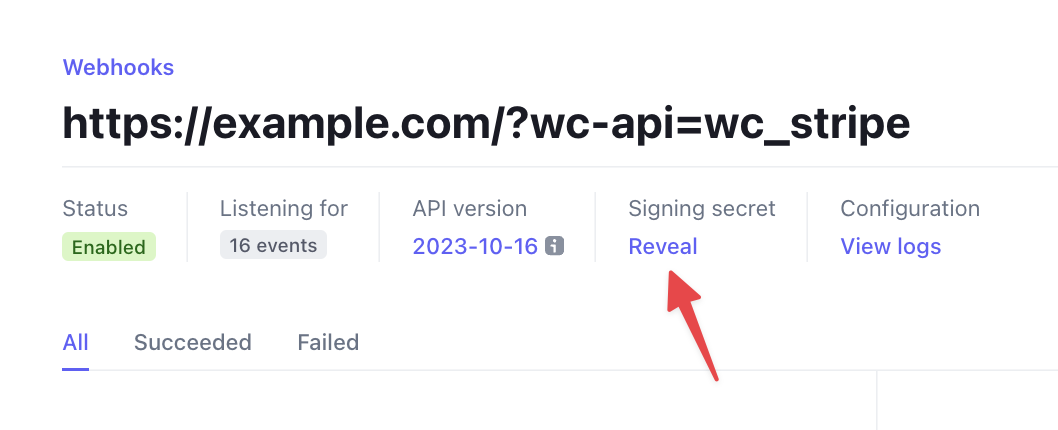
The Reveal option will turn into a webhook signing secret key, which will be a string of characters that begins with whsec_:

- Highlight the webhook signing secret and copy it to your clipboard.
- Navigate to WooCommerce > Settings > Payments > Stripe > Settings from your admin dashboard.
- Select Edit account keys to bring up the Edit live account keys & webhooks modal.
- Paste the webhook signing secret into the
WEBHOOK SECRETsection of the Edit live account keys & webhooks popup.
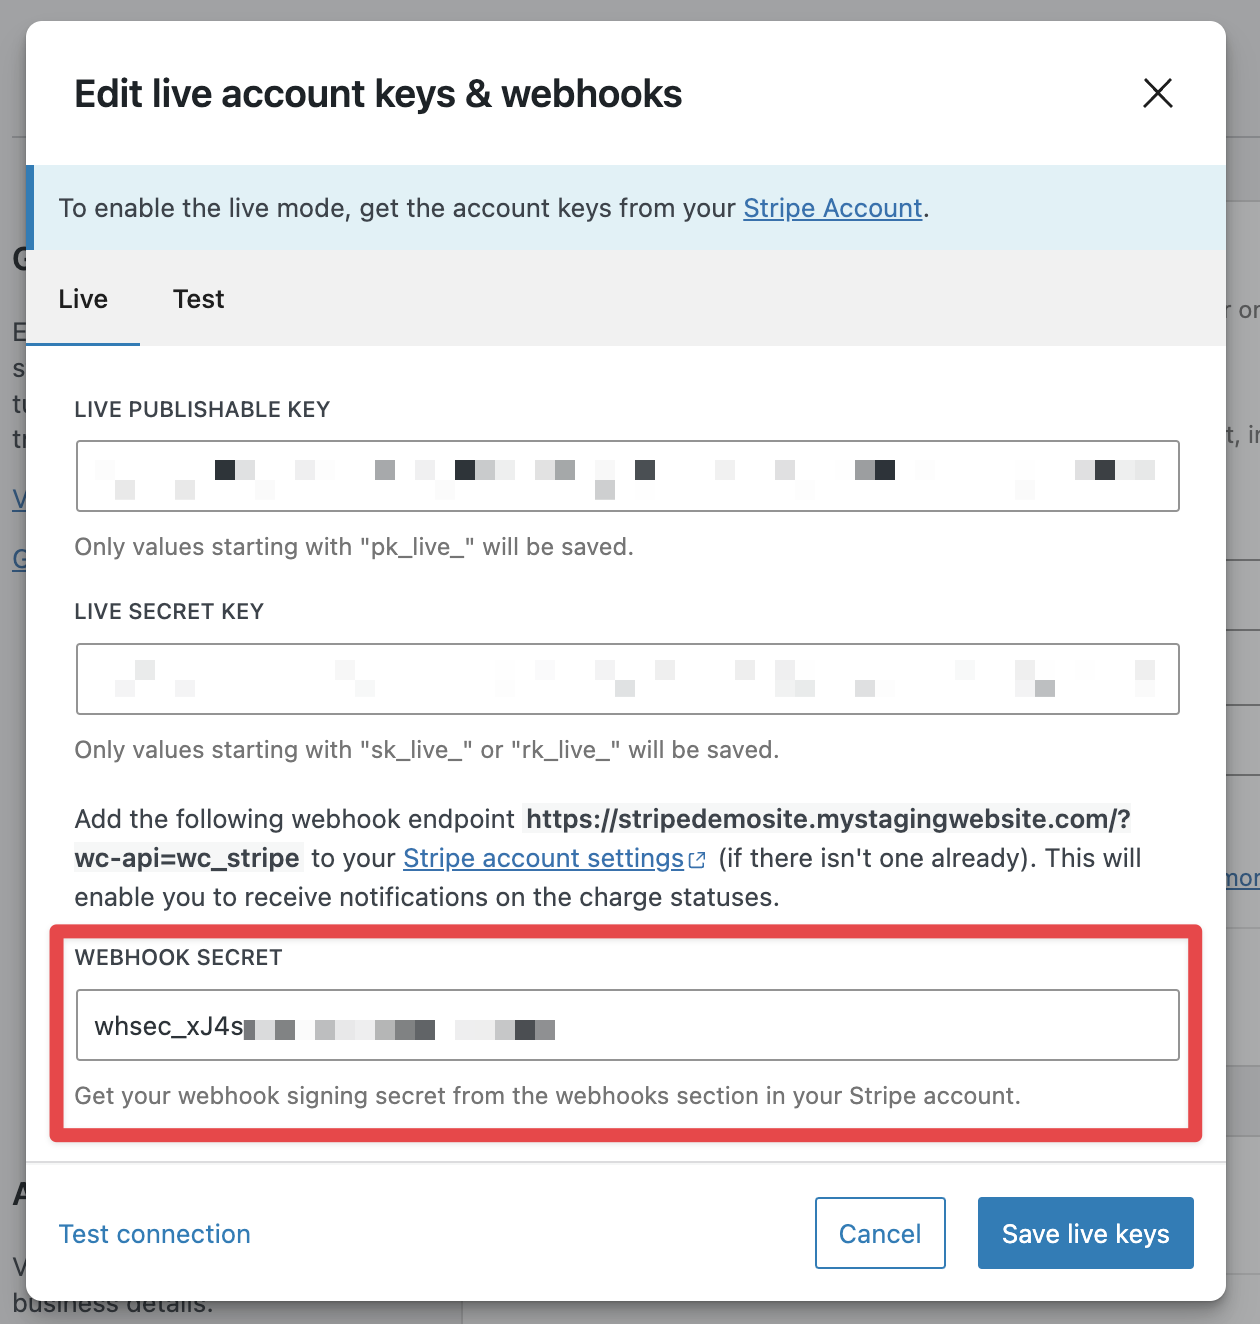
- Select
Save live keysto save the Edit live account keys & webhooks settings.
Successful webhook configuration
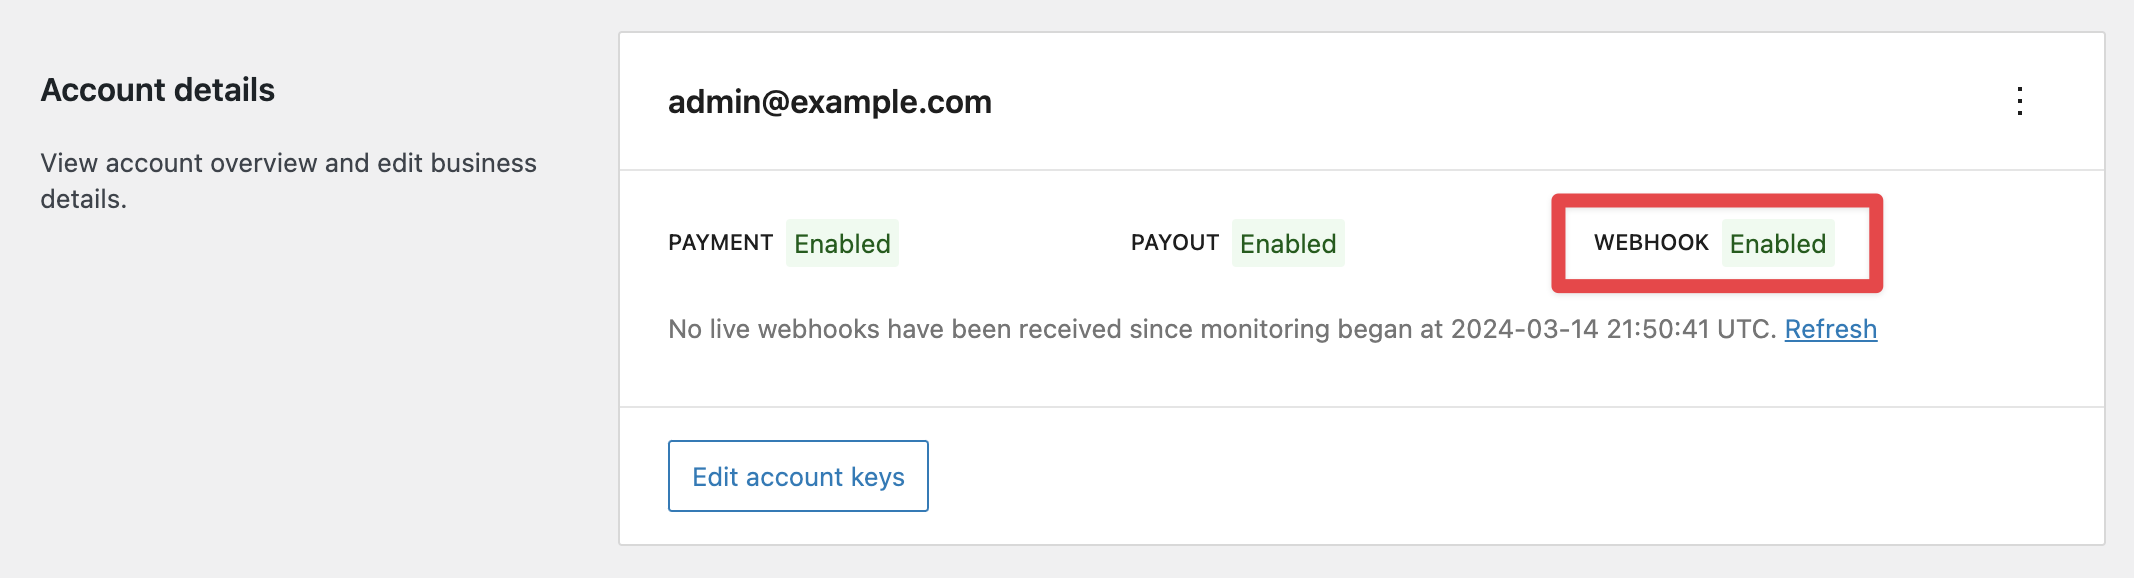
↑ Back to topOnce you’ve successfully configured your webhooks, you will see a green Enabled indicator under the Account details section of the Stripe WooCommerce Extension settings at WooCommerce > Settings > Payments > Stripe > Settings.
Going further
↑ Back to topOnce you’ve properly configured your webhooks, you can start accepting payments.
The next steps are up to you and depend on what you’d like to accomplish. For example, you can:
- Adjust the Stripe WooCommerce Extension settings
- Learn how to make test payments without using live funds
- Enable additional payment methods