The Stripe WooCommerce Extension is very versatile. A part of this versatility is a dedicated way to perform test transactions on your WooCommerce site via the built-in test mode feature. This allows you to make purchases using Stripe test cards.
Performing test transactions via test mode is a great way to simulate the customer experience or troubleshoot issues without using real funds.
In this guide, you will learn how to configure the Stripe WooCommerce Extension to enable test mode and accept test payments.
Configuring Stripe WooCommerce Extension for testing
↑ Back to topWhen you initially connect your Stripe account to the Stripe WooCommerce Extension, it allows you to accept live payments from customers using real card credentials. It does this by connecting to your Stripe account using what are called API Keys, and these API keys are supported by configuring webhooks.
If you’d like to configure your Stripe WooCommerce Extension to be able to accept test payments, then you’ll have to add Test API Keys and configure webhooks for your account while it is in test mode.
Adding your test API keys
↑ Back to topTo accept test payments via the Stripe WooCommerce Extension, you’ll need to enter test account API credentials. To add these API keys:
- Navigate to your Stripe account’s dashboard at dashboard.stripe.com.
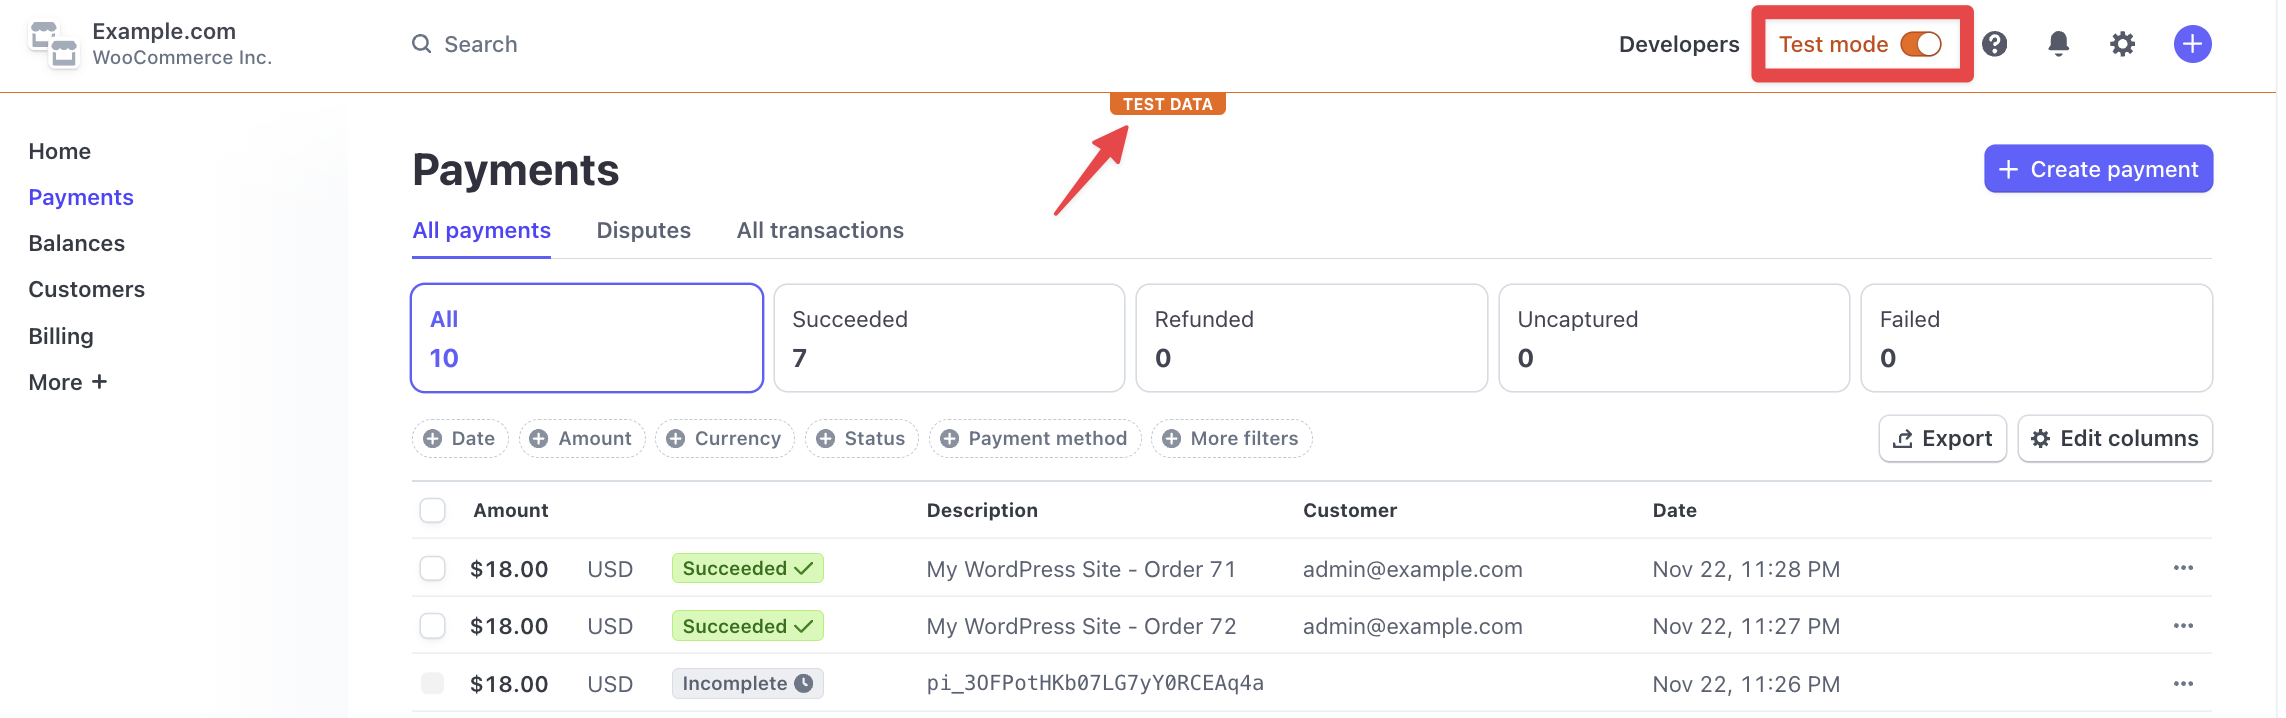
- Toggle the
Test modeoption at the top-right of the page.- This will allow for test information to be displayed in your Stripe dashboard, including test transactions, test API keys, etc.
- You can verify that
Test modehas been toggled on correctly if it turns orange, the slider turns orange, and there is an orangeTEST DATAbanner on your dashboard.
- Select the
Developersmenu item on the top-right of the page. - Select the API keys tab to locate your account’s public and secret keys.
- Copy your
Publishable keyto your clipboard by clicking it with your mouse. - Navigate back to the Stripe WooCommerce Extension settings in your site’s administrator dashboard at WooCommerce > Settings > Payments > Stripe > Settings.
- Select Edit account keys.
- This will bring up the Edit live account keys & webhooks popup.
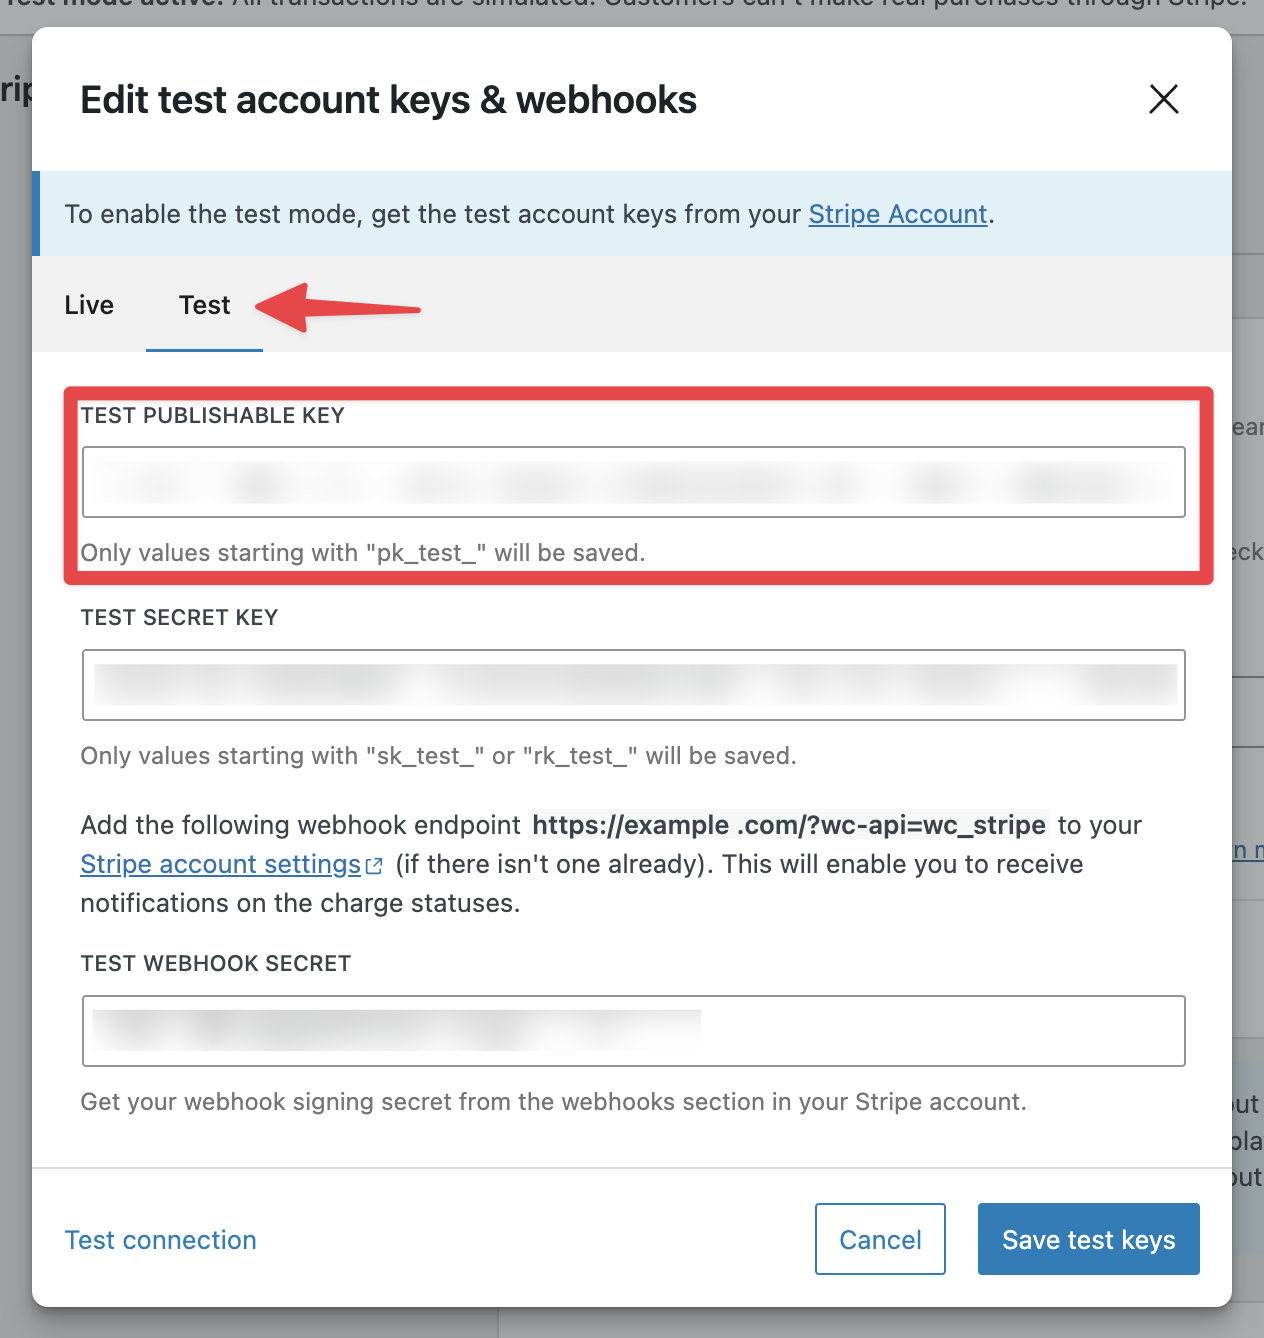
- Select the
Testtab at the top to access the test credentials section. - Paste the
Publishable keyin theTEST PUBLISHABLE KEYsection of the Edit live account keys & webhooks popup:
- Navigate back to your Stripe dashboard and reveal your
Secret keyby selecting theReveal live keybutton. - Confirm that you would like to reveal the secret key by selecting the red
Revealbutton. - Click on the secret key to copy it to your clipboard.
- Navigate back to the Stripe WooCommerce Extension settings in your site’s administrator dashboard.
- Paste the
Secret keyin theLIVE SECRET KEYsection of the Edit live account keys & webhooks popup. - Select
Save live keysto save the Edit live account keys & webhooks settings.
Adding your test webhook secret
↑ Back to topTo truly simulate payments via the Stripe WooCommerce Extension’s test mode, you’ll need to configure webhooks and add a webhook secret. To add a webhook secret for test purchases:
- Navigate to WooCommerce > Settings > Payments > Stripe > Settings from your admin dashboard.
- Select Edit account keys.
- This will bring up the Edit live account keys & webhooks popup.
- Select the
Testtab at the top to access the Stripe test credentials section. - Highlight the webhook endpoint — which is usually your site’s URL followed by
?wc-api=wc_stripe— and copy it to your clipboard. - Navigate to your Stripe dashboard at dashboard.stripe.com in a new tab or window.
- Toggle the
Test modeoption at the top-right of the page. - Select the
Developersitem on the top-right of the page. - On the next page, select the Webhooks tab.
- From here, select the
Add an endpointbutton. - Paste the webhook endpoint URL you copied previously in the
Endpoint URLfield. - Add an optional description.
- Select which webhook endpoints to listen to.
- You will want to at least listen to these 16 events.
- Select the Add endpoint button once you’ve added all of the events you’d like your site to listen to.
- After selecting the Add endpoint button, you will be redirected to the webhook details automatically.
- Select the Reveal option under
Signing secret.- The Reveal option will turn into a webhook signing secret key, which will be a string of characters that begins with
whsec_.
- The Reveal option will turn into a webhook signing secret key, which will be a string of characters that begins with
- Highlight the webhook signing secret and copy it to your clipboard.
- Navigate to WooCommerce > Settings > Payments > Stripe > Settings from your admin dashboard.
- Select the
Testtab at the top to access the Stripe test credentials section. - Once there, select Edit account keys to bring up the Edit live account keys & webhooks popup.
- Paste the webhook signing secret into the
WEBHOOK SECRETsection of the Edit live account keys & webhooks popup. - Select
Save live keysto save the Edit live account keys & webhooks settings.
Enabling test mode
↑ Back to topOnce your test API keys and test webhook secret are configured, you can enable test mode.
To enable test mode:
- Navigate to WooCommerce > Settings > Payments > Stripe > Settings from your admin dashboard.
- Check the
Enable test modeoption in the General section.
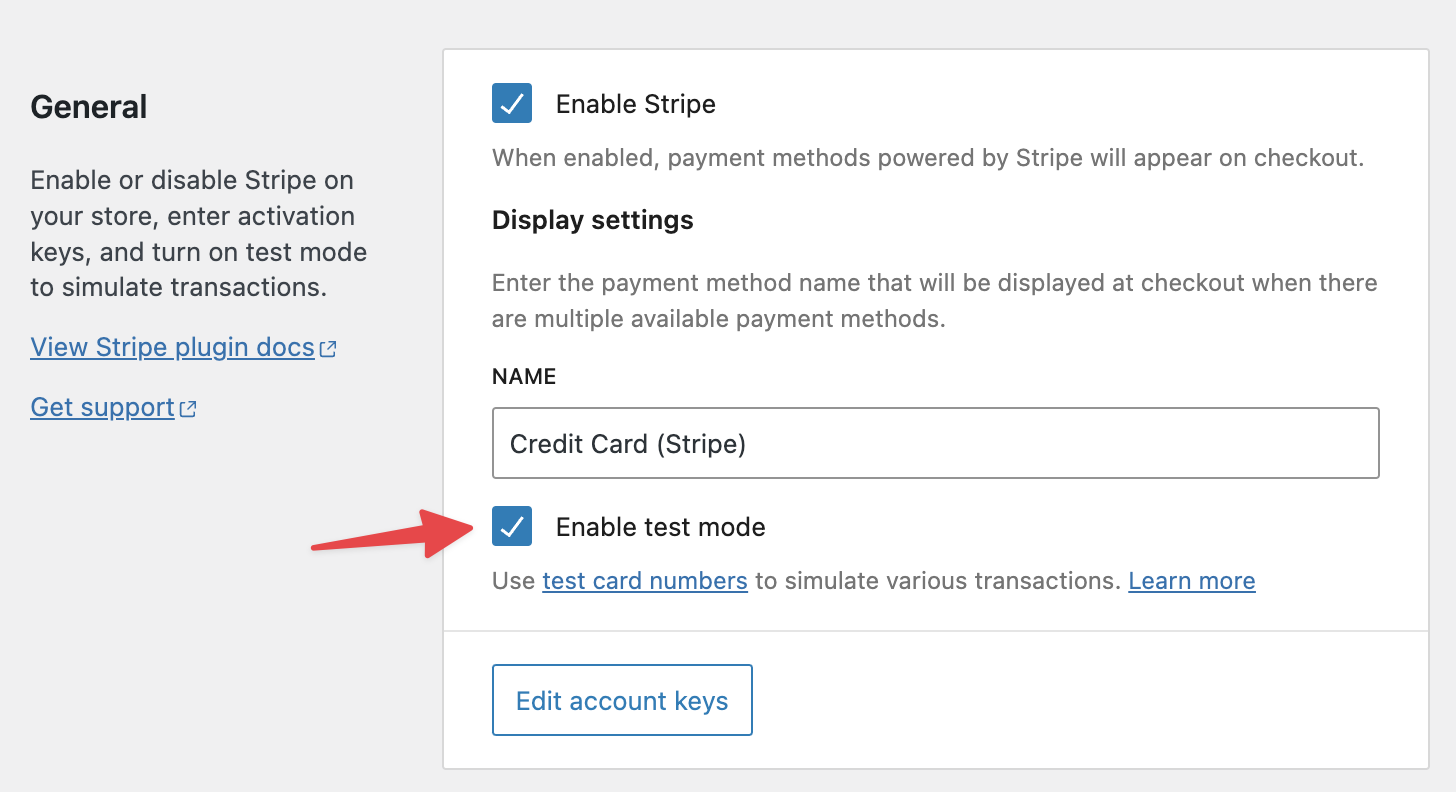
- Scroll to the bottom of the page and select the Save Changes button to save your settings.
Using test mode
↑ Back to topOnce test mode is enabled, you can make a test purchase by:
- Navigating to your store’s shop page.
- Adding a product to your cart.
- Proceeding to the checkout page.
- Adding a Stripe test card as a payment method.
- There are numerous cards for testing different scenarios, such as successful payments, declines, etc.
- Selecting the
Place orderbutton.
If you used a card that resulted in a successful payment, you’ll be redirected to your site’s thank you page, which confirms:
- The order was placed successfully.
- The order number.
- The information provided when placing the order.
- The products purchased.
- The payment method used.
- The total amount charged.
Using test mode with express checkouts
↑ Back to topYou can also test Stripe WooCommerce Extension’s express checkouts while in test mode.
- If you are using Google Pay, you will want to take one of the Stripe test cards and add it to your Google account.
- If you are using Apple Pay, you will be unable to add a test card to your Apple ID.
- The Stripe WooCommerce Extension will use the card credentials saved to your Apple ID without charging your saved payment method.