WARNING: Our suggestion is that you leave authorize and capture disabled unless you have a very specific and well-justified use case in mind. If you do need or want to enable it, please read the entirety of this document beforehand!
Card transactions occur very quickly, which is what makes them so convenient for day-to-day purchases. In fact, they happen so fast that many people don’t realize that there are actually two events taking place: an authorization and a capture.
By default, the Stripe WooCommerce Extension will perform the authorization and capture at the same time. However, by enabling the Issue an authorization on checkout, and capture later setting, you can prevent the Stripe WooCommerce Extension from automatically capturing charges. This allows you to manually capture the charge at a later time.
Although most merchants won’t need to use this feature, it may be helpful in certain scenarios.
Enabling authorize and capture later
↑ Back to topIf you wish to enable this feature, you can do that like so:
- Navigate to WooCommerce > Settings > Payments > Stripe > Settings from your admin dashboard.
- In the Payments & transactions section, check the box next to “Issue an authorization on checkout, and capture later.”
- A popup will appear to ask if you are sure. Click Enable.
- Scroll to the bottom and click Save changes.
Do additional payment methods support authorize and capture?
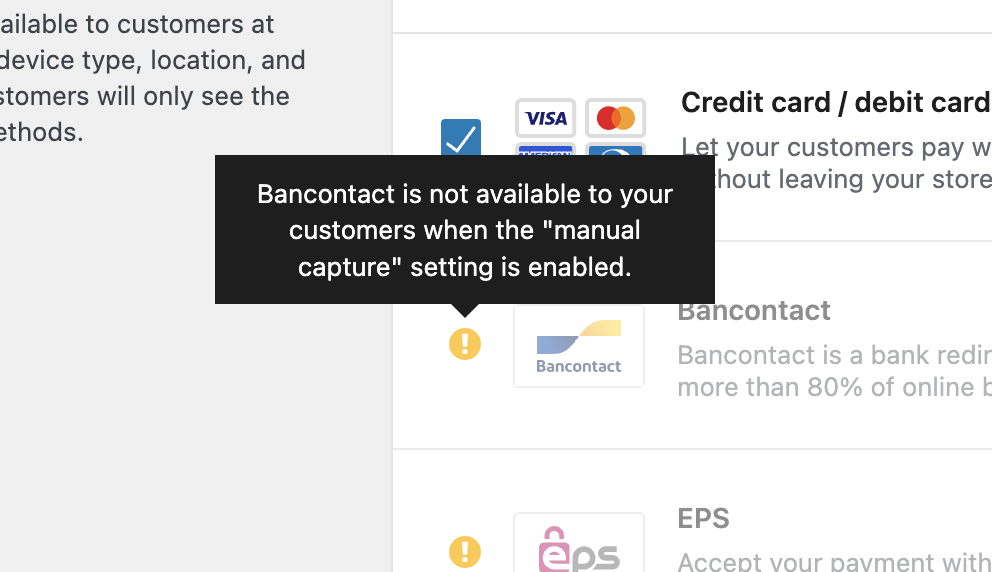
↑ Back to topAdditional payment methods do not support authorize and capture. If you enable authorize and capture, any additional payment methods cannot be enabled. A warning will be shown stating that they cannot be used while authorize and capture is enabled.
Viewing authorized orders
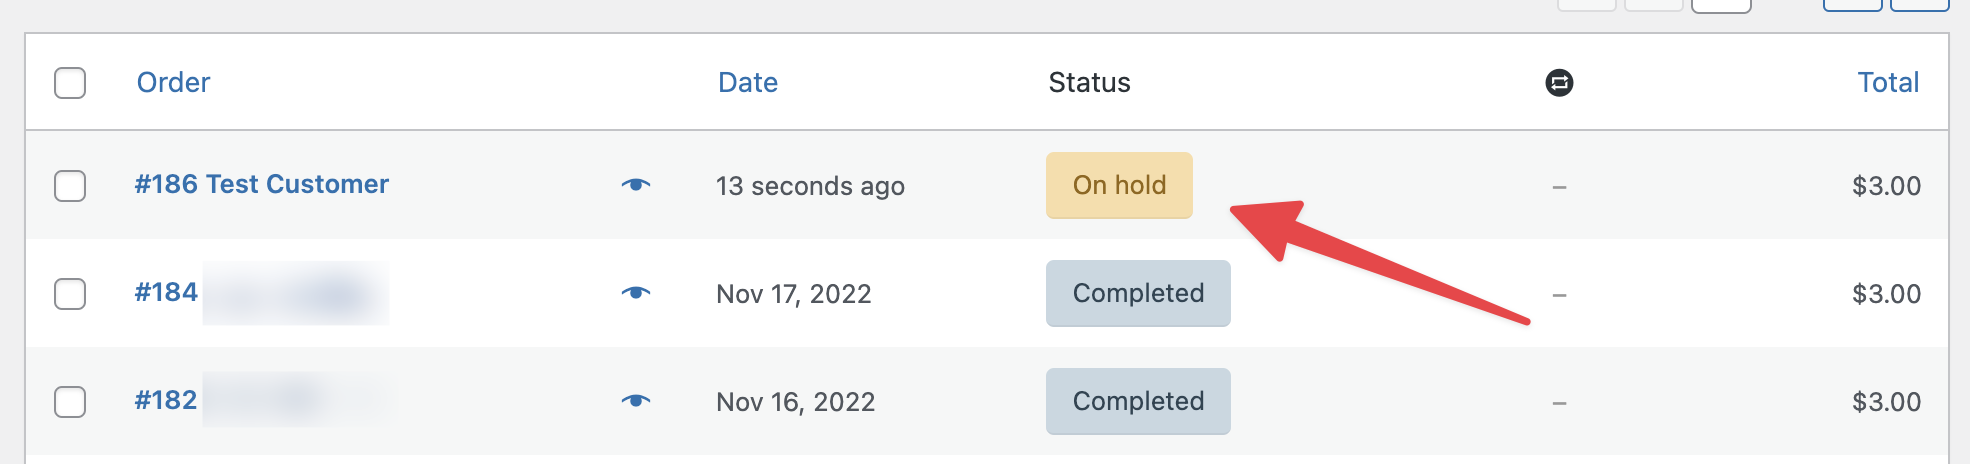
↑ Back to topIf an order is placed while capture later is enabled, the order will be assigned the On Hold order status, which you can see under WooCommerce > Orders.
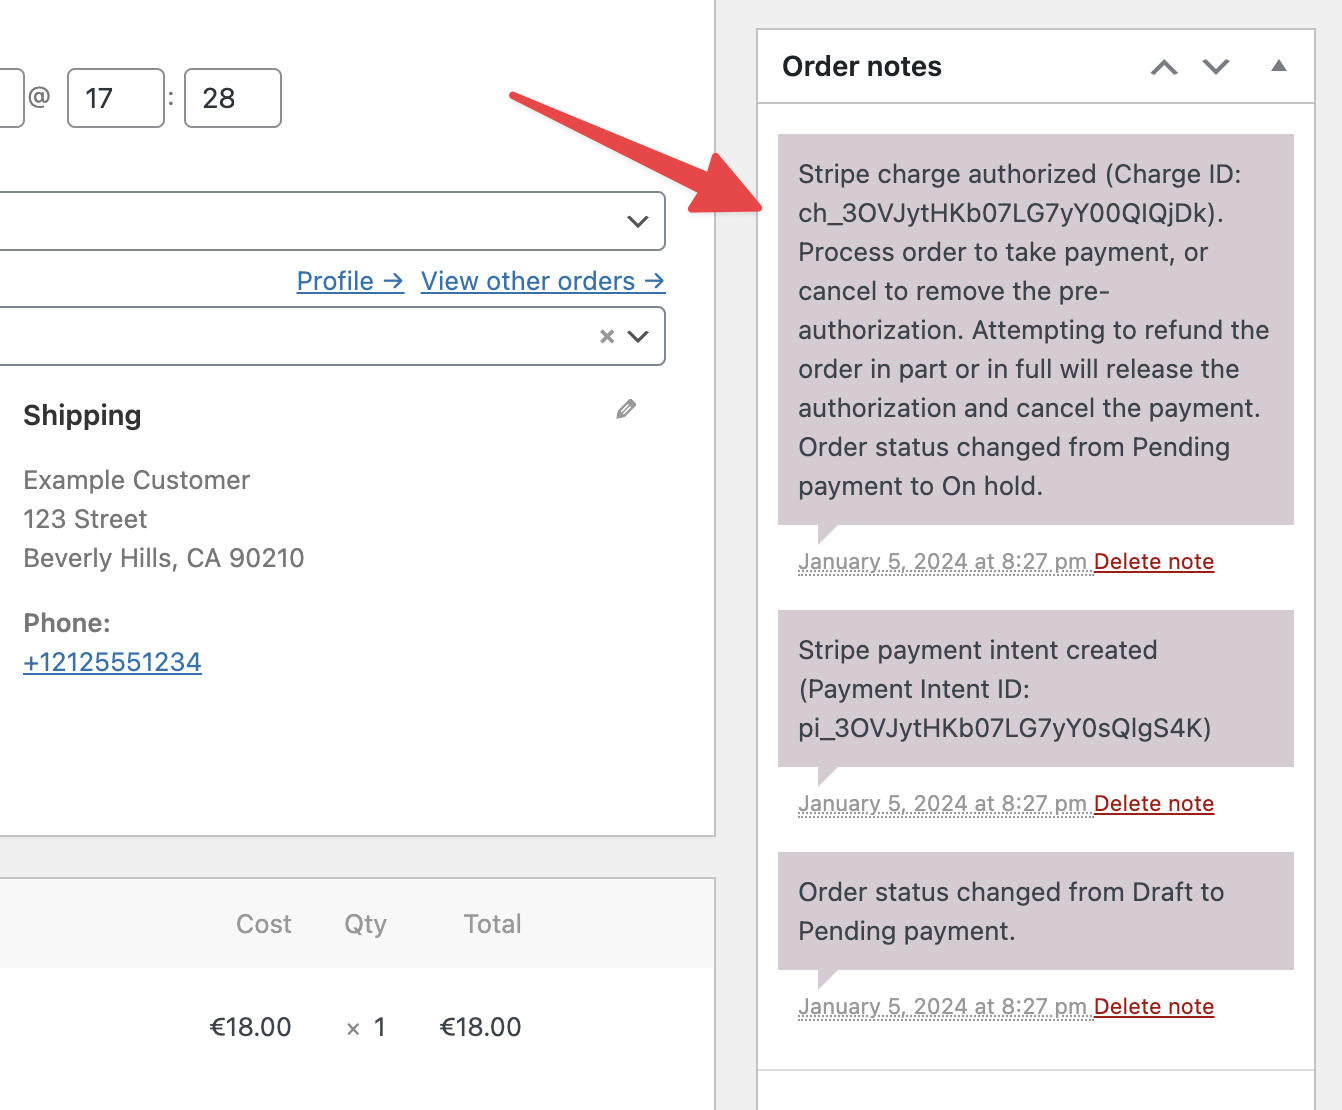
If you open the order itself, you’ll see a note indicating that the payment was authorized:
Capturing authorized payments
↑ Back to topNOTE: You have seven days after the order was placed to capture the charge. After that time, the authorization will automatically expire and you will be unable to capture.
To capture an authorized payment, you can either:
- Change the order status at WooCommerce > Orders to
ProcessingorCompleted. Once you’ve done that, update the order. - Capture the funds via the Stripe dashboard.
They both capture the payment, but the latter will automatically change the order status to Processing only if webhooks are properly configured.
Partial captures
↑ Back to topYou may, if you wish, capture a lower amount than the one you originally authorized against the customer’s card. This is called a “partial capture.”
Keep in mind, however, that you can only capture one time per order. If the capture is a partial one, the difference between the captured amount and the authorized amount is immediately released back to the customer, and you will not be able to capture it later.
To perform a partial capture:
- Find the order under WooCommerce > Orders and click to open it.
- Hover your cursor over an item from the order and click the pencil icon that appears.
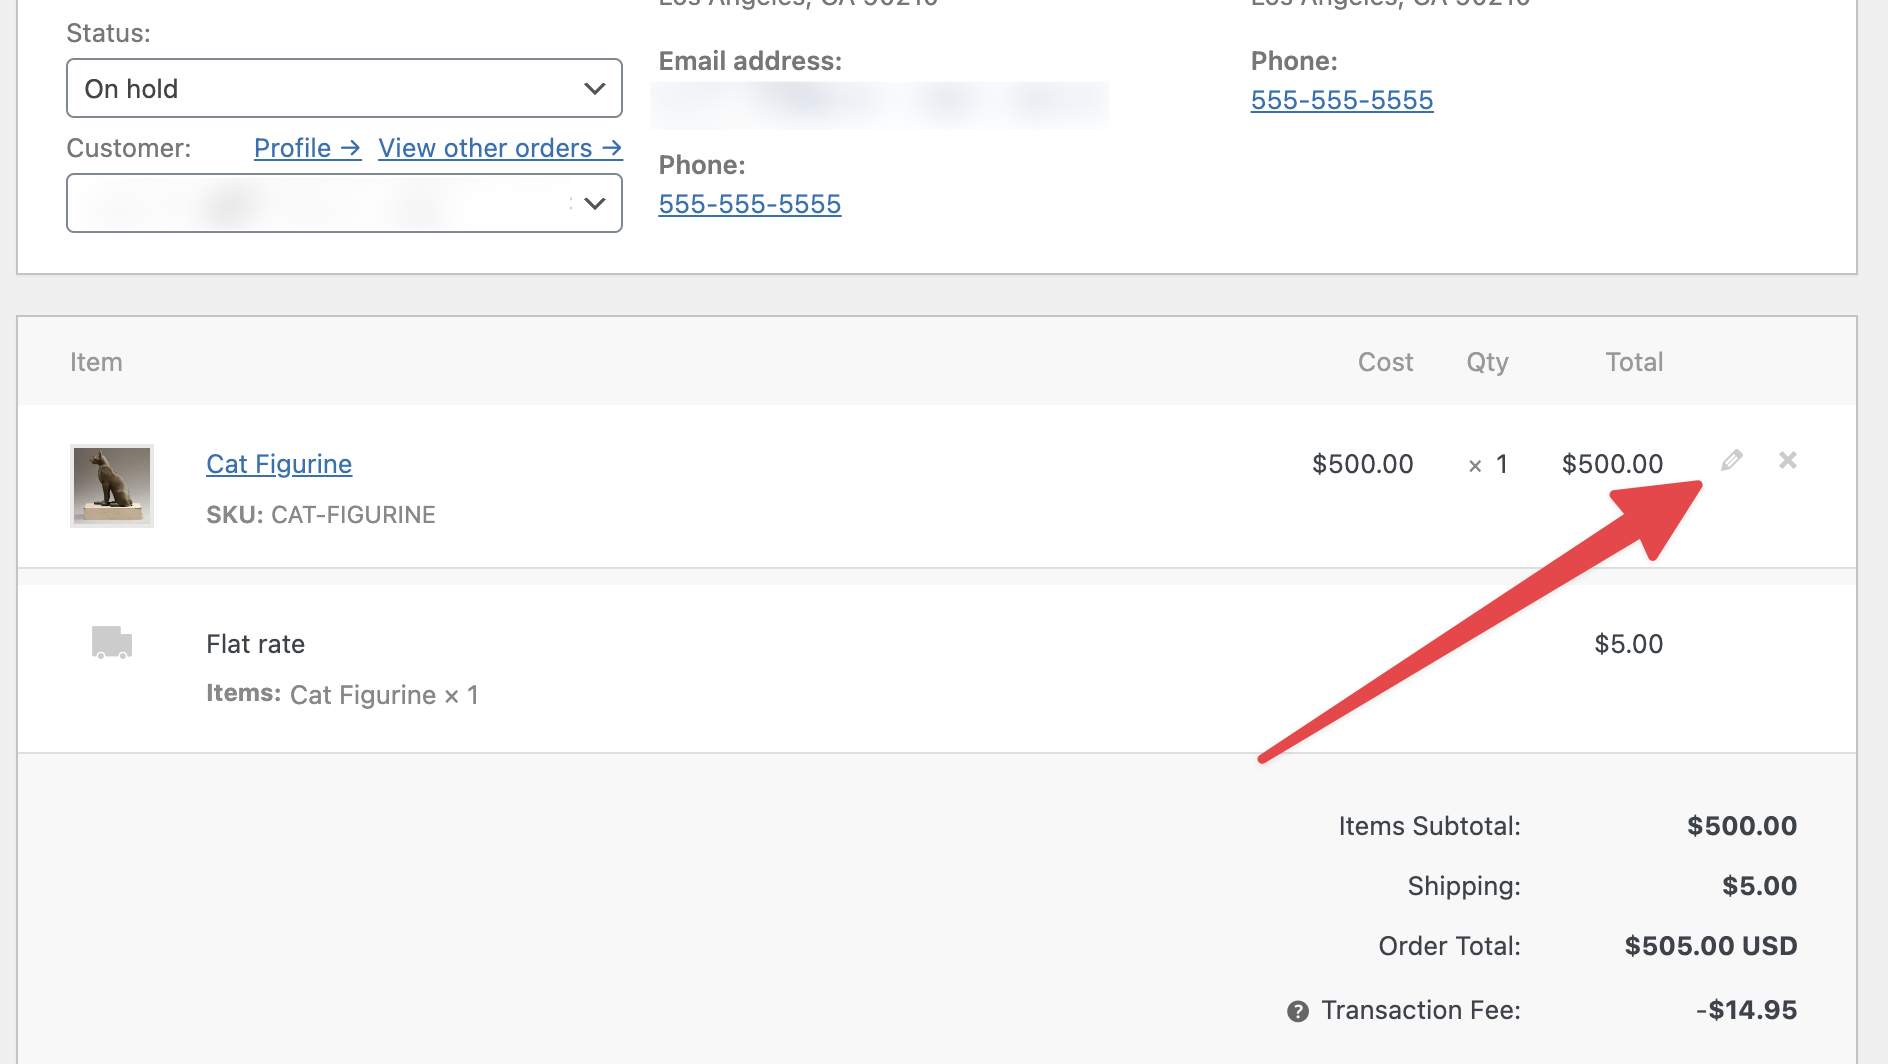
- In the Total box, enter the amount you wish to capture, then click Save.
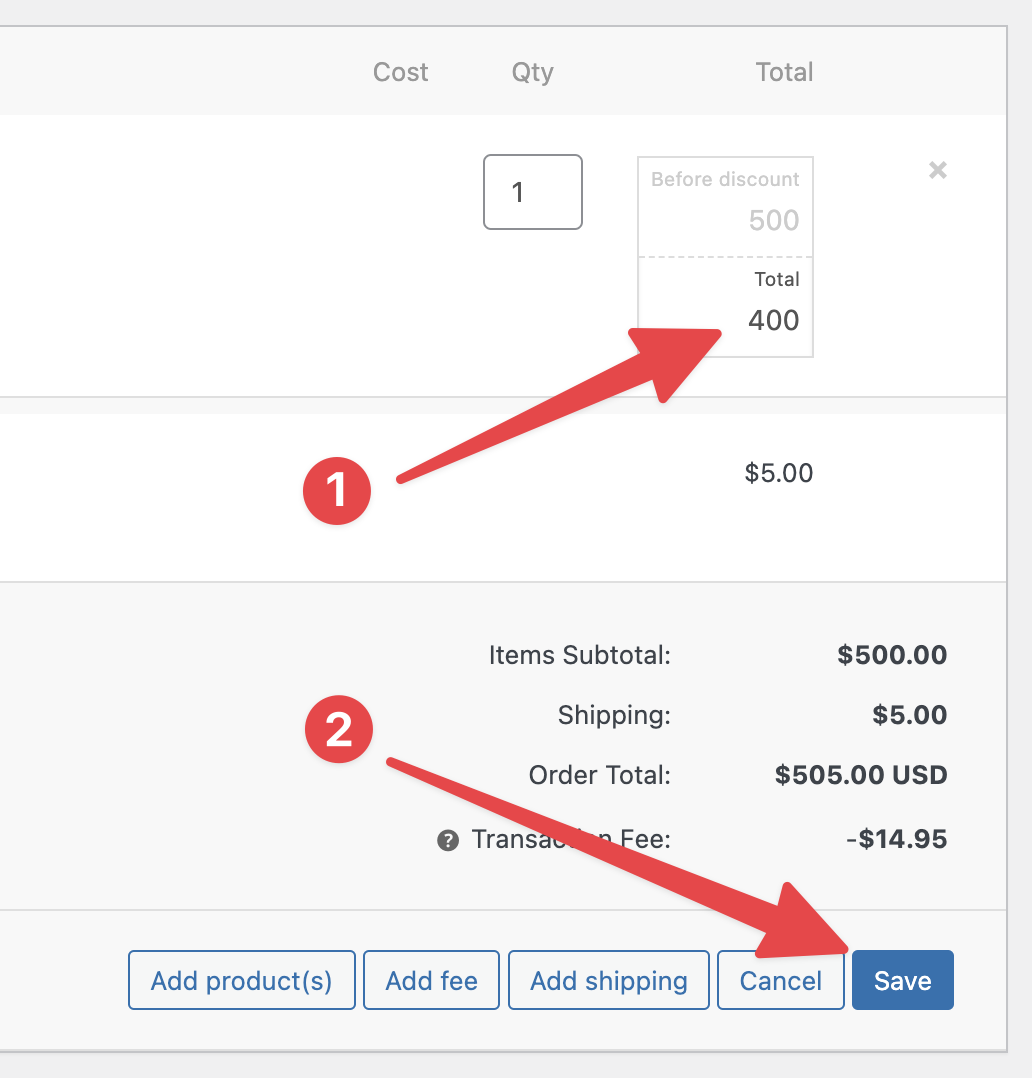
- The cost of the item will updated as if a coupon were applied.
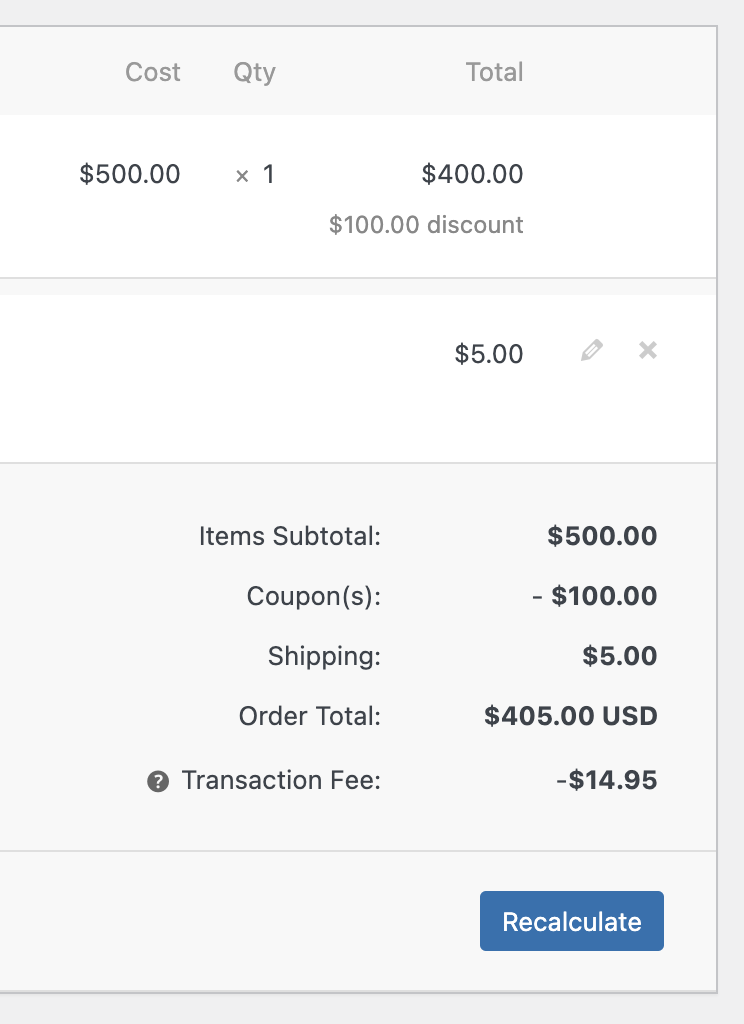
- Change the order status to
ProcessingorCompleted. - Click the Update button.
After updating the order, the lesser amount will be captured.
NOTE: Attempting to capture more than the authorized amount will fail with an error. The order can still be captured once it’s been edited to have a total less than or equal to the original authorized amount.
Cancelling authorizations
↑ Back to topIf a customer wishes to cancel their order after it’s been authorized but before it’s been captured, you can do so by using steps below.
Although authorizations expire automatically after seven days, it’s best to cancel them if you’ve confirmed that you won’t need to charge the customer. Doing so releases the hold their bank placed on their funds.
You can cancel an authorization by:
- Setting the order status to
Cancelled. - Refunding all or part of the transaction.
- Cancelling the authorization via the Stripe dashboard.
All three options will cancel an authorization, but the last item will automatically change the order status to Cancelled only if webhooks are properly configured.
Expired authorizations
↑ Back to topIf an authorized payment is not captured within seven days, the authorization will expire. An expired authorization operates similarly to a cancelled authorization, meaning that:
- The held funds will be returned to the customer.
- The order status is set to
Cancelled. - The funds can no longer be captured.
The major difference between an expired authorization and a cancelled authorization is that an expiration occurs automatically while a cancelled authorization must be initiated by a site administrator.