“Paywall” is a WooCommerce extension that allows creating products with restricted access to content.
Installation
↑ Back to top- Download the .zip file from your WooCommerce account.
- Go to: WordPress Admin > Plugins > Add New and Upload Plugin with the file you downloaded with Choose File.
- Install Now and Activate the extension.
More information at Install and Activate Plugins/Extensions.
Setup and Configuration
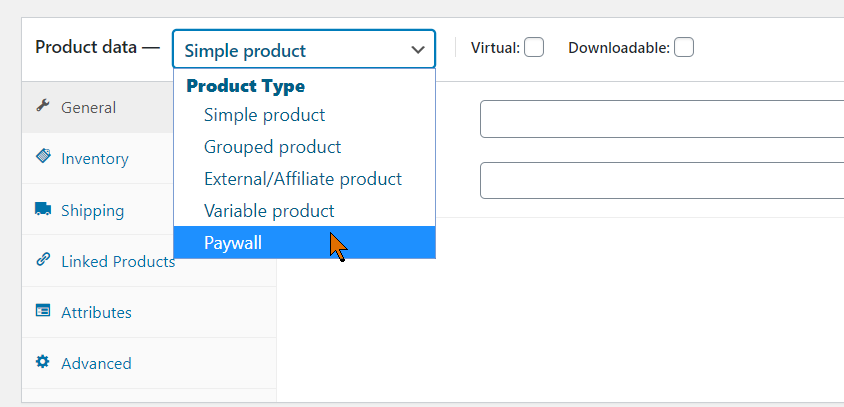
↑ Back to topProduct type
↑ Back to topWhen you create a new WooCommerce product, choose the “Paywall” product type in the dropdown menu:
The “Paywall” product data tab
↑ Back to top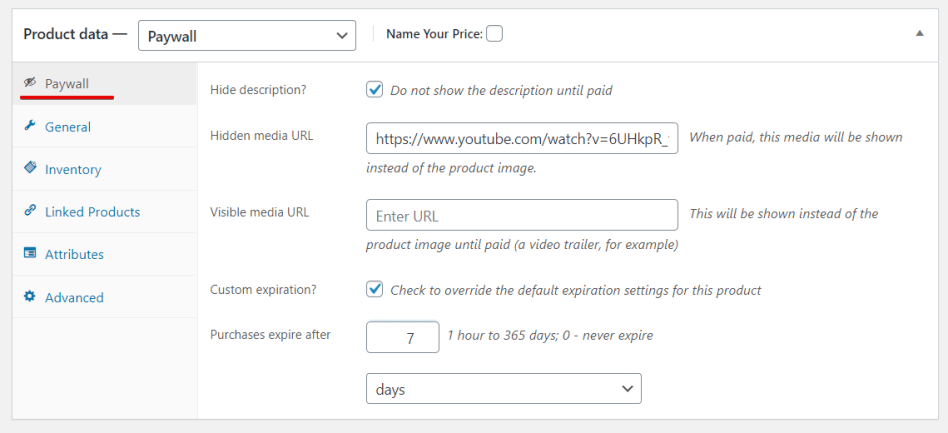
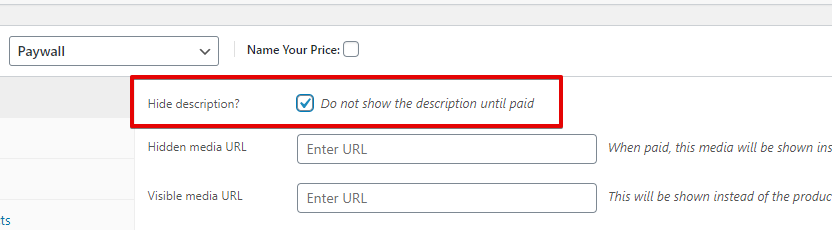
When the product type is selected, the “Paywall” tab appears with the following fields:
- Hide description? checkbox – if checked, the entire “Description” field will be hidden at the frontend until the product is purchased. This is the simplest way to sell premium content: you can place text, links, coupon codes and so on in the description field and reveal it only to the paid customers.
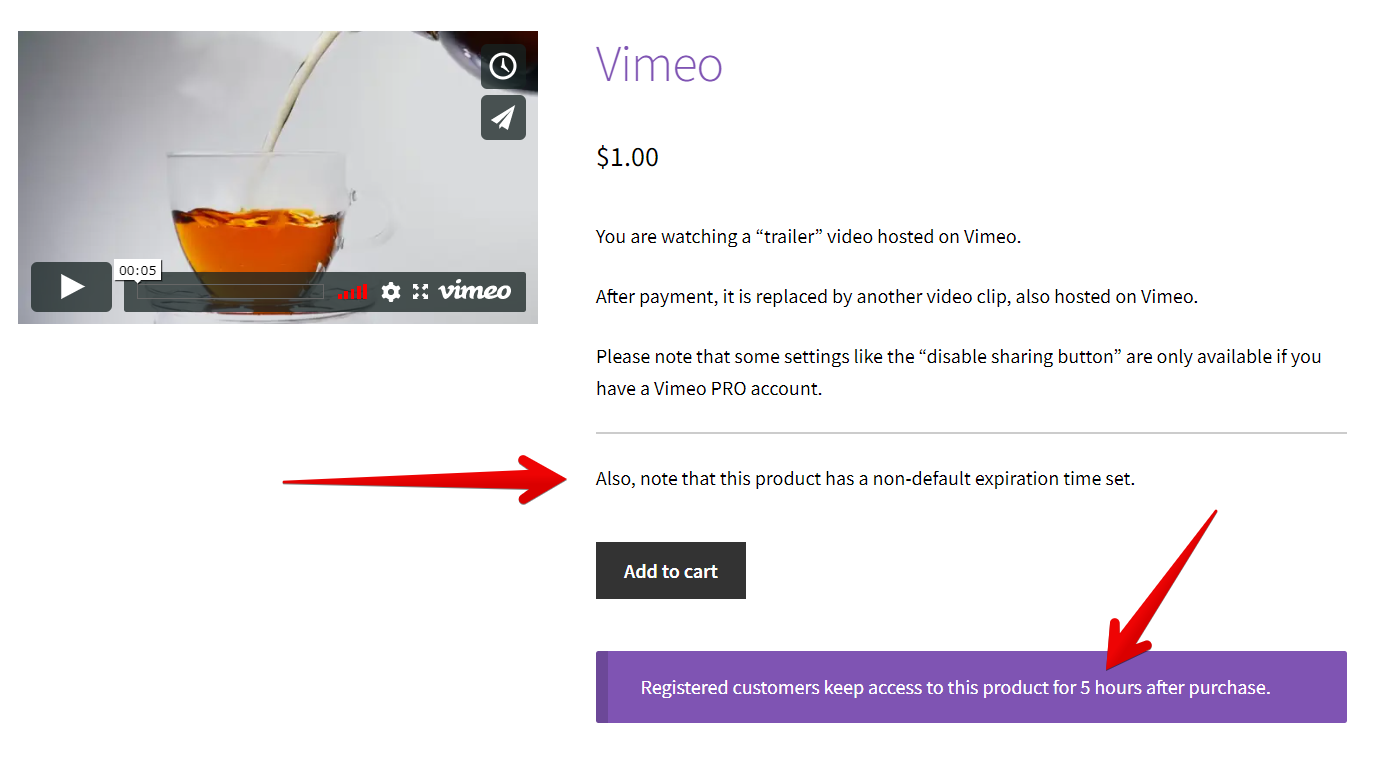
- Hidden media URL – here you can put a URL to YouTube, Vimeo, Issuu, Scribd and other embeddable media. An image URL will work, too. After payment, the regular product image (or product Gallery) will be replaced with the content the URL points to.
- Visible media URL – optionally, you can use this URL to use an embeddable media instead of the product images – for unpaid products. An example could be a video trailer, a low-resolution image, etc.
- Custom expiration? – here you can override the global expiration settings for this product.
Settings panel
↑ Back to top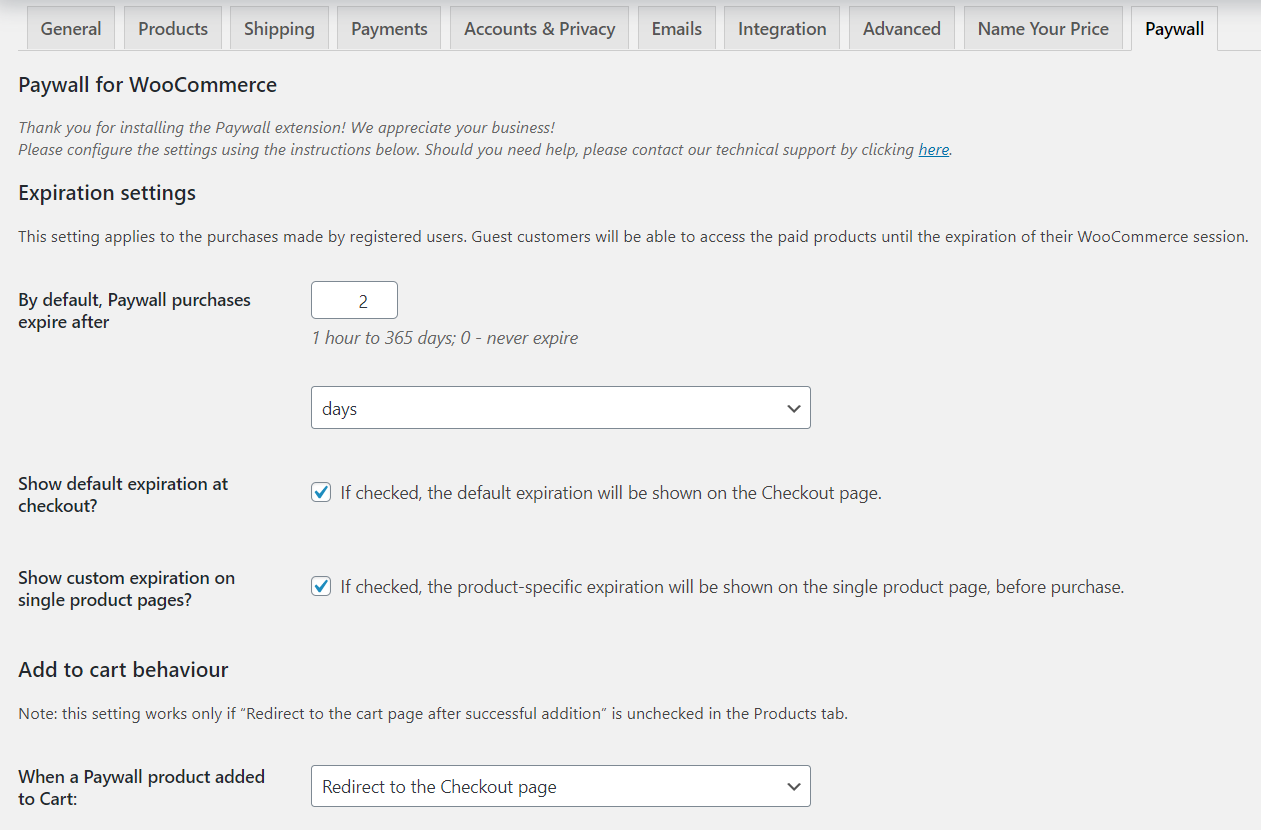
Go to the WooCommerce -> Settings -> Paywall tab to see the settings panel.
Expiration settings
↑ Back to topHere you can specify the default expiration period for all Paywall products.
If you set the “expire after” to a non-zero value, the registered buyers will retain access to the paid products until their order is “expired”.
- Zero value means “no expiration”.
Note:
The expiration settings apply to the purchases made by registered users only.
If your store allows purchases without registration, the “guest” customers will be able to access the paid products until the expiration of their WooCommerce session.
- The default expiration settings can be overridden for each product.
Expiration terms messages
↑ Back to topYou can display the expiration terms on Checkout and Single Product pages.
On the Checkout page, the terms can be displayed if the expiration value is non-zero:
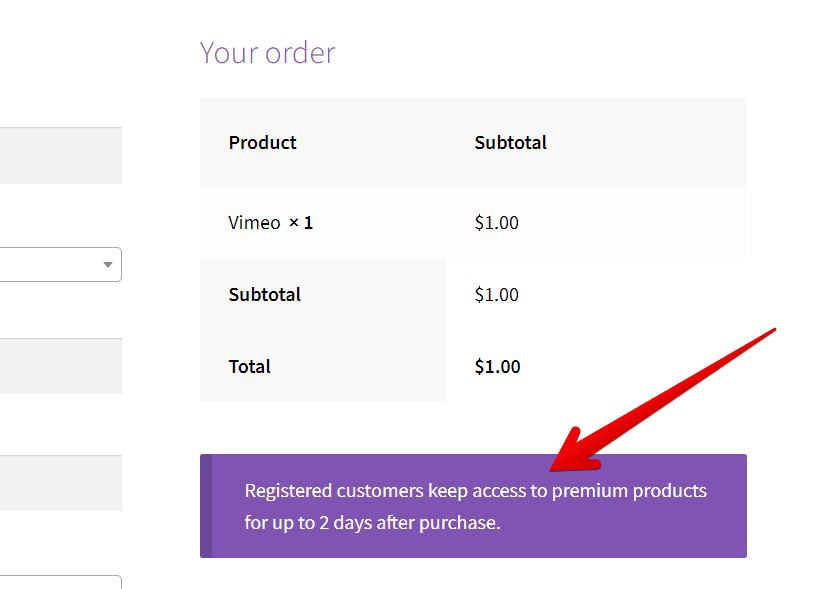
Displaying expiration terms on the Checkout page works best if you only apply expiration settings globally and not on a per-product basis.
On Single Product pages, the expiration terms are (optionally) shown if they differ from the global expiration settings:
Add-to-cart behavior
↑ Back to topYou can force automatic redirect to Cart or to Checkout when a Paywall product is added the the cart. For sites mostly selling Paywall, going directly to Checkout should work best.
Note: there is a checkbox "Redirect to the cart page after successful addition" on the Products tab. Its priority is higher than the redirect settings on the Paywall panel.
Pay-to-view media
↑ Back to top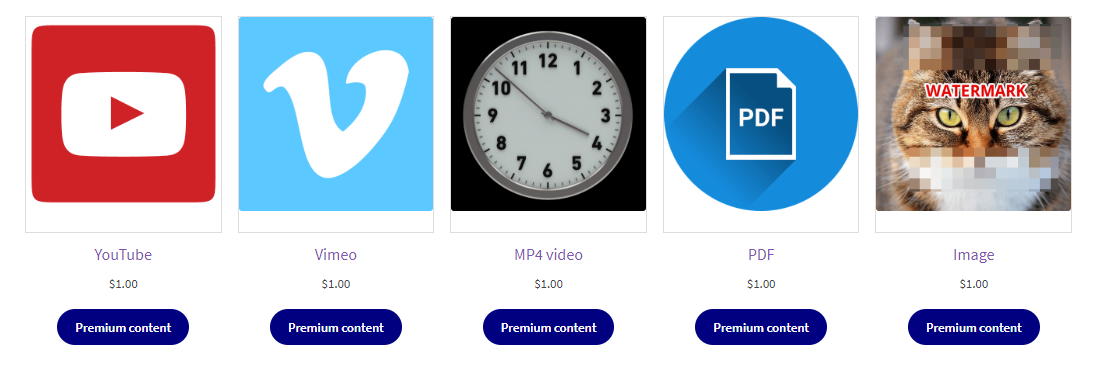
Generally, any media URL, which WordPress supports through oembed, could be used with Paywall. The media types that we specifically tested are:
- YouTube URLs in either
https://www.youtube.com/watch?v=...orhttps://youtu.be/...form. - Vimeo URLs:
https://vimeo.com/... - Direct links to media files: Those are URLs pointing to the audio/video files, such as
.mp3/.mp4. They can be stored locally on your server or on somewhere else. - PDF URLs pointing to files with extension
.pdf - Images: URLs pointing to
JPG,PNG, or any other image file that browser can display. - Audio URLs pointing to files with audio extensions (WAV, MP3, etc.)
You can see those media types in action on our Demo Site.
Show/hide premium content
↑ Back to top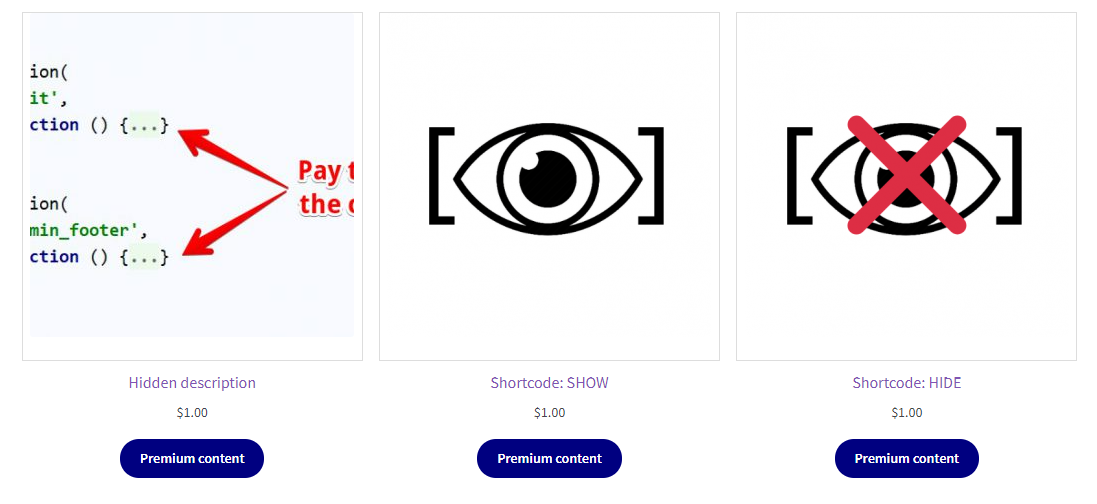
Using special Paywall shortcodes, you can show or hide certain parts of the content.
[woopaywall_show_after_purchase]
↑ Back to topThis shortcode allows you to hide a part of the content (short or full description, for instance) and show it only with the client purchased the product.
[woopaywall_show_after_purchase]
The content placed here is hidden until paid.
For example, you can hide a YouTube video here:
[/woopaywall_show_after_purchase][woopaywall_hide_after_purchase]
↑ Back to topYou can use the woopaywall_hide_after_purchase shortcode to hide some parts of the content that have no value after the purchase:
[woopaywall_hide_after_purchase]

The content placed here is shown only until paid.

Hey, here is a sales pitch! You definitely must buy this NOW!

[/woopaywall_hide_after_purchase]
Shortcodes in PHP
↑ Back to topYou can use the shortcodes in PHP (functions.php of your theme or a custom plugin). For example:
<?php
echo do_shortcode('[woopaywall_show_after_purchase]' .
'<p>Hidden content</p>' .
'[/woopaywall_show_after_purchase]');
?>
Hide the “Description” tab
↑ Back to topYou can also hide the entire “Description” tab until paid.
Paywall Pass
↑ Back to topPaywall Pass (introduced in Paywall version 4) is a powerful addition to our Paywall extension, allowing you to provide an all-access pass to your hidden content, simplifying the purchasing experience for your customers while offering store managers greater flexibility in pricing and expiration settings.