Note: If you want to save time in configuring the plugin on your website, our trusted partner, Codeable, can help. Check out their offer to configure one or more plugins on your site.
The purpose of this document is to outline the different settings available to users of the WooCommerce Bookings Extension.
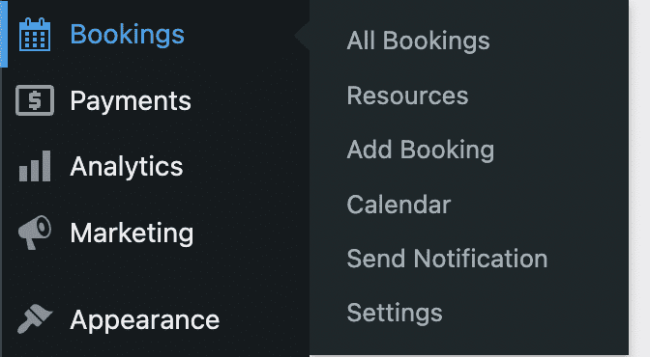
Once the WooCommerce Bookings Extension is installed and activated on your site, you will see a Bookings menu item in the left-hand sidebar. Hovering over the Bookings menu item will reveal a sub-menu with the following options:
- All Bookings
- Resources
- Add Booking
- Calendar
- Send Notification
- Settings
These sub-menu items are visible in the following image.
All Bookings
↑ Back to topClick the All Bookings link in the Bookings menu on your site’s admin dashboard to access the main hub for managing all your bookings. From All Bookings, you can view, edit, and manage individual bookings made on your site, search for specific bookings, and perform various actions related to those bookings.
Read more about how to perform these actions in this document: Managing Bookings – All Bookings
Resources
↑ Back to topClick the Resources link in the Bookings menu on your site’s admin dashboard to manage the resources associated with your bookings. Resources can be anything from rooms, equipment, staff members, and more. In the Resources section, you can add, edit, or remove these resources. You can also define their availability, capacity, and other relevant details.
Read more about setting up and managing your resources in this document: Resources in Bookings
Add Booking
↑ Back to topThis option lets you manually add a booking for a customer or guest from the backend.
You can find the detailed steps here: Managing Bookings – Manually add a booking
Calendar
↑ Back to topThe Calendar options provide a visual representation of your bookings in a calendar format. It allows you to easily view booked time slots, and manage bookings directly from the calendar interface.
You can find the detailed guide here: Managing Bookings – Bookings Calendar View.
Send Notifications
Using this, you can send an email notification to all customers who have a future booking for a particular booking product. This will use the default template specified under WooCommerce > Settings > Emails.
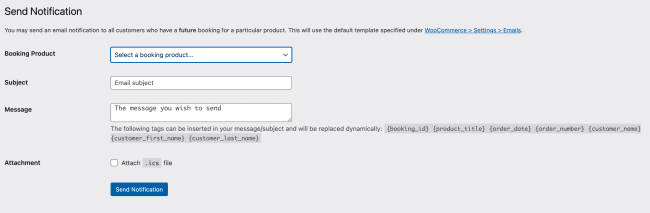
The following settings need to be configured to send a notification email to the customer for a future booking:
- Booking Product: The Booking Product for which you want to send a notification email
- Subject: Subject of the email
- Message: The email body (message), The following tags can be inserted in your message/subject and will be replaced dynamically:
{booking_id},{product_title},{order_date},{order_number},{customer_name},{customer_first_name},{customer_last_name} - Attachment: An
.icsfile will be attached to the email, and the recipient can import the file into their calendar application or compatible software. By doing so, the recipient can easily add the events or bookings contained in the.icsfile to their personal calendar.
You can send Send SMS notifications for bookings using WooCommerce Twilio integration.
Settings
↑ Back to topStore Availability
↑ Back to top“Store Availability” refers to the setting that determines the overall availability of all your bookable products or services within your store. It allows you to define when your products or services are available for booking by customers.
Store availability rules apply to all bookable products in your store. Configuring these rules is useful if you, for example:
- Have consistent/expected hours of availability (e.g., Monday – Friday, 9:00 a.m. – 5:00 p.m.)
- Need to block out a specific date range for all products (e.g., Unavailable for Christmas break)
- Only have availability during specific seasons (e.g., Closed from October – May)
To define a global rule:
- Go to: Bookings > Settings > Store Availability.
- Select Add Range. This adds a row to the table (next step)
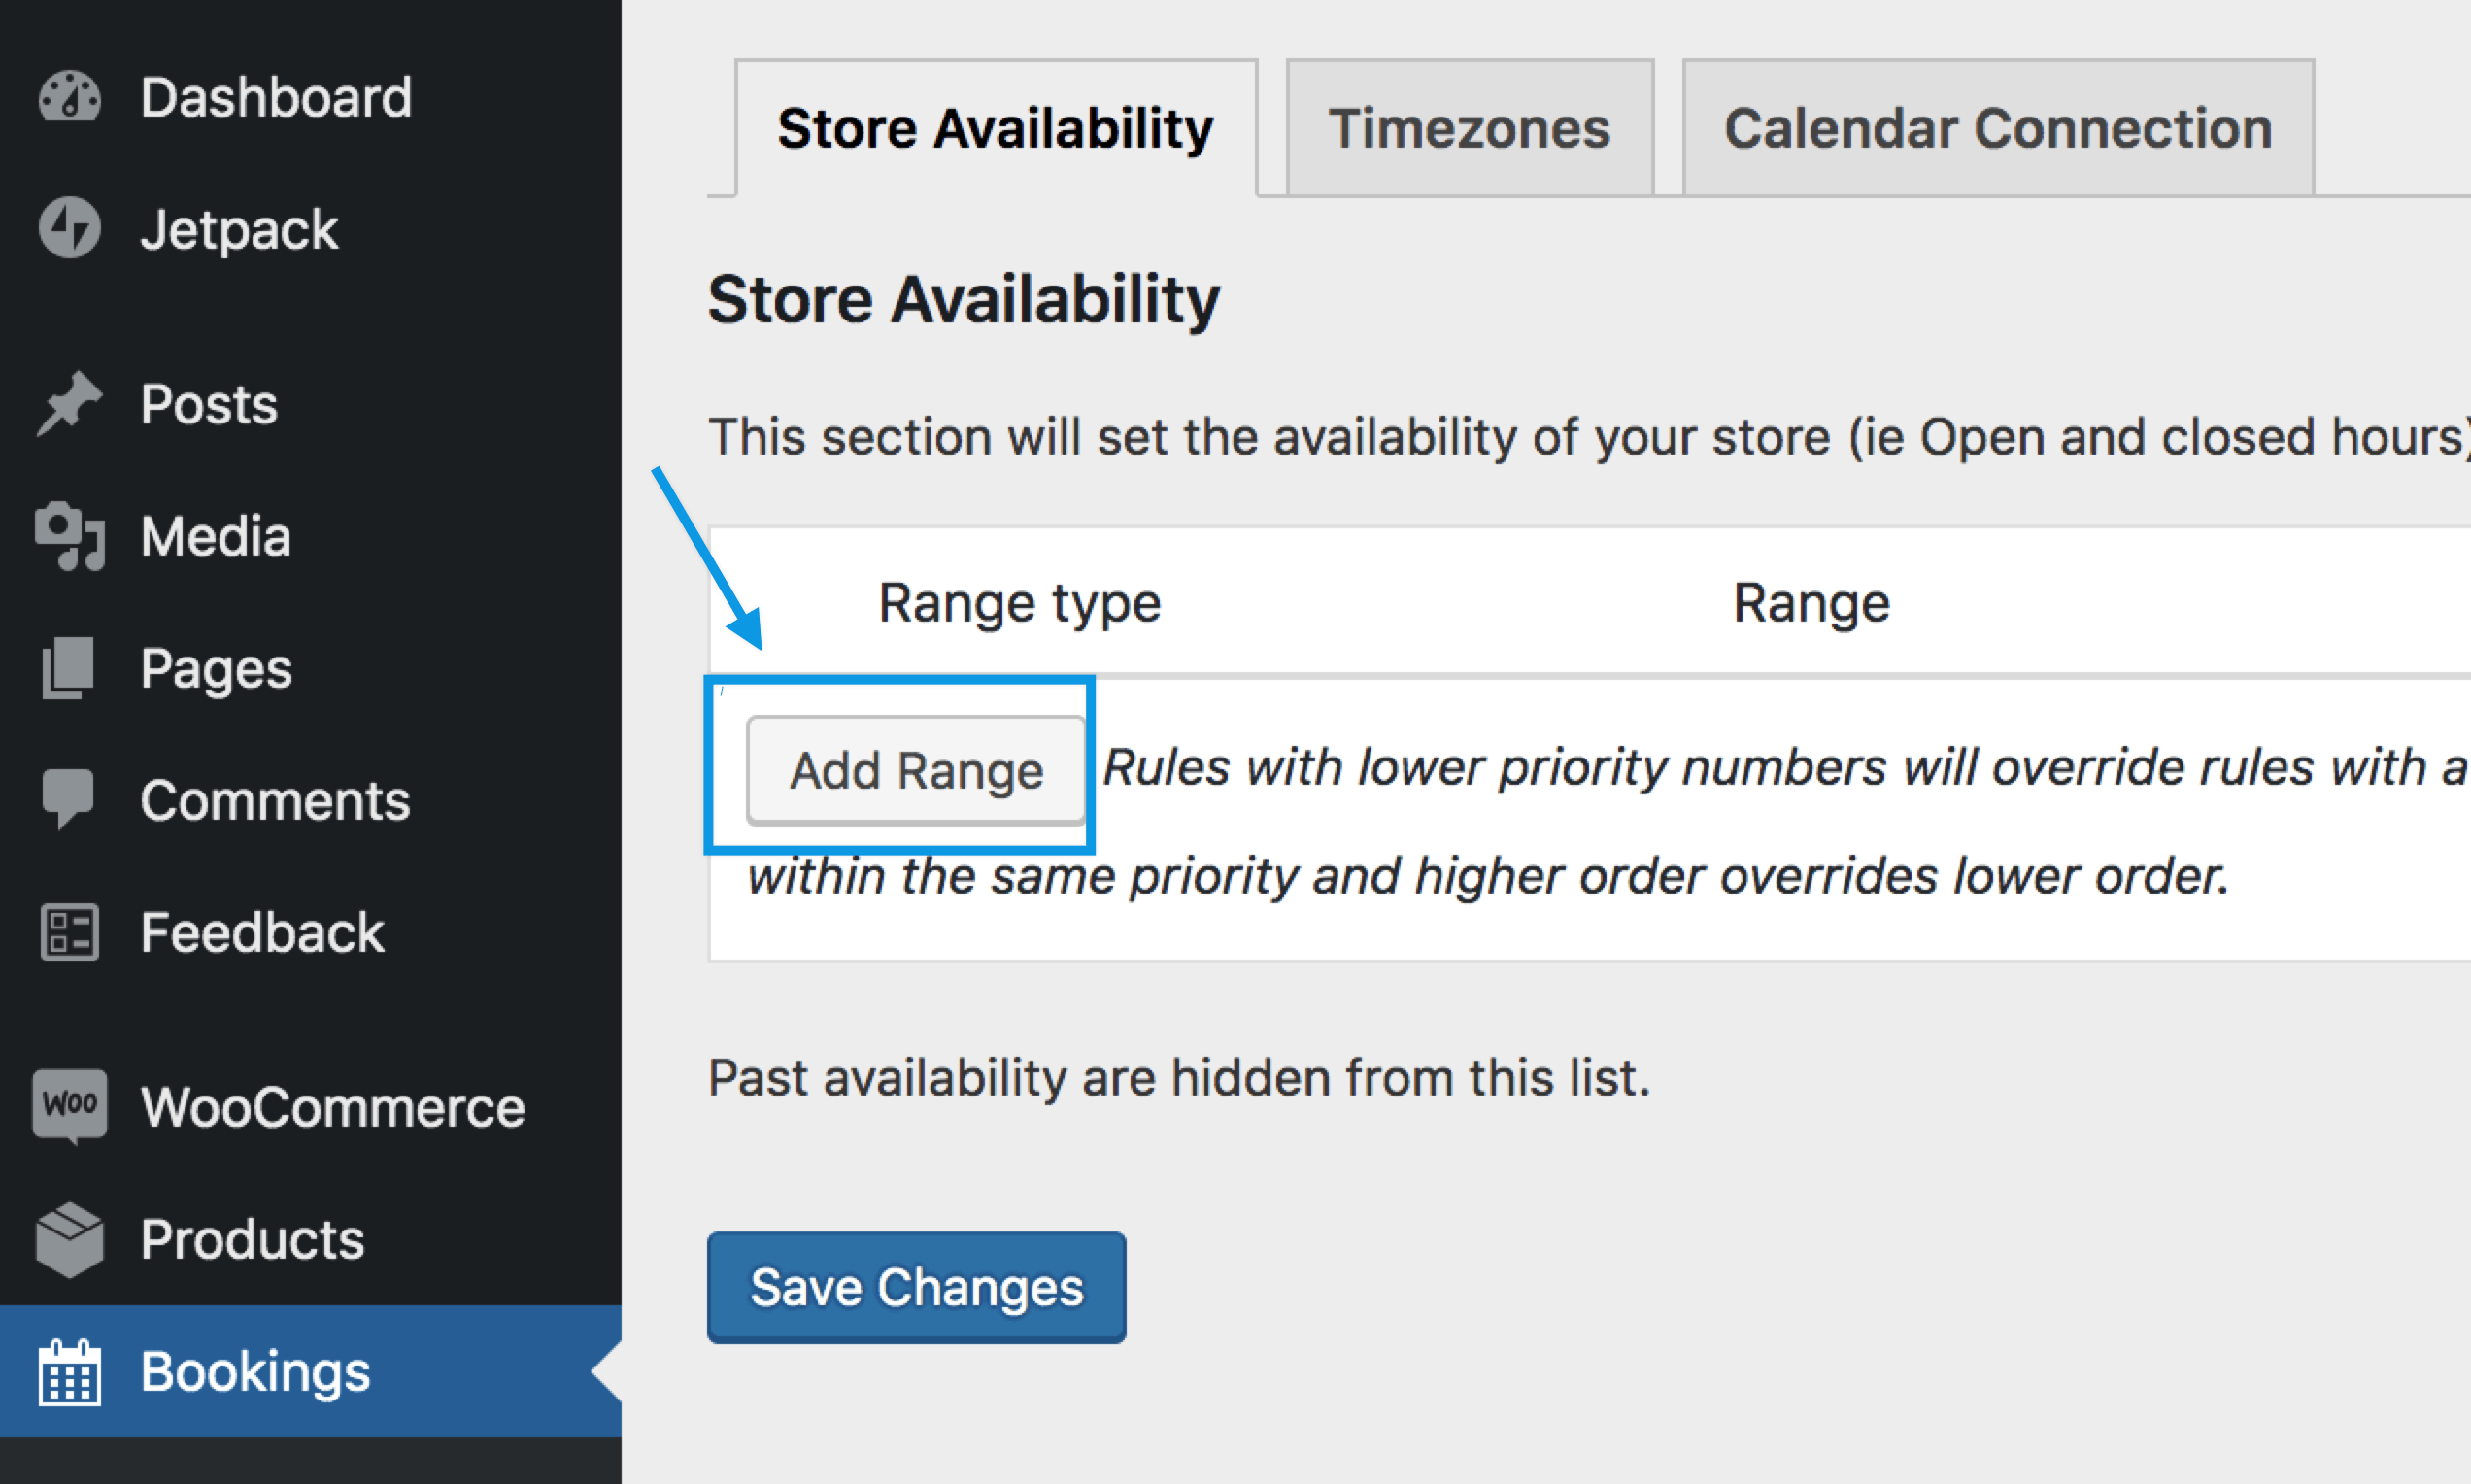
- Enter rules using the dropdown menus. Select:
- Range type
- Range
- Whether it’s bookable or not
- Priority
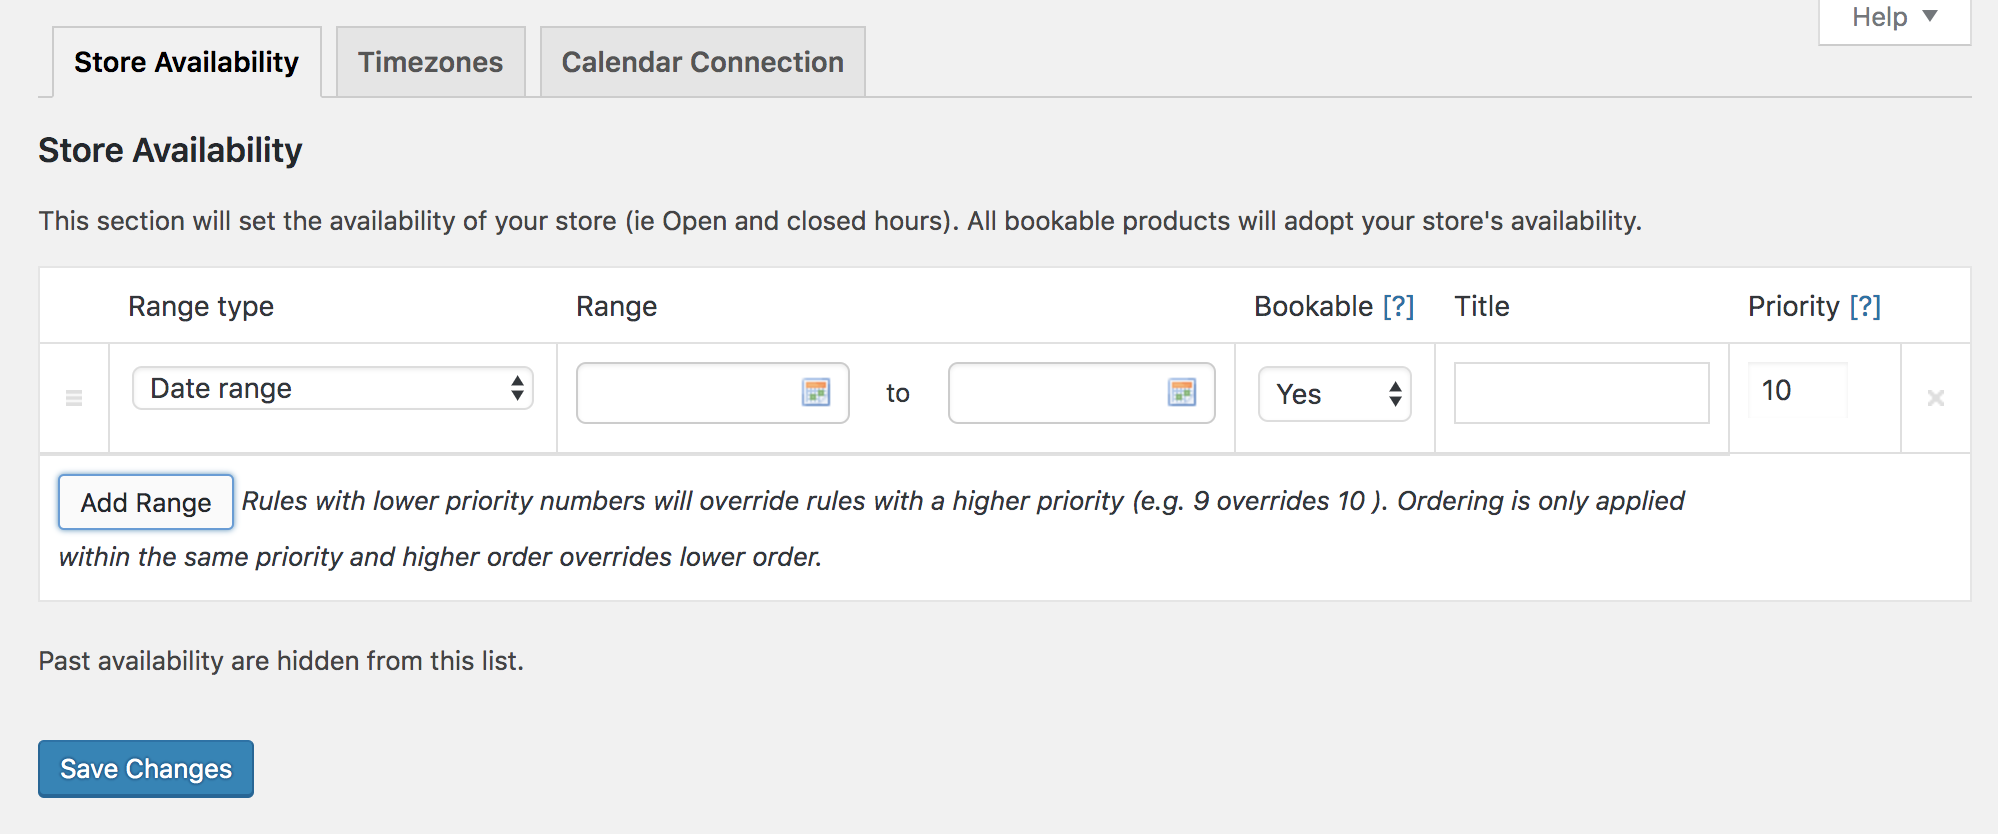
- Save changes.
Store Availability comes with the following Range types:
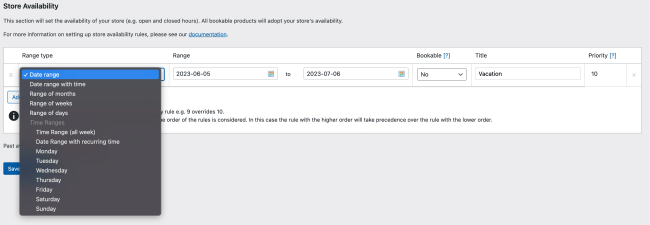
Please read more at Understanding How Priority Affects Availability Rules.
Store Availability: Use Case
A hair salon offers one-hour appointments for haircuts and is open Monday – Friday, 9:00 a.m. – 6:00 p.m. with the last appointment at 5:00 p.m. The owner has decided to close the salon for a holiday break between December 24, 2023 and January 4, 2024.
In the Bookings Settings, the following global availability rules are added:

- Date range: 2023-12-24 – 2024-01-04; Bookable – No
- Range of days: Saturday – Sunday; Bookable – No
- Time Range (all week): 9:00 a.m. – 06:00 p.m.; Bookable – Yes
At Bookable Product, Make All dates are: not-available by default.
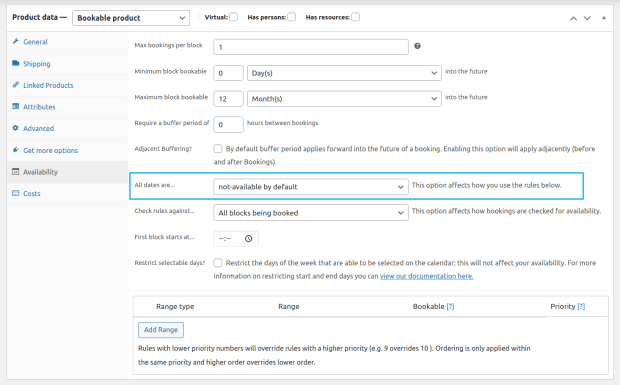
By default, Store availability rules take priority over product-level availability rules and product availability rules take priority over resource priority rules. You can learn about it here: Understanding How Priority Affects Availability Rules
- For more information on setting up availability rules, see: Custom Availability Rules
- For more examples, go to the other Use Cases.
Timezones
↑ Back to top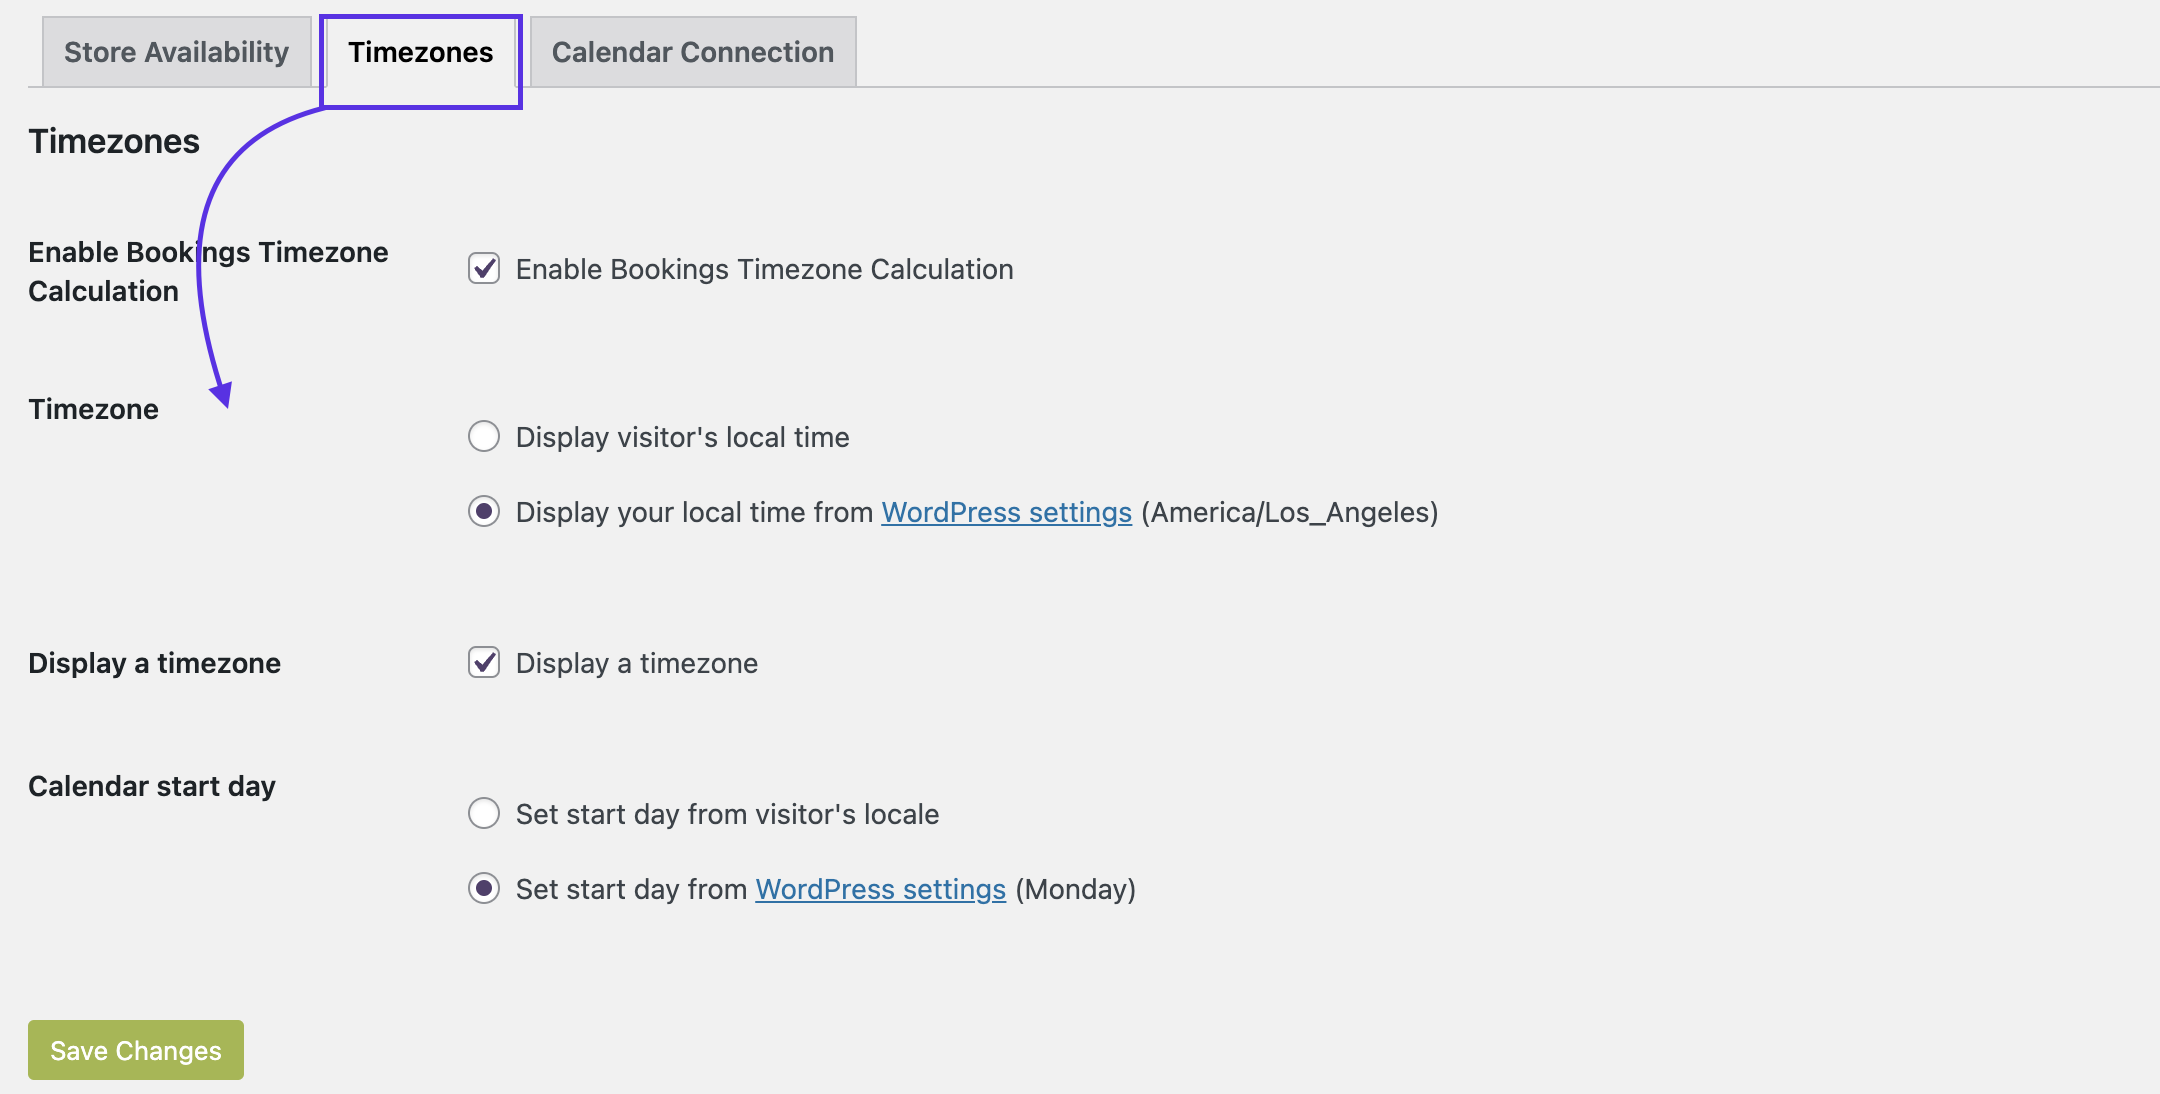
To control how Bookings displays the timezone to customers:
- Go to: Bookings > Settings > Timezones.
- Tick the box for Enable Bookings Timezone Calculation, if you want Bookings emails and other automatic events to be triggered using the site’s configured timezone. If disabled, events are triggered on UTC time.
- Select.
- Timezone – Use your visitors’ local time or yours. This only affects bookable products with the booking duration configured to either minutes or hours. Bookable products with the booking duration set to days or months are always displayed in the site’s configured timezone.
- Calendar start day – Use the visitors’ locale or yours. If yours, info is pulled from: Dashboard > Settings > General > Week Starts On. Some countries start the week on Sunday; some on Monday.
- Save changes.
Timezones: Usage
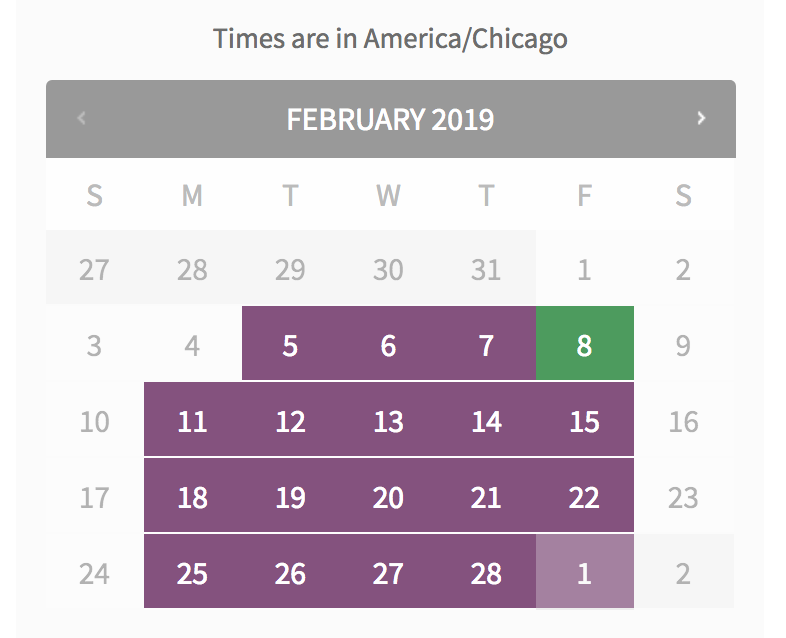
Timezone
The frontend Bookings calendar displays in the timezone specified: Visitor or yours.

After the booking is made, the time displayed to the customer is in their timezone, including the cart, order confirmation, and reminder emails.

Calendar
The frontend Bookings calendar displays according to the Start Day specified: Visitor or yours.
Calendar Connection (Google Calendar Integration)
↑ Back to topWooCommerce Bookings enables one-way or two-way sync with Google Calendar. You need a Google account to use this functionality.
To set this up, go to: Google Calendar Integration.
Accommodation
↑ Back to topIf you have activated the WooCommerce Accommodation Bookings extension, then an additional setting is provided to set site-wide check-in and check-out times.
Site-wide check-in and check-out times are displayed to the user when booking and purchasing and reviewing past bookings.
- Go to: WordPress Admin > Bookings > Settings > Accommodation
- Enter the check-in and check-out times.
- Save.

Questions and Feedback
↑ Back to topHave a question before you buy? Please fill out this pre-sales form.
Already purchased and need some assistance? Get in touch with a Happiness Engineer via the Help Desk.