Upgrade: Enhance your Elementor website with the Elementor Connector – effortlessly integrate WooCommerce Bookings and other WooCommerce plugins to stay ahead of the competition!
Can I use Elementor Connector for WooCommerce Bookings to add custom fields to the booking form?
↑ Back to topNo – The Elementor Connector extension only focuses on the design/layout aspects of the booking form on the single product page. For additional fields, we recommend the Product Addons extension by WooCommerce.
Why is the calendar widget not showing properly when editing the page template?
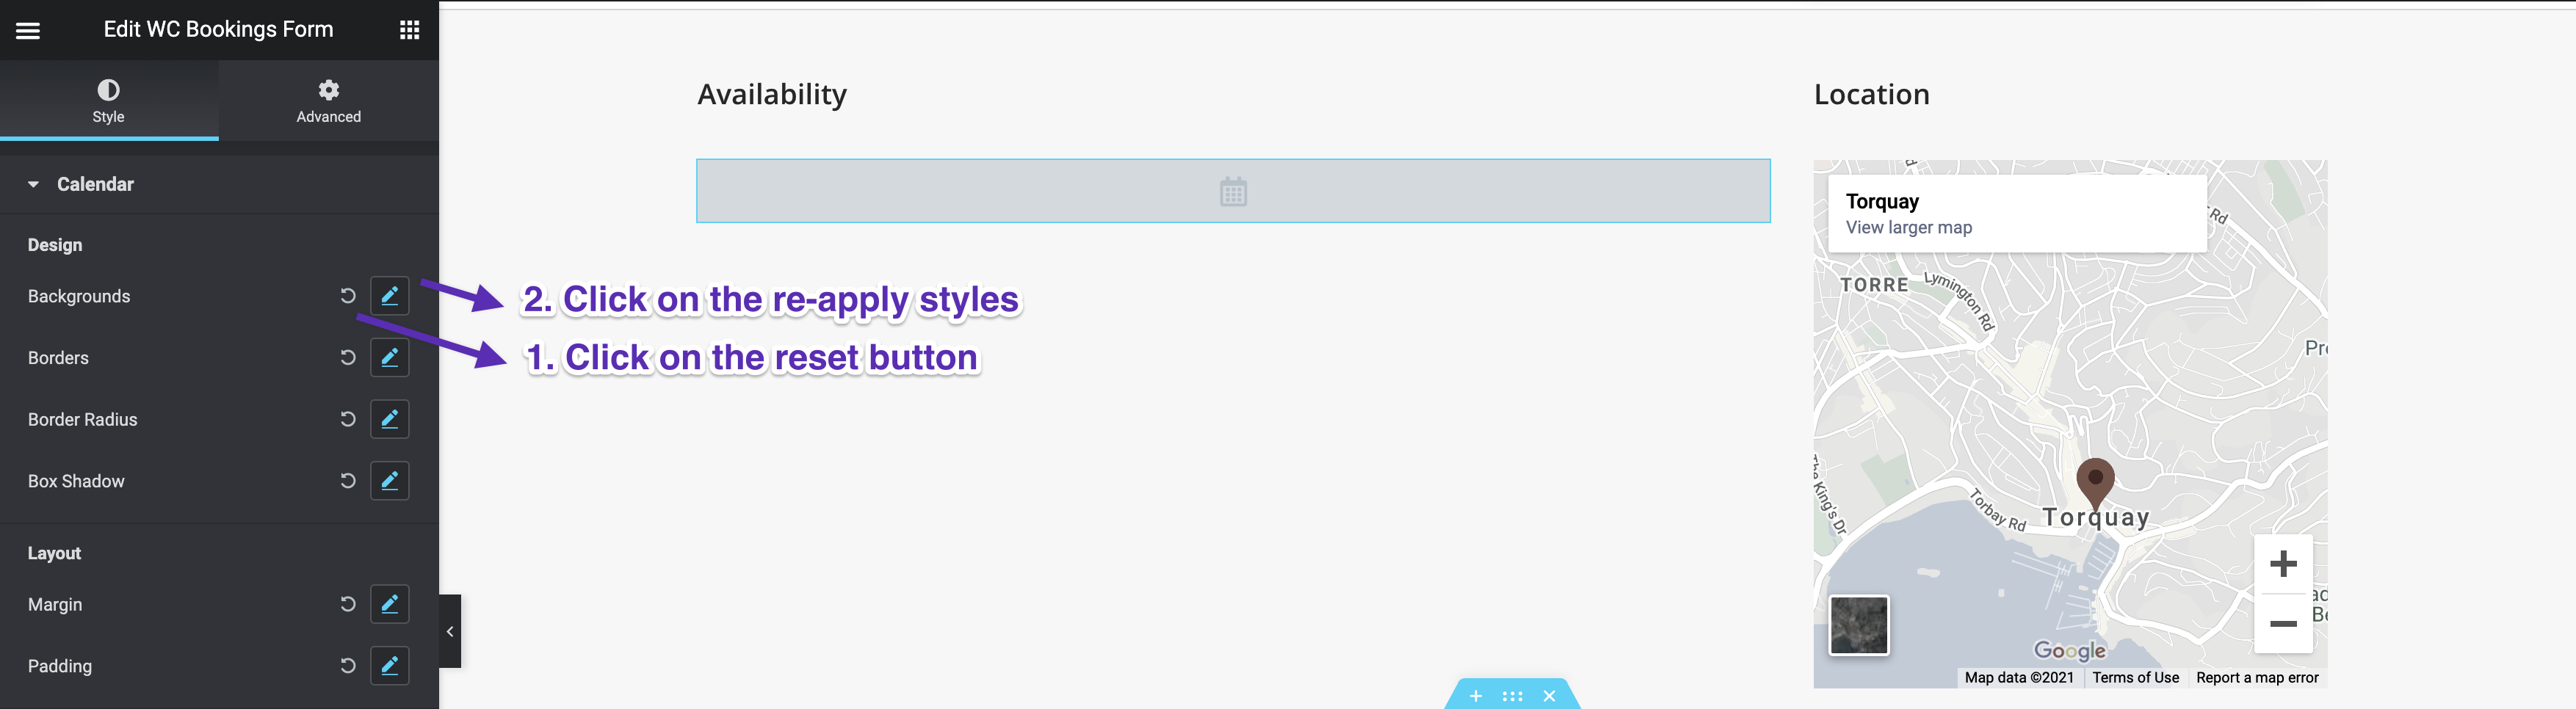
↑ Back to topThis is a known limitation in Elementor Pro plugin. To reset the widget to get an expanded view, please follow these steps:
- Click on any of the “Reset” icons for a section that was previously edited;
- Re-click on the “Popover” icon to restore the original settings: This will reset Bookings widget and show the expanded view
What plugins are active on the demo site?
↑ Back to topOn the Elementor Connector demo website, we have the following plugins active:
- WooCommerce
- WooCommerce Bookings
- Elementor
- Elementor Pro
- Essential Addons for Elementor
- 301 Redirects
Where can I find the Elementor template files used on the demo website?
↑ Back to topThese can be downloaded for free directly from the WPExtend website.
Do I need this extension if I already know CSS?
↑ Back to topWhile CSS skills will definitely come in handy, it’s important to note that it only affects design. To change the layout (e.g. using the calendar in a completely different area of the single product page), you’d still need to drag-and-drop the WC Bookings Form widget into place. This isn’t possible using CSS alone since the main WooCommerce Bookings extension doesn’t have a shortcode that can be used.
Why can’t I access the “Resources” and “Persons” settings?
↑ Back to topIn order to access these settings in the Elementor widget, please ensure the following:
- The Bookable Product has the Resources or Persons checkbox selected under Products > All Products > Your Bookable Product > Product Data
- The Elementor template is set to preview the same product where those checkboxes have been enabled.
To change the product being previewed while designing your template, please follow these steps:
- Navigate to Templates > Theme Builder > Your Bookable Template
- Click on Panel Preview > Settings > Preview Settings and the type on the dropdown field to locate your bookable product containing the resources and persons
- Once the bookable product preview has been updated, the respective setting areas in the widget will be active.
Does it work with Accommodation Bookings?
↑ Back to topYes – Accommodation Bookings is supported from version 1.1 onwards.
Can I have multiple calendar booking forms on the same page?
↑ Back to topNo – WooCommerce Bookings does not currently support multiple forms on the same page.
Can I use the EC Bookings Form widget on a page?
↑ Back to topYes – Since version 1.4, the Elementor Connector for WooCommerce Bookings widget can be used on standard pages as well as Elementor templates for Single Product Page. To use the booking form widget on a page, please specify the product ID in the content tab.
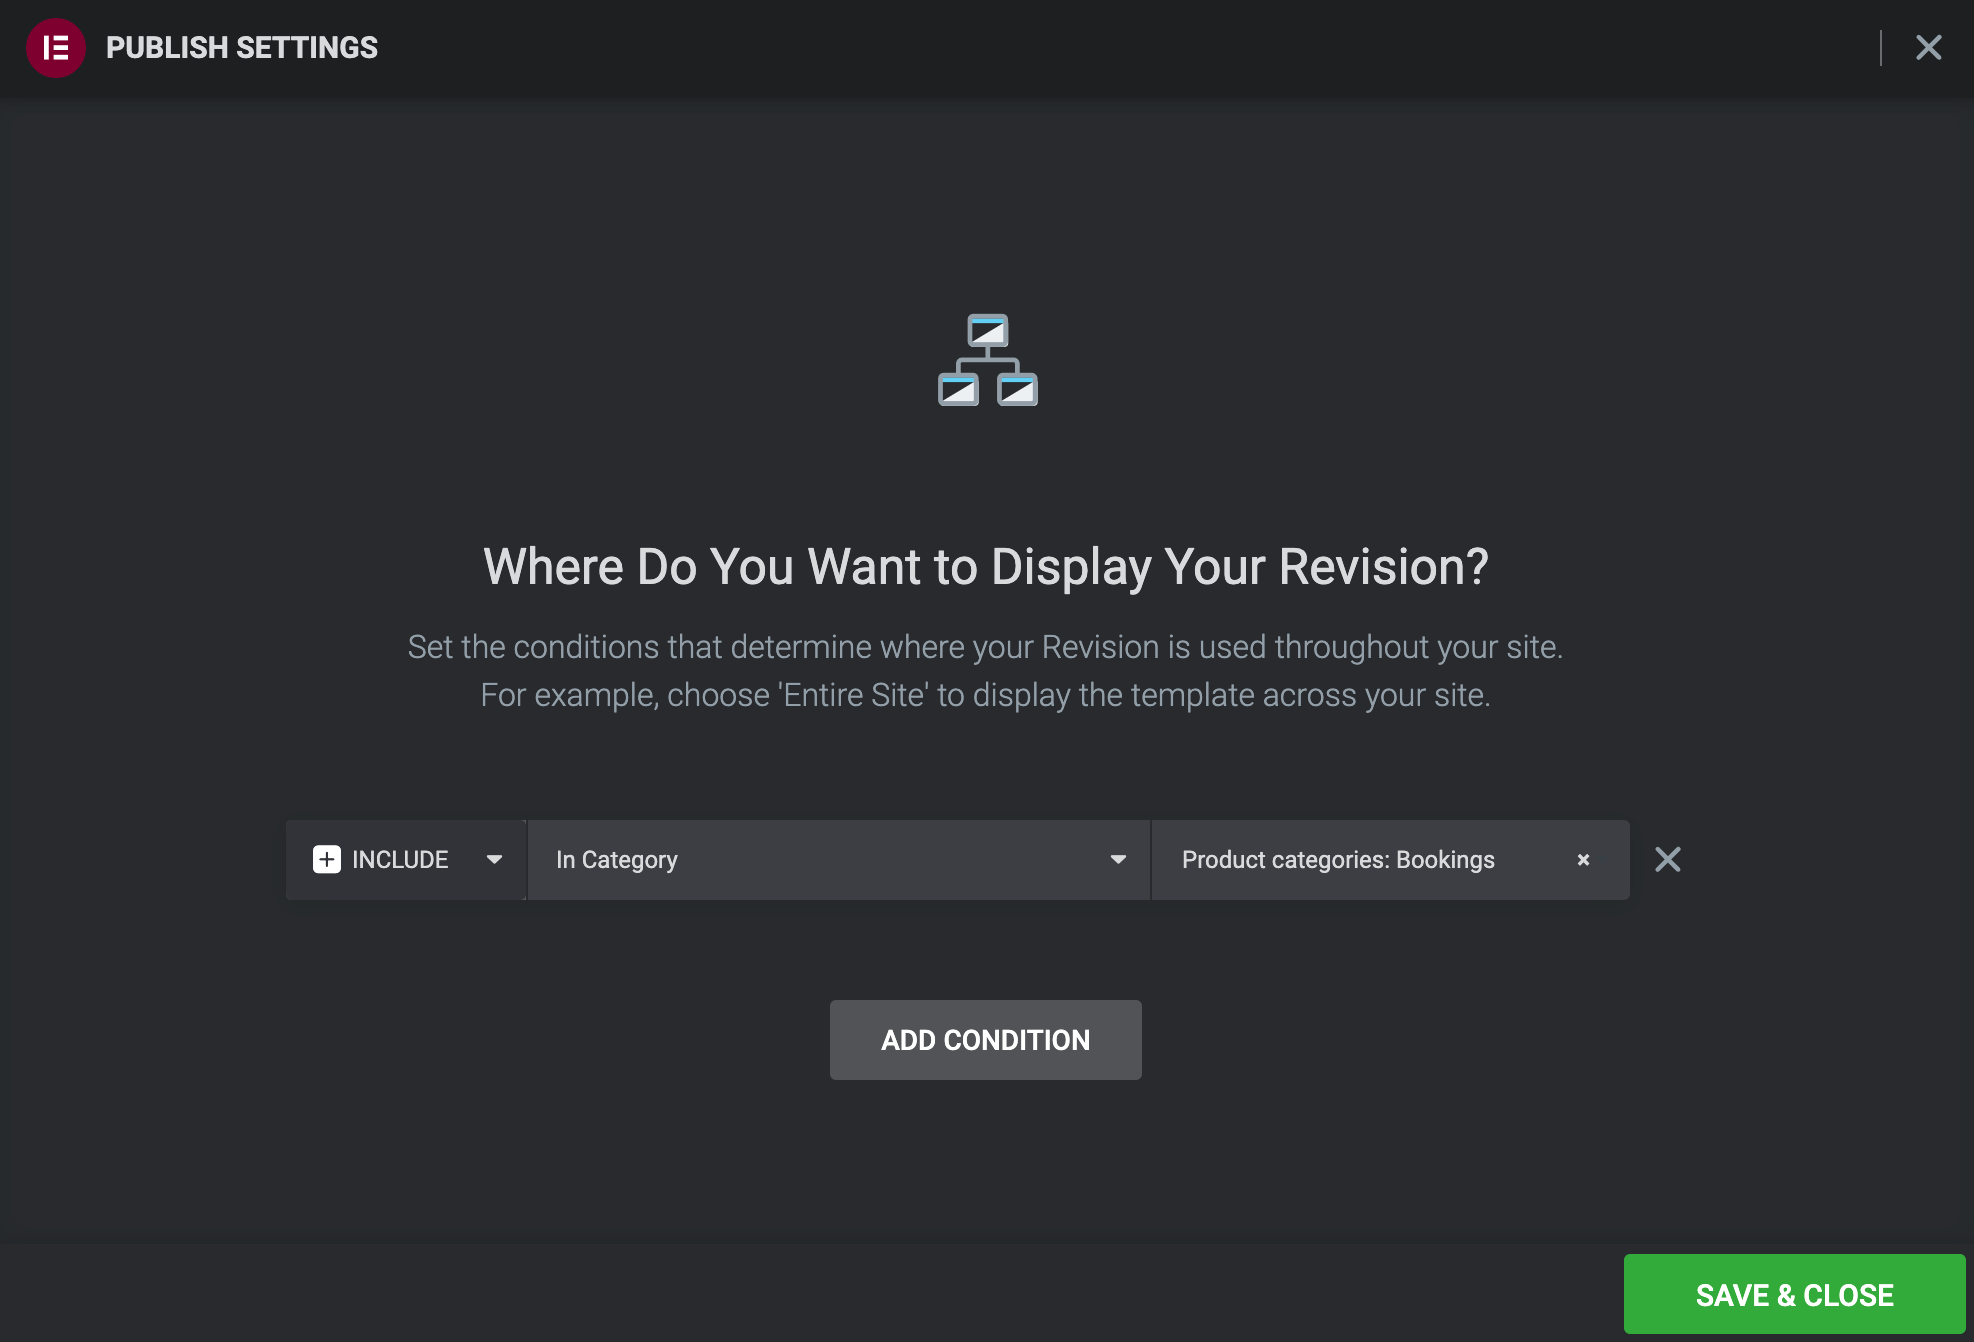
How can I configure different templates per product type (e.g. Template A for Bookable Products, Template B for Simple Products)?
↑ Back to topThe easiest way is to group the type of products using product categories. These categories can then be used to filter the Elementor template display conditions.