The WooCommerce Bookings extension allows you to synchronize your Bookings with a Google Calendar and supports two-way syncing.
You can connect your Google Calendar using your own app credentials following the steps below.
If you have a working connection but would like to switch to this method, please disconnect the other connection first.
Step 1: Google Cloud Console
↑ Back to topTo use this integration, go to the Google Developers Console.
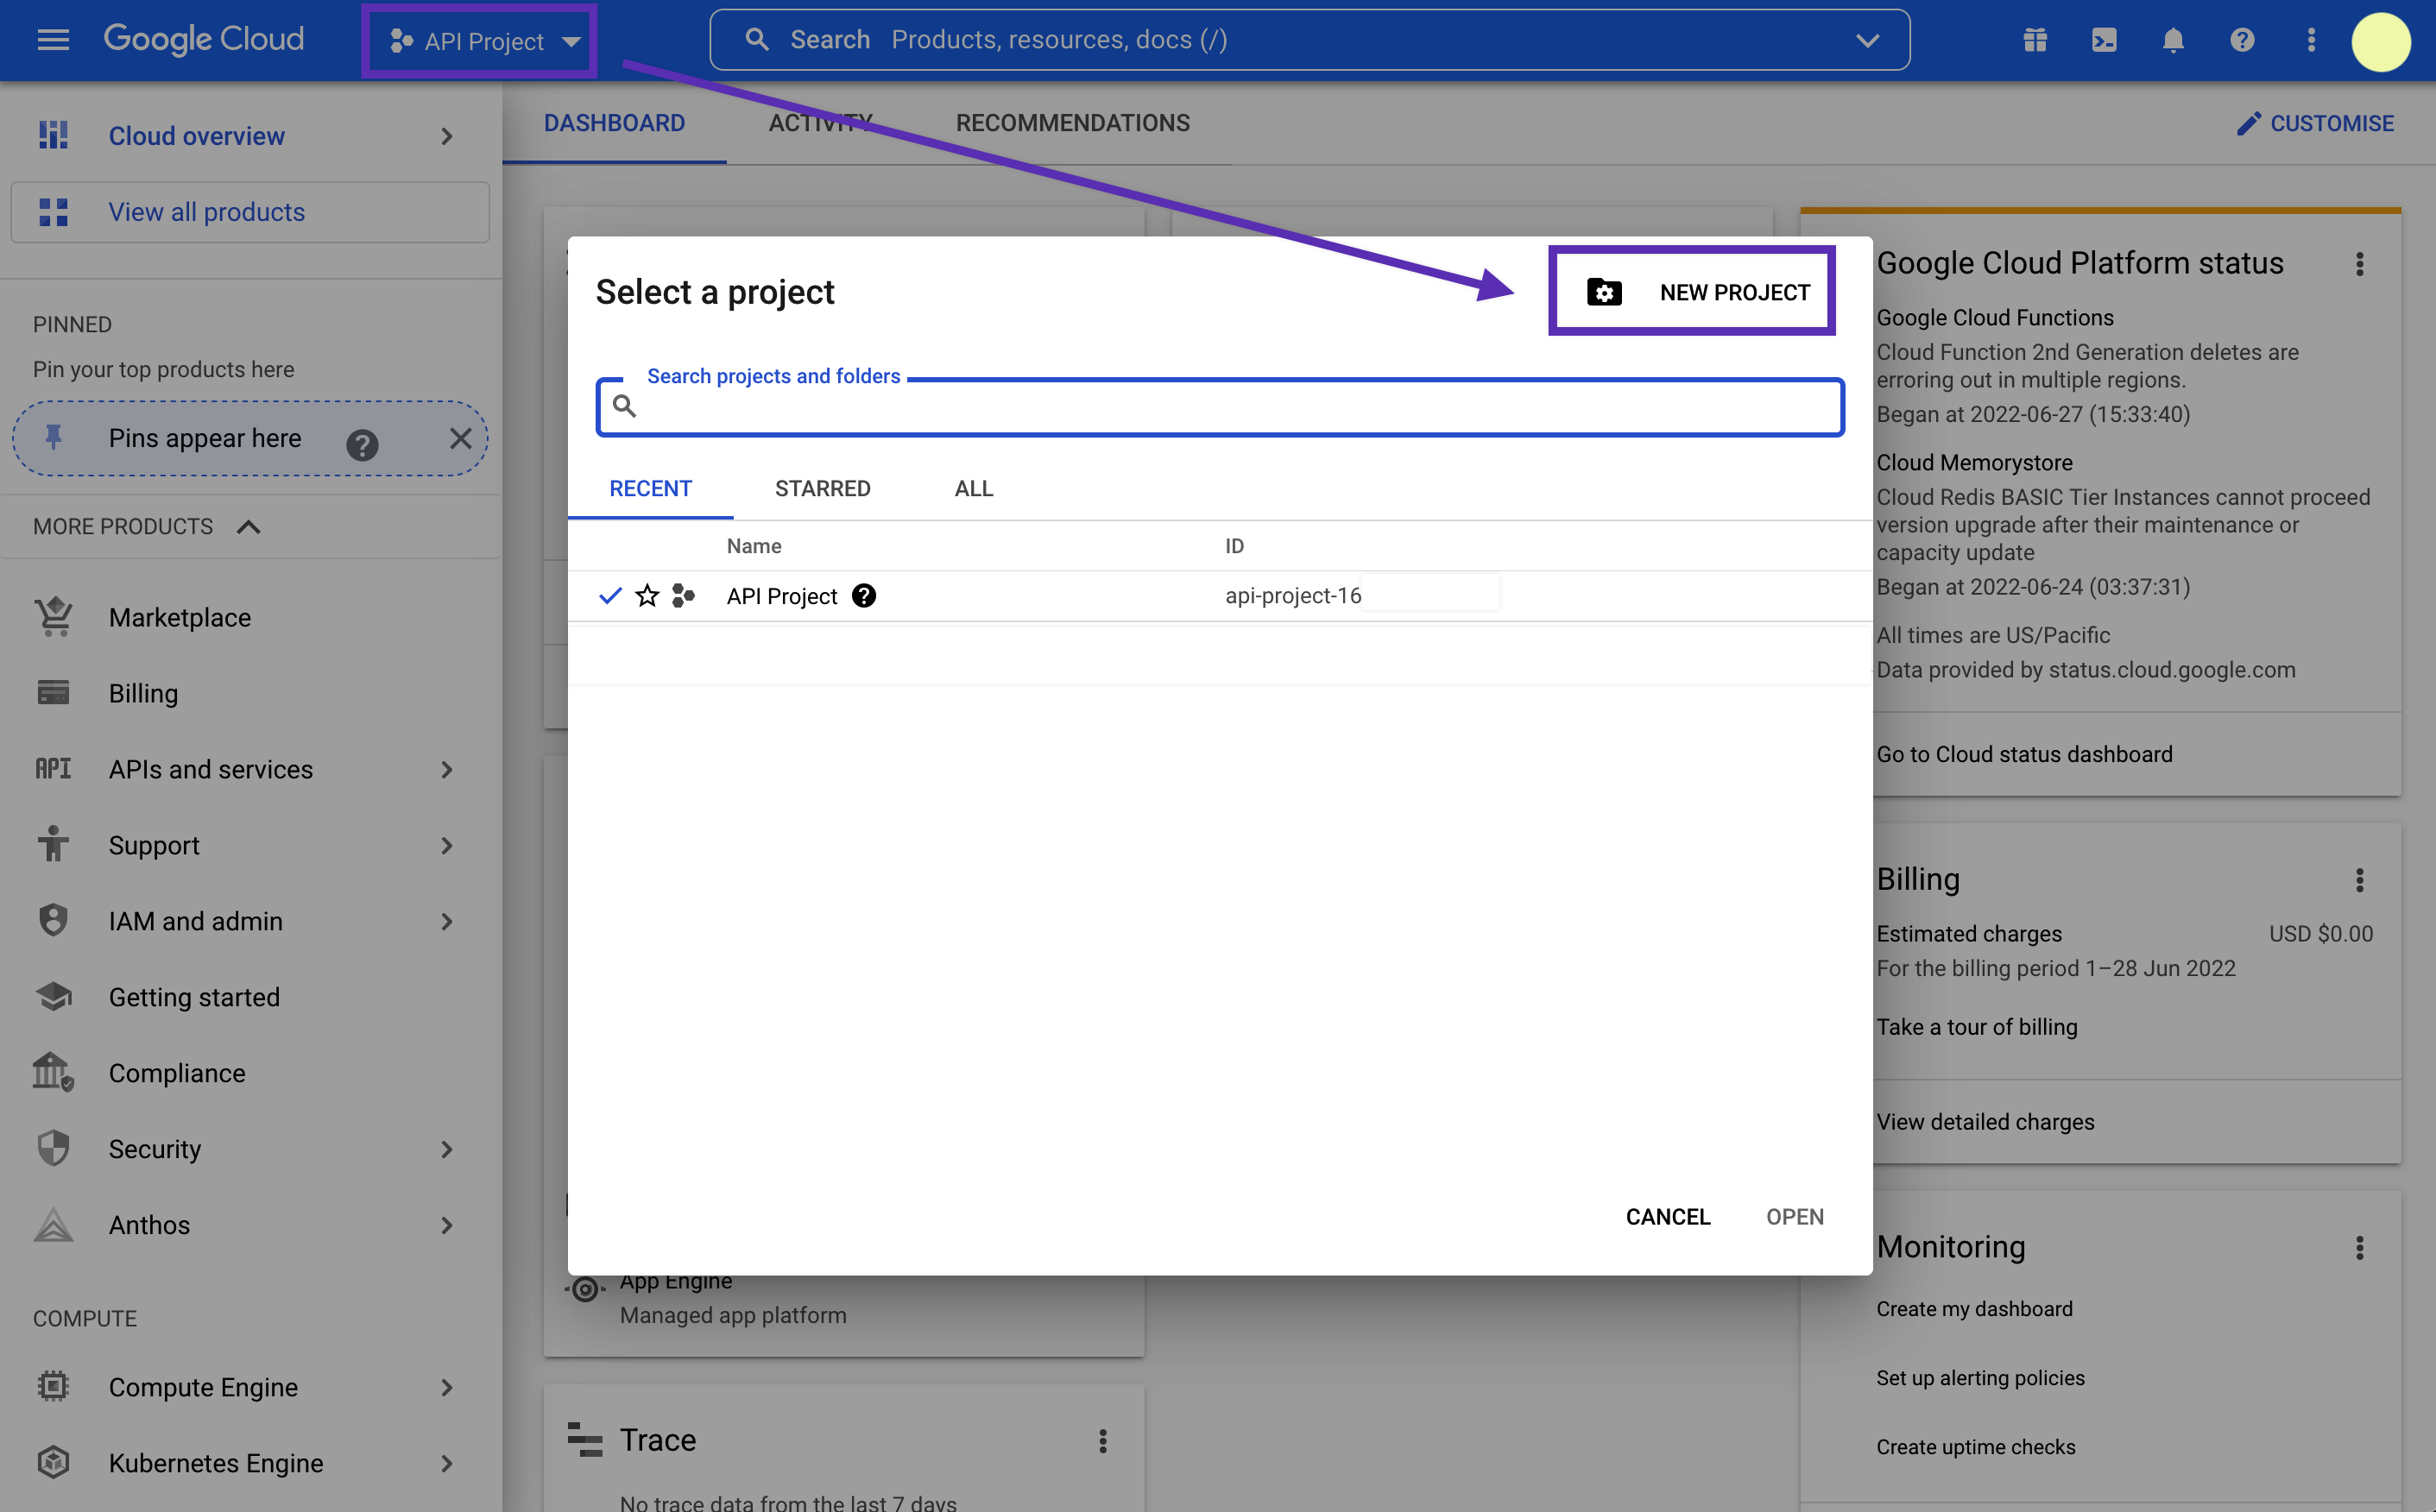
Step 2: Create Project
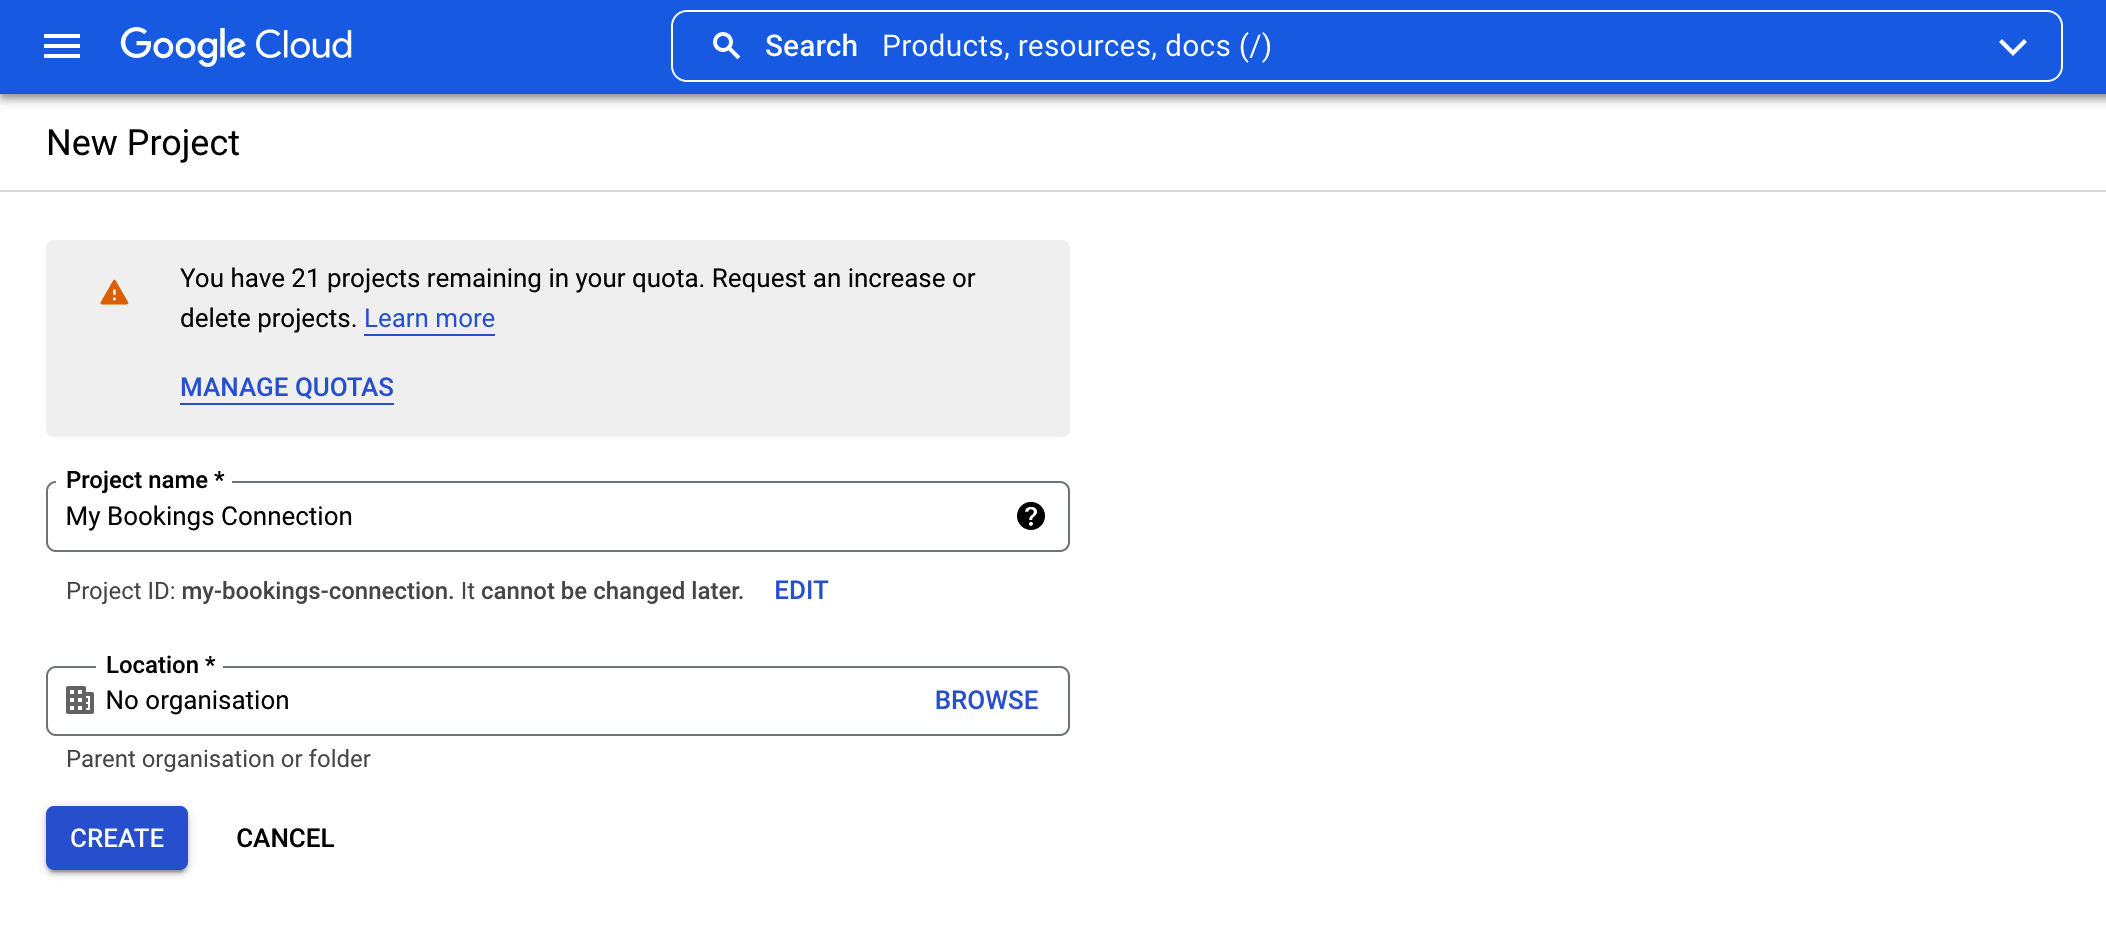
↑ Back to topGo to Projects > Create Project button. A popup should appear and ask for Project Name and Project ID. Enter your preferences.
And name your new project:
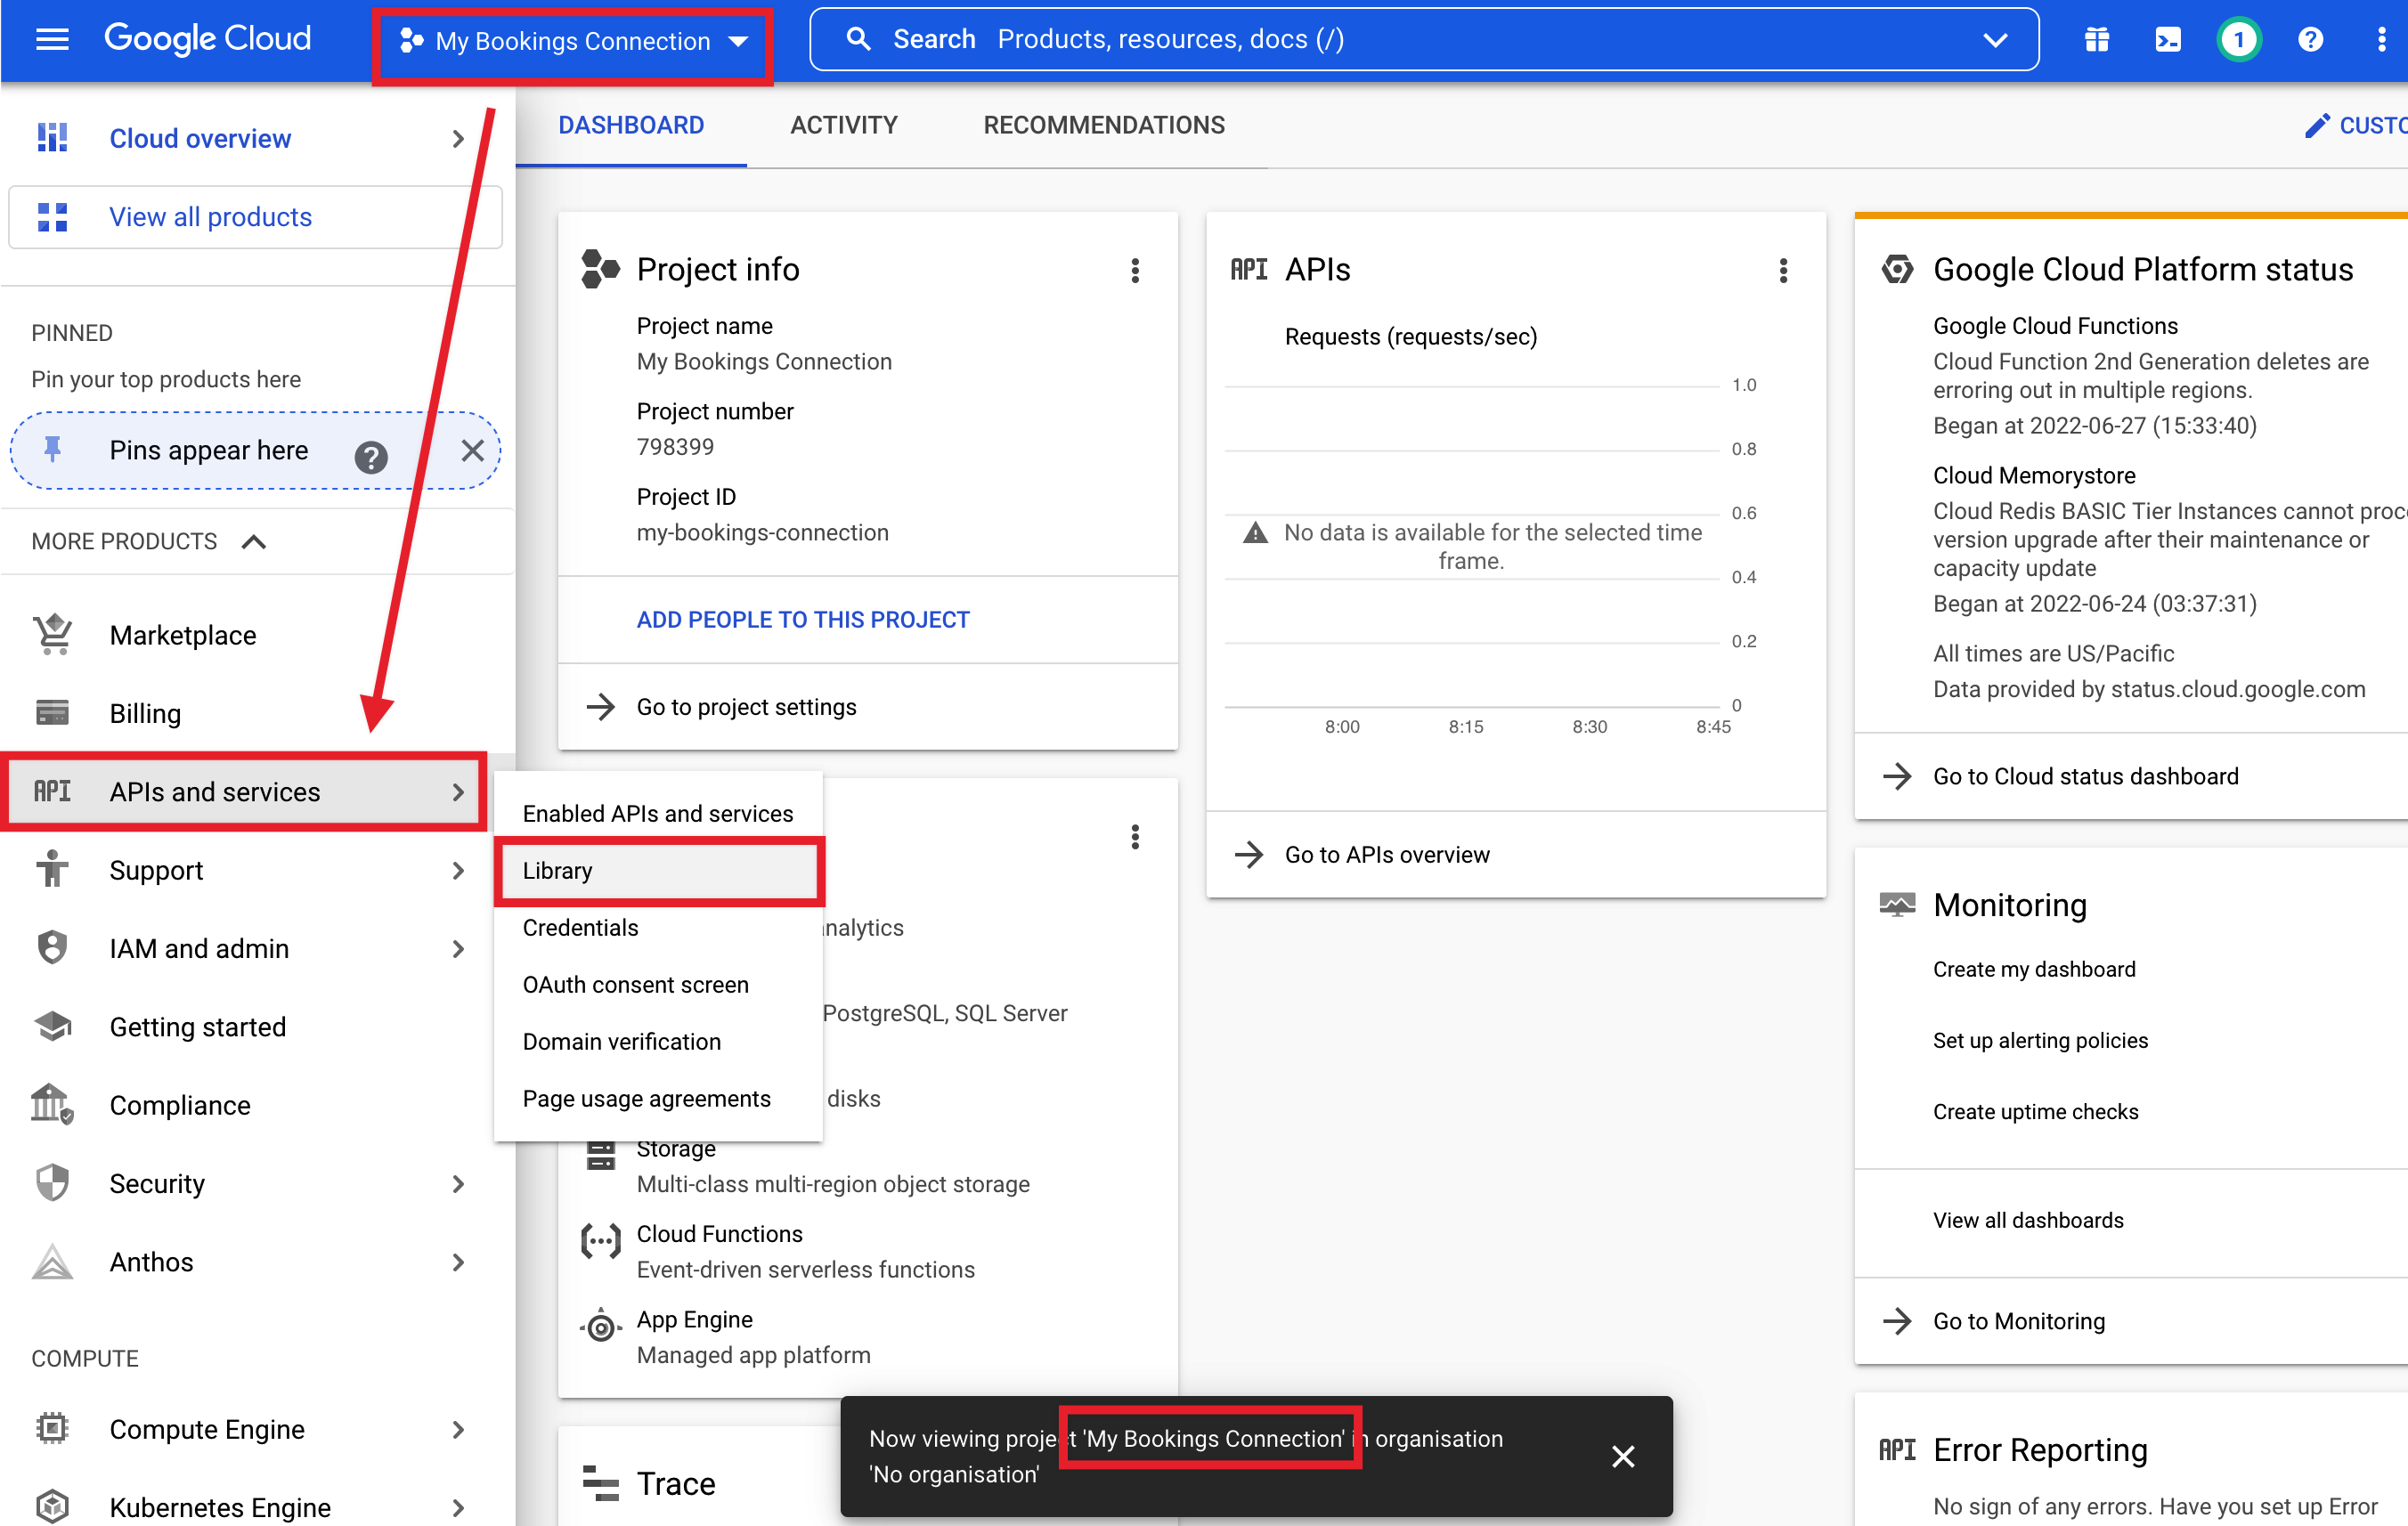
Step 3: Enable the Calendar API
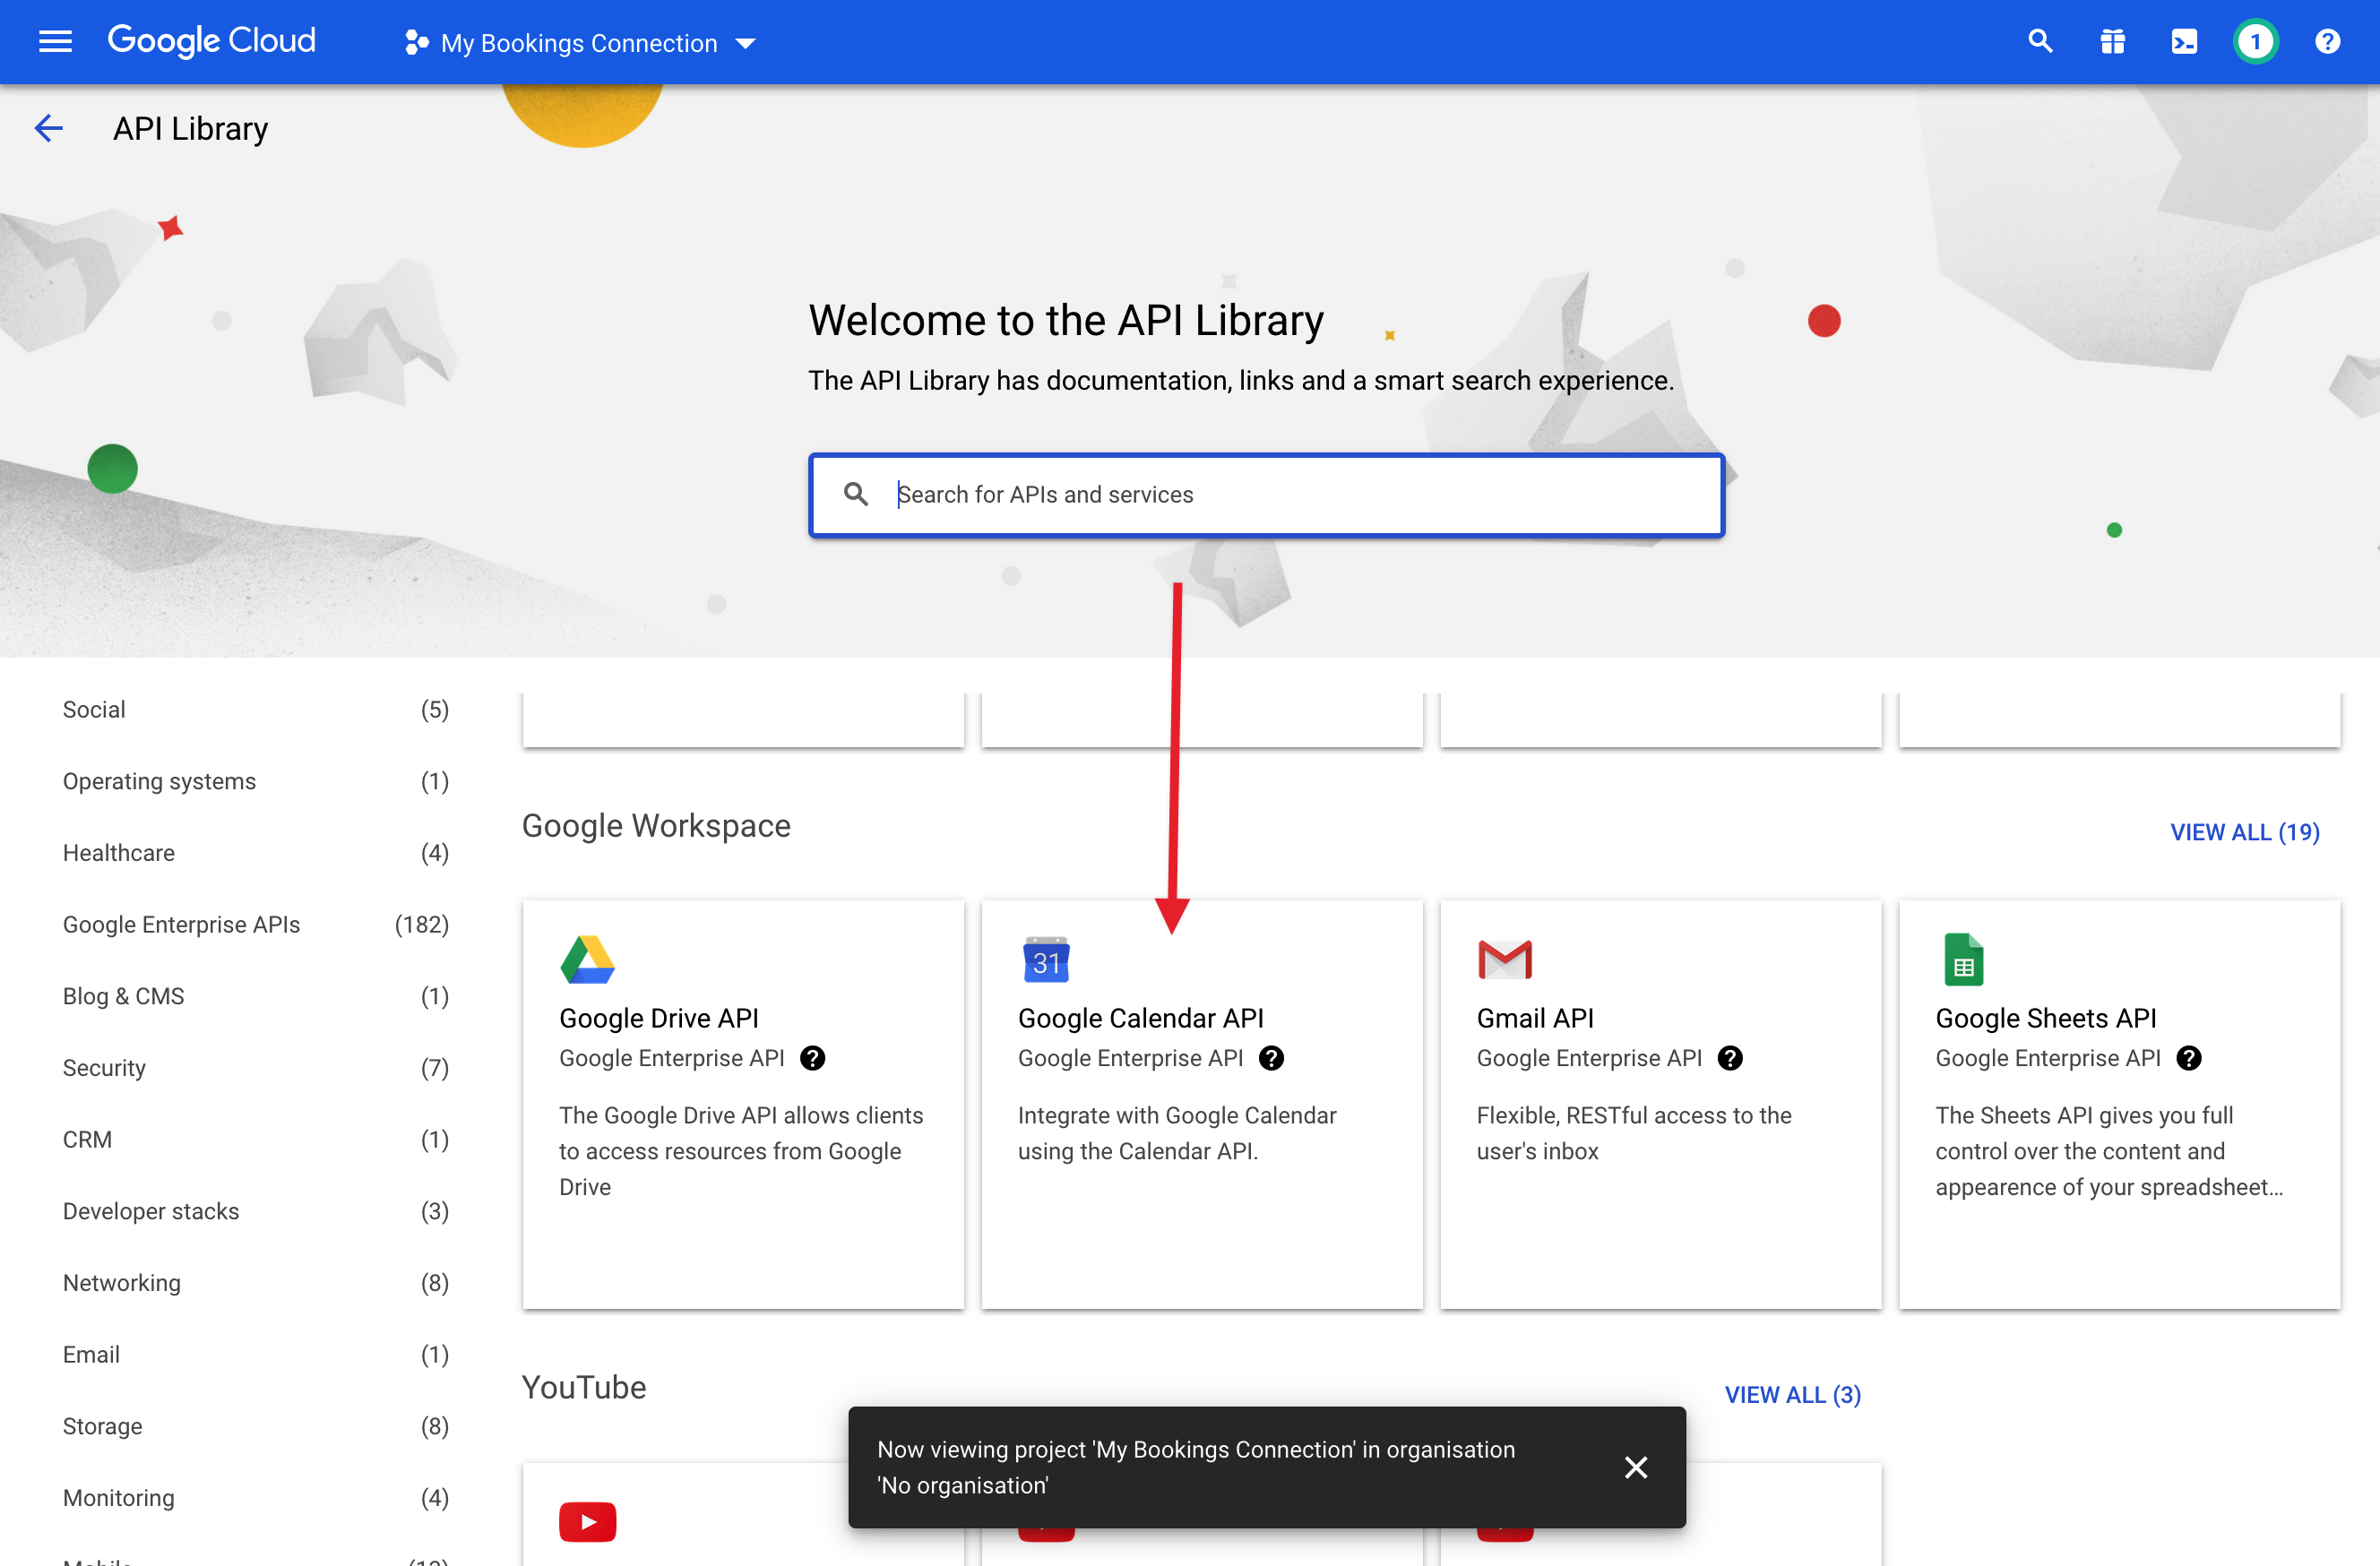
↑ Back to topOnce the project has been created, make sure it’s selected from the dropdown at the top-left of the screen. Then, from the menu on the right select APIs and Services > Library.
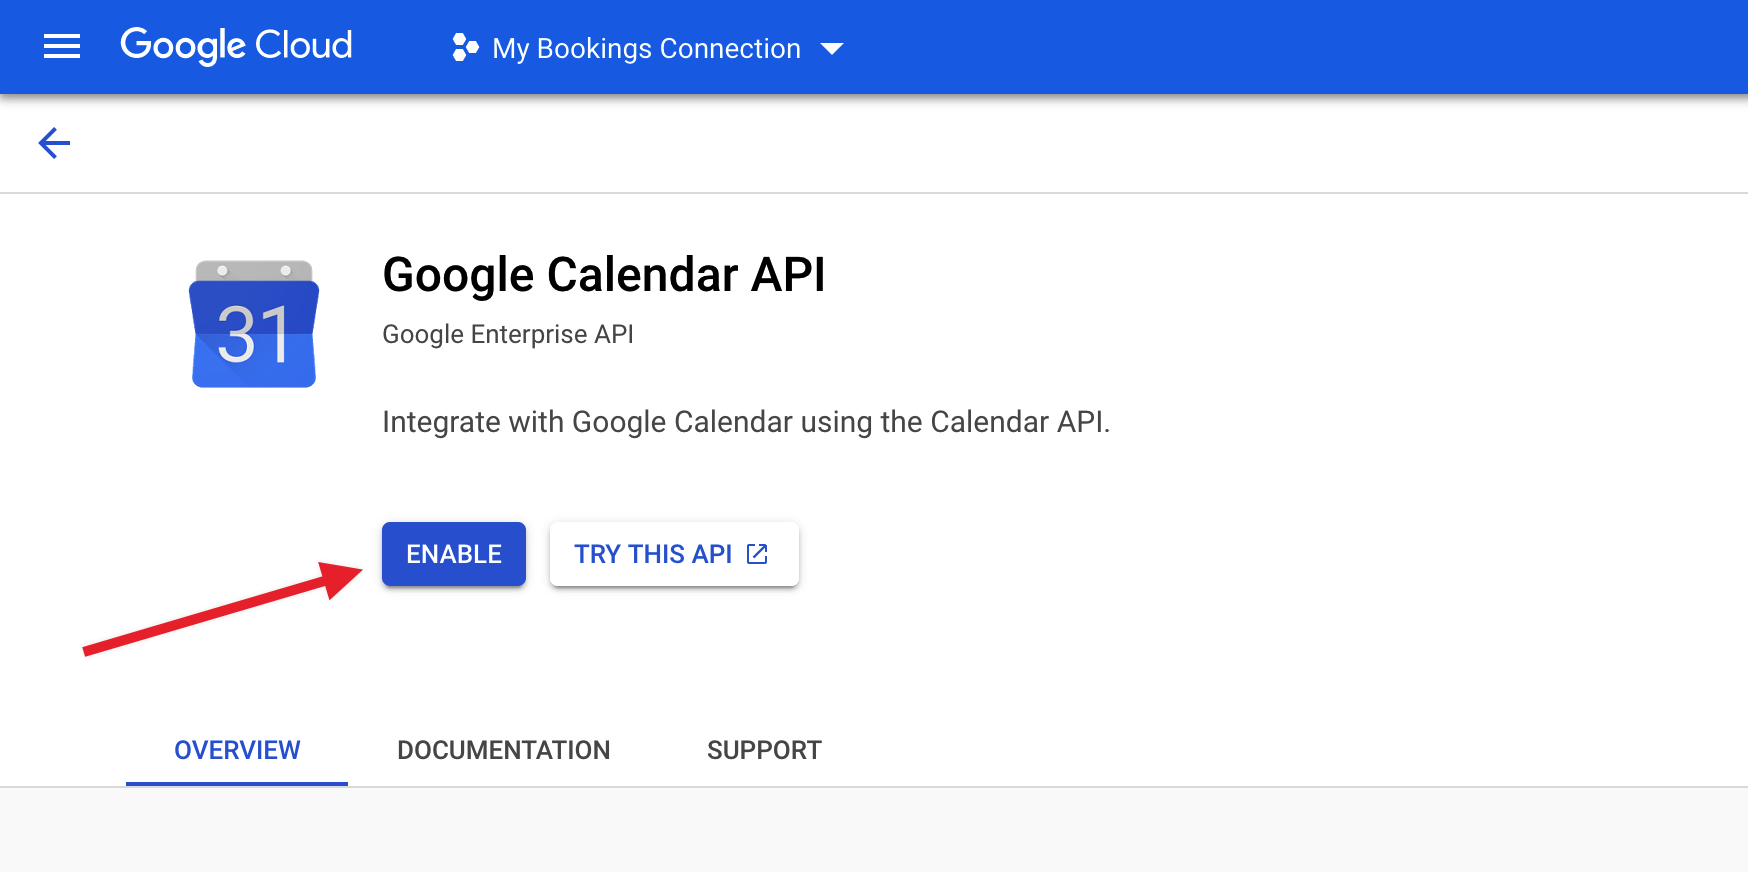
Choose the Google Calendar API.
Then click on Enable.
Step 4: Create Credentials
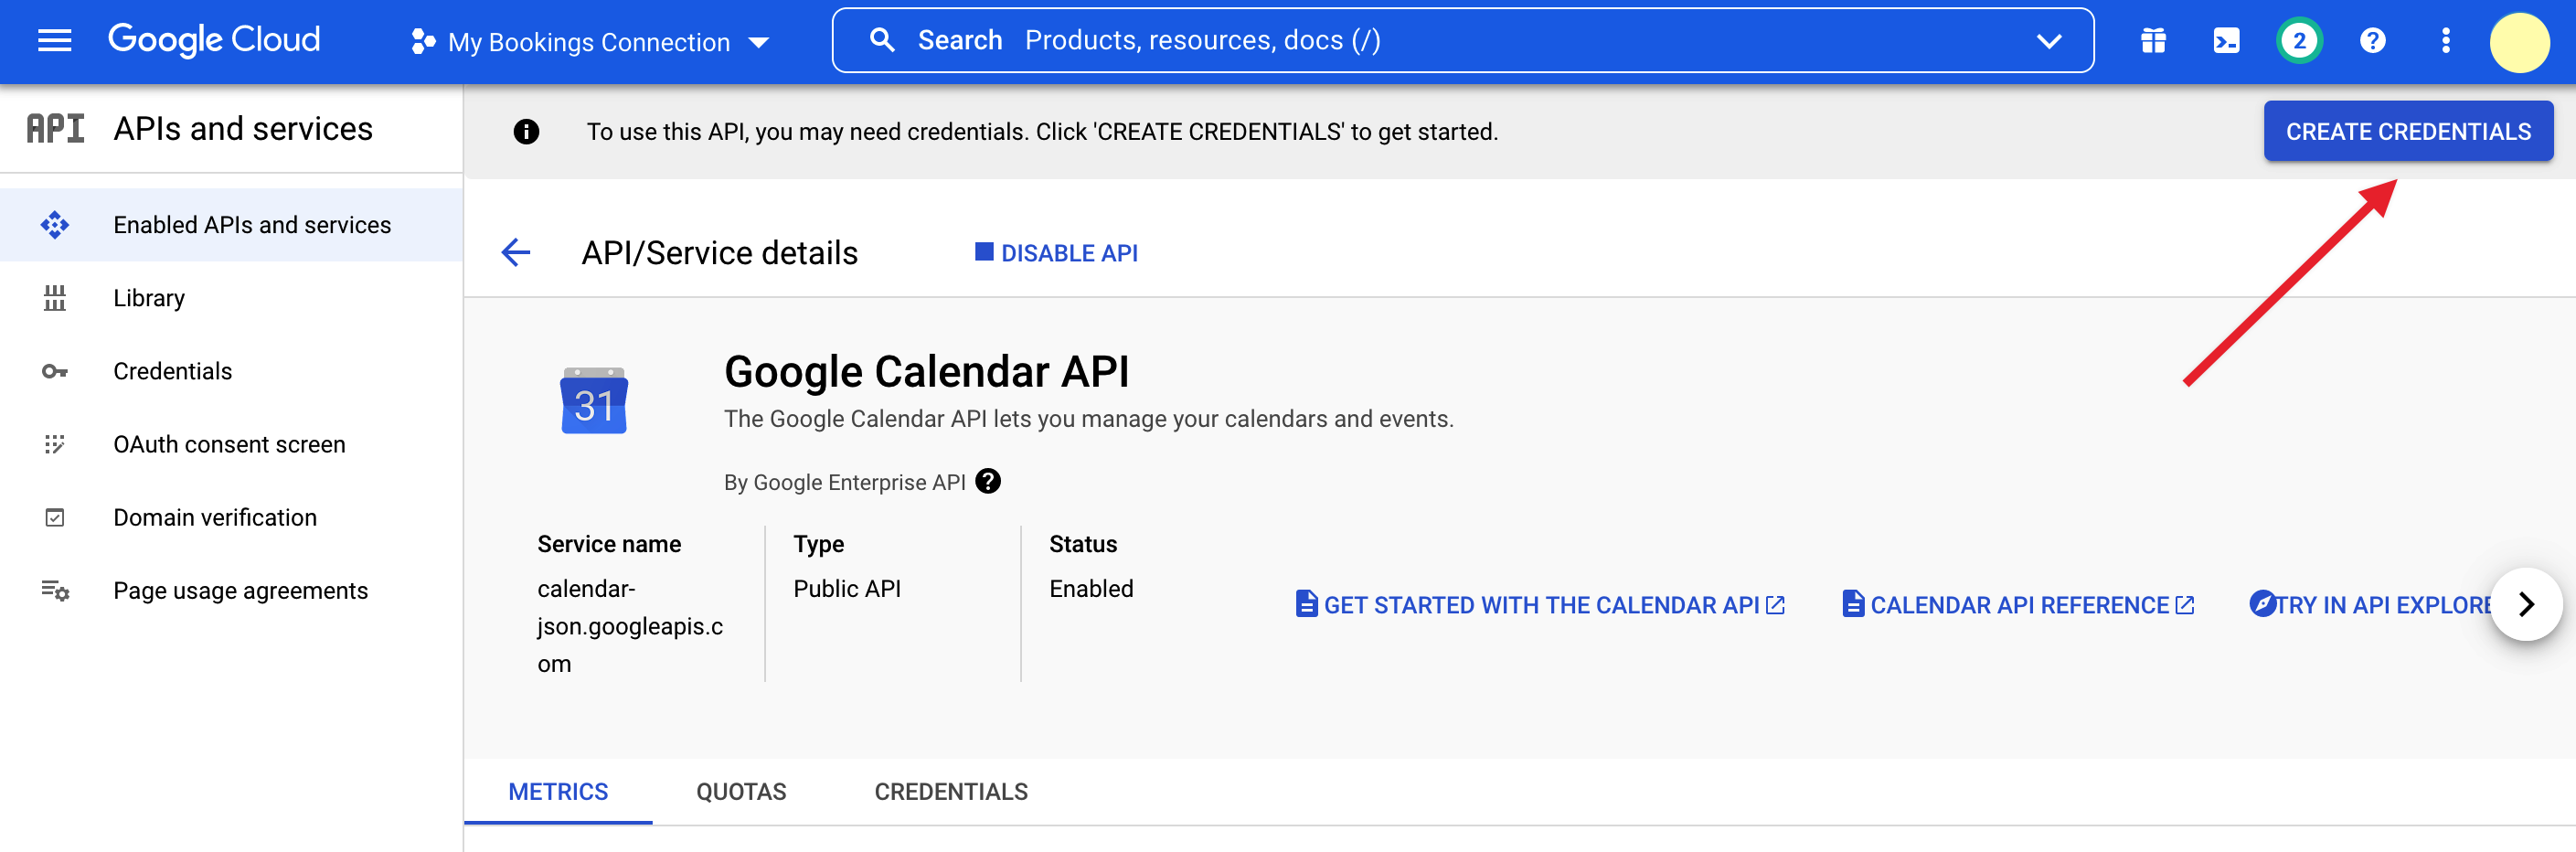
↑ Back to topClicking Enabled as illustrated above will take you to the screen from where you can create credentials. Select Go to Credentials from the top-right of the screen.
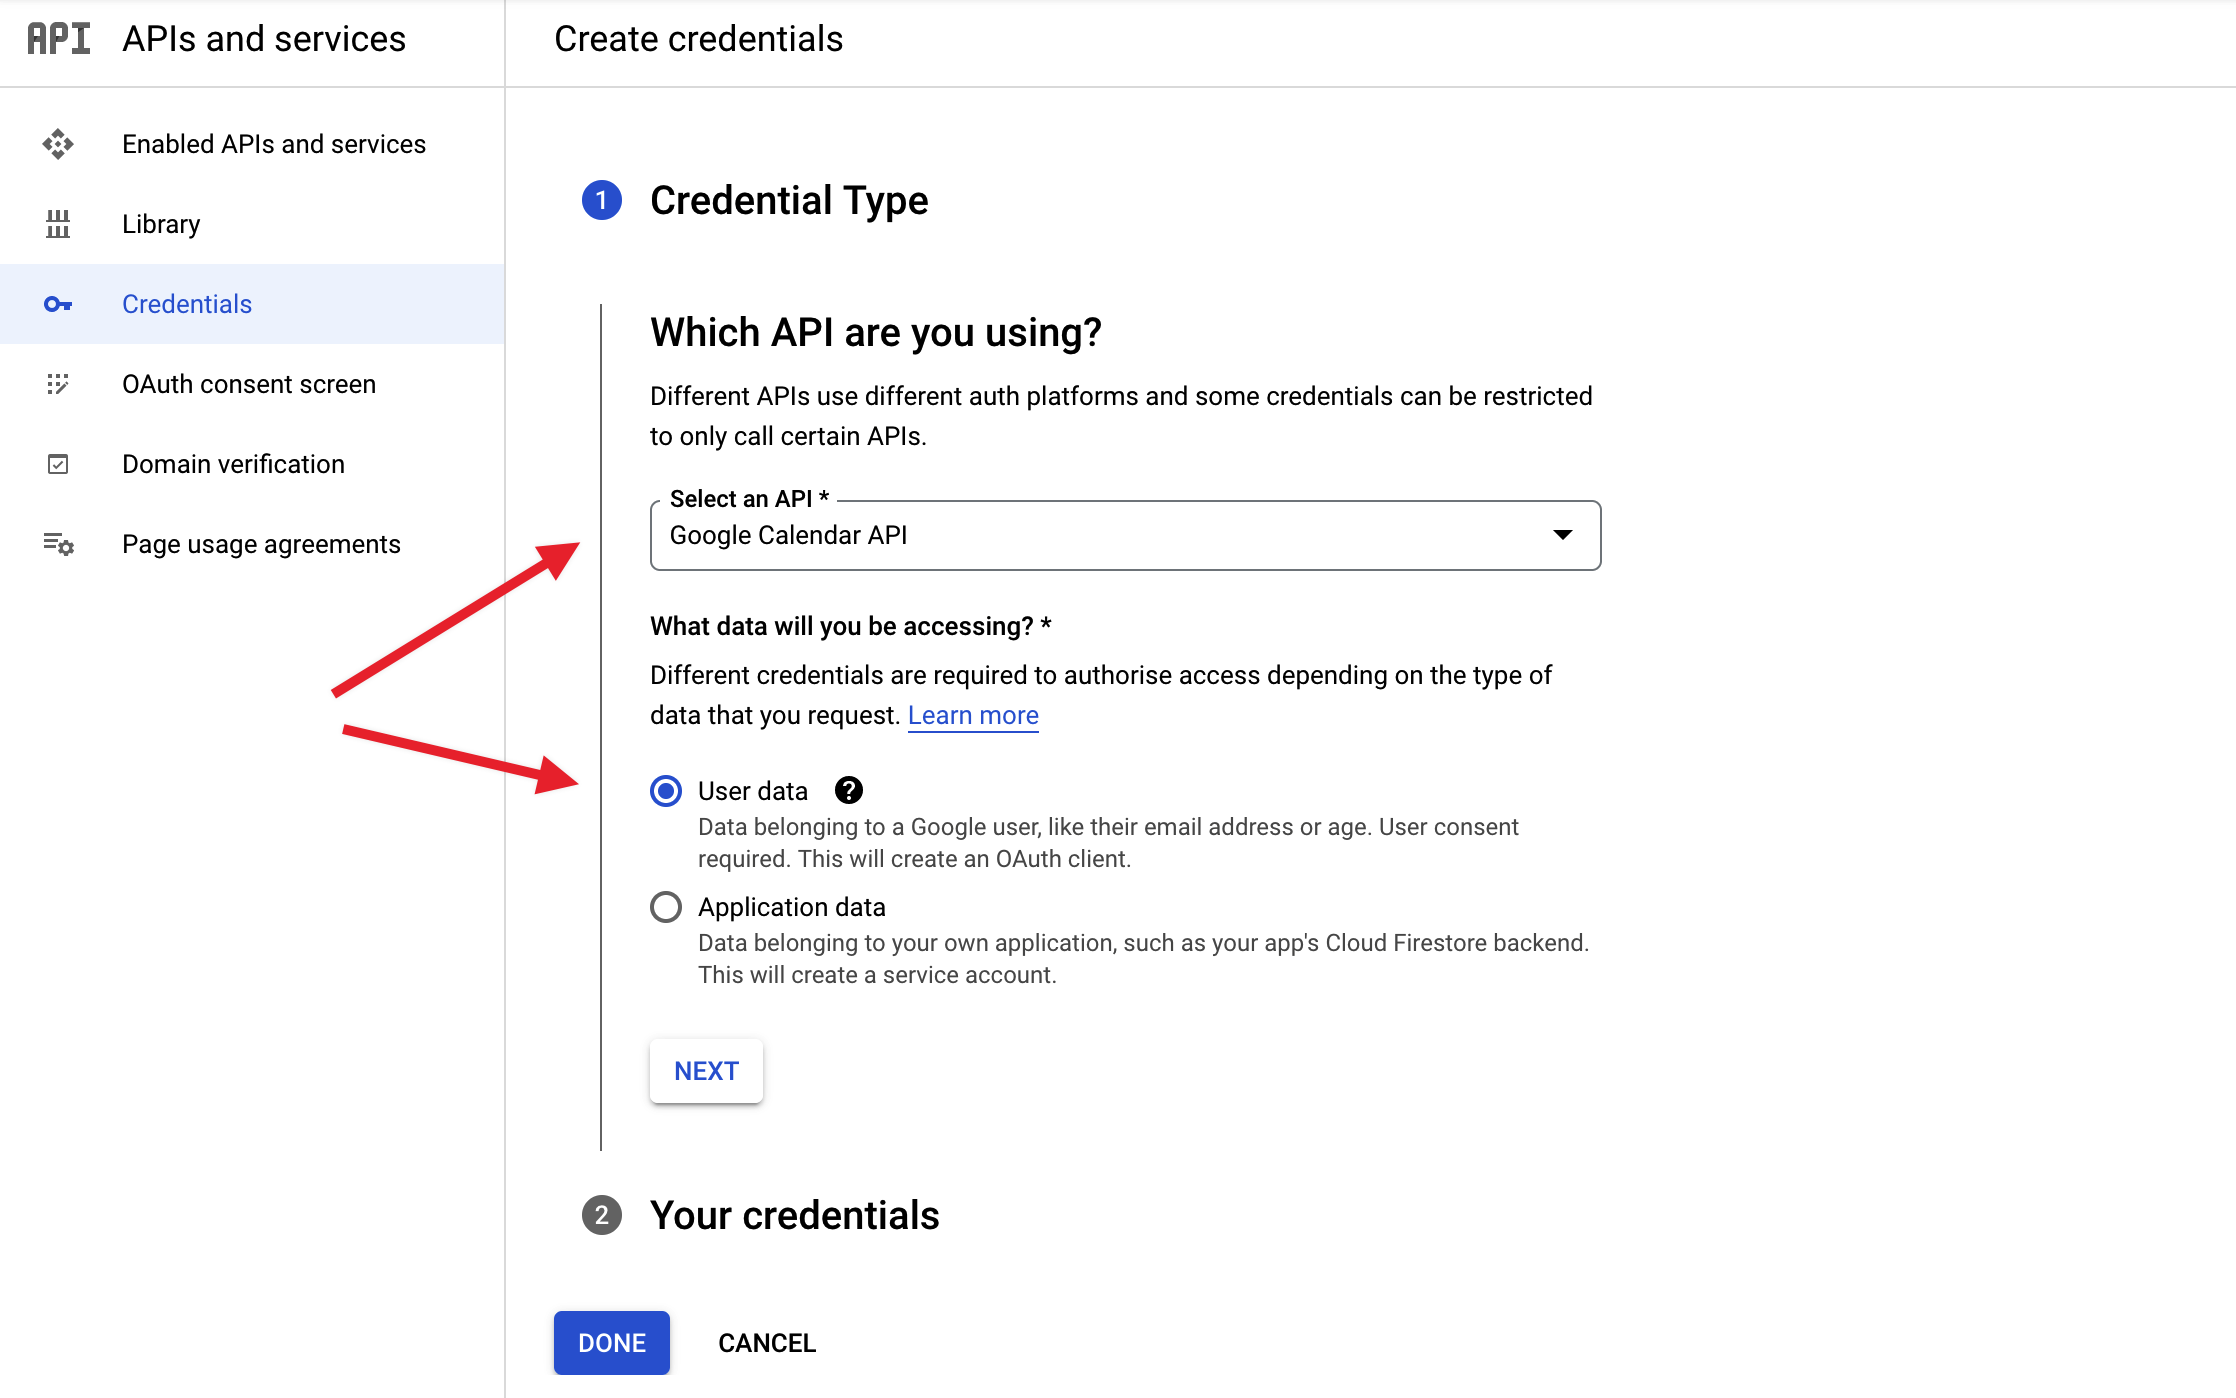
- Under Select an API select Google Calendar API
- Under What data will you be accessing? select User data
- Then click on the Next button
Step 5: Set up your OAuth Consent screen
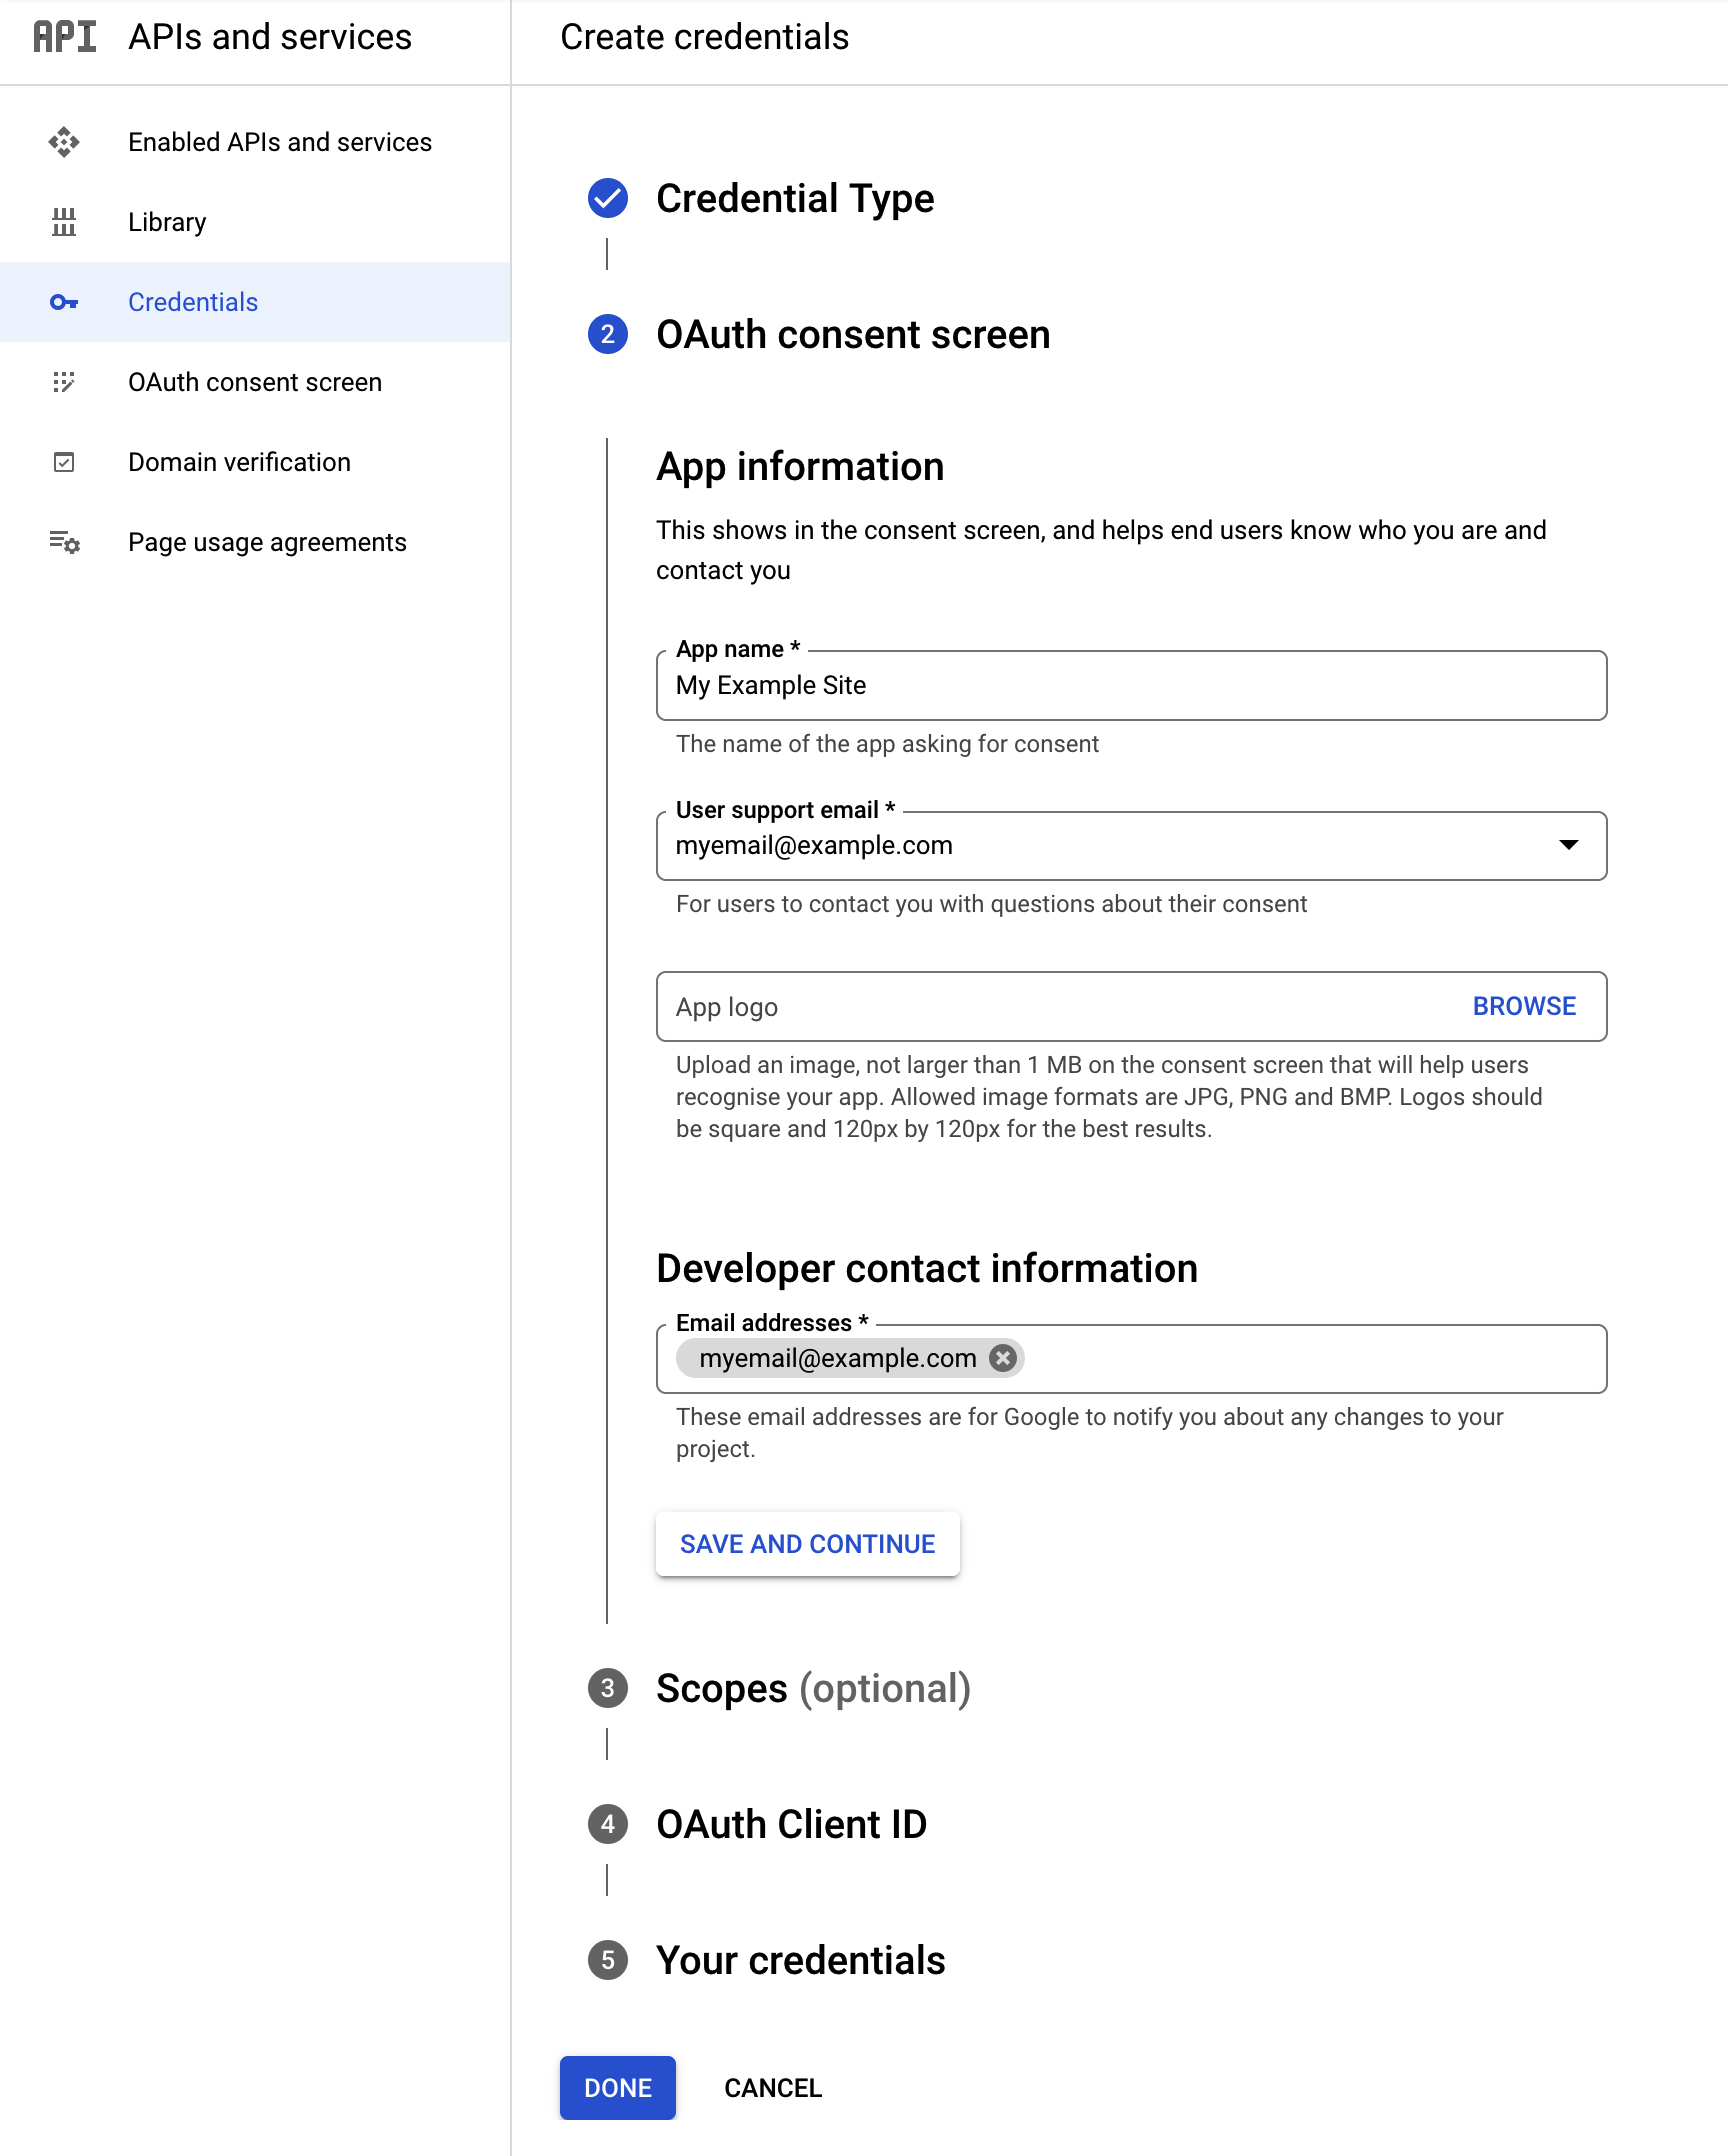
↑ Back to topThe Next button above takes you to the next step with the oAuth Consent screen set up. The consent screen is the popup presented when you click on Connect in the Bookings Settings in your store under WP-Admin > Bookings > Settings > Calendar Integration.
- App Name is for reference and will appear on the popup.
- User support email is set by default to the account you’re logged in as (you may have other options in the dropdown list)
- We suggest not to add an App logo. It may trigger your app needing a review by Google and can take up to 4-6 weeks (during which you will not be able to use it). Since this app is only used internally for connecting the site to the calendar, it’s recommended that you do not add one.
- Developer Contact Info is required and can be the same as the above.
- When you’re done, click Save and Continue.
Step 6: Scopes
↑ Back to topThe Scopes section can be left blank as there’s nothing in this section that is required.
Scroll to the bottom of the section and click Save and Continue.
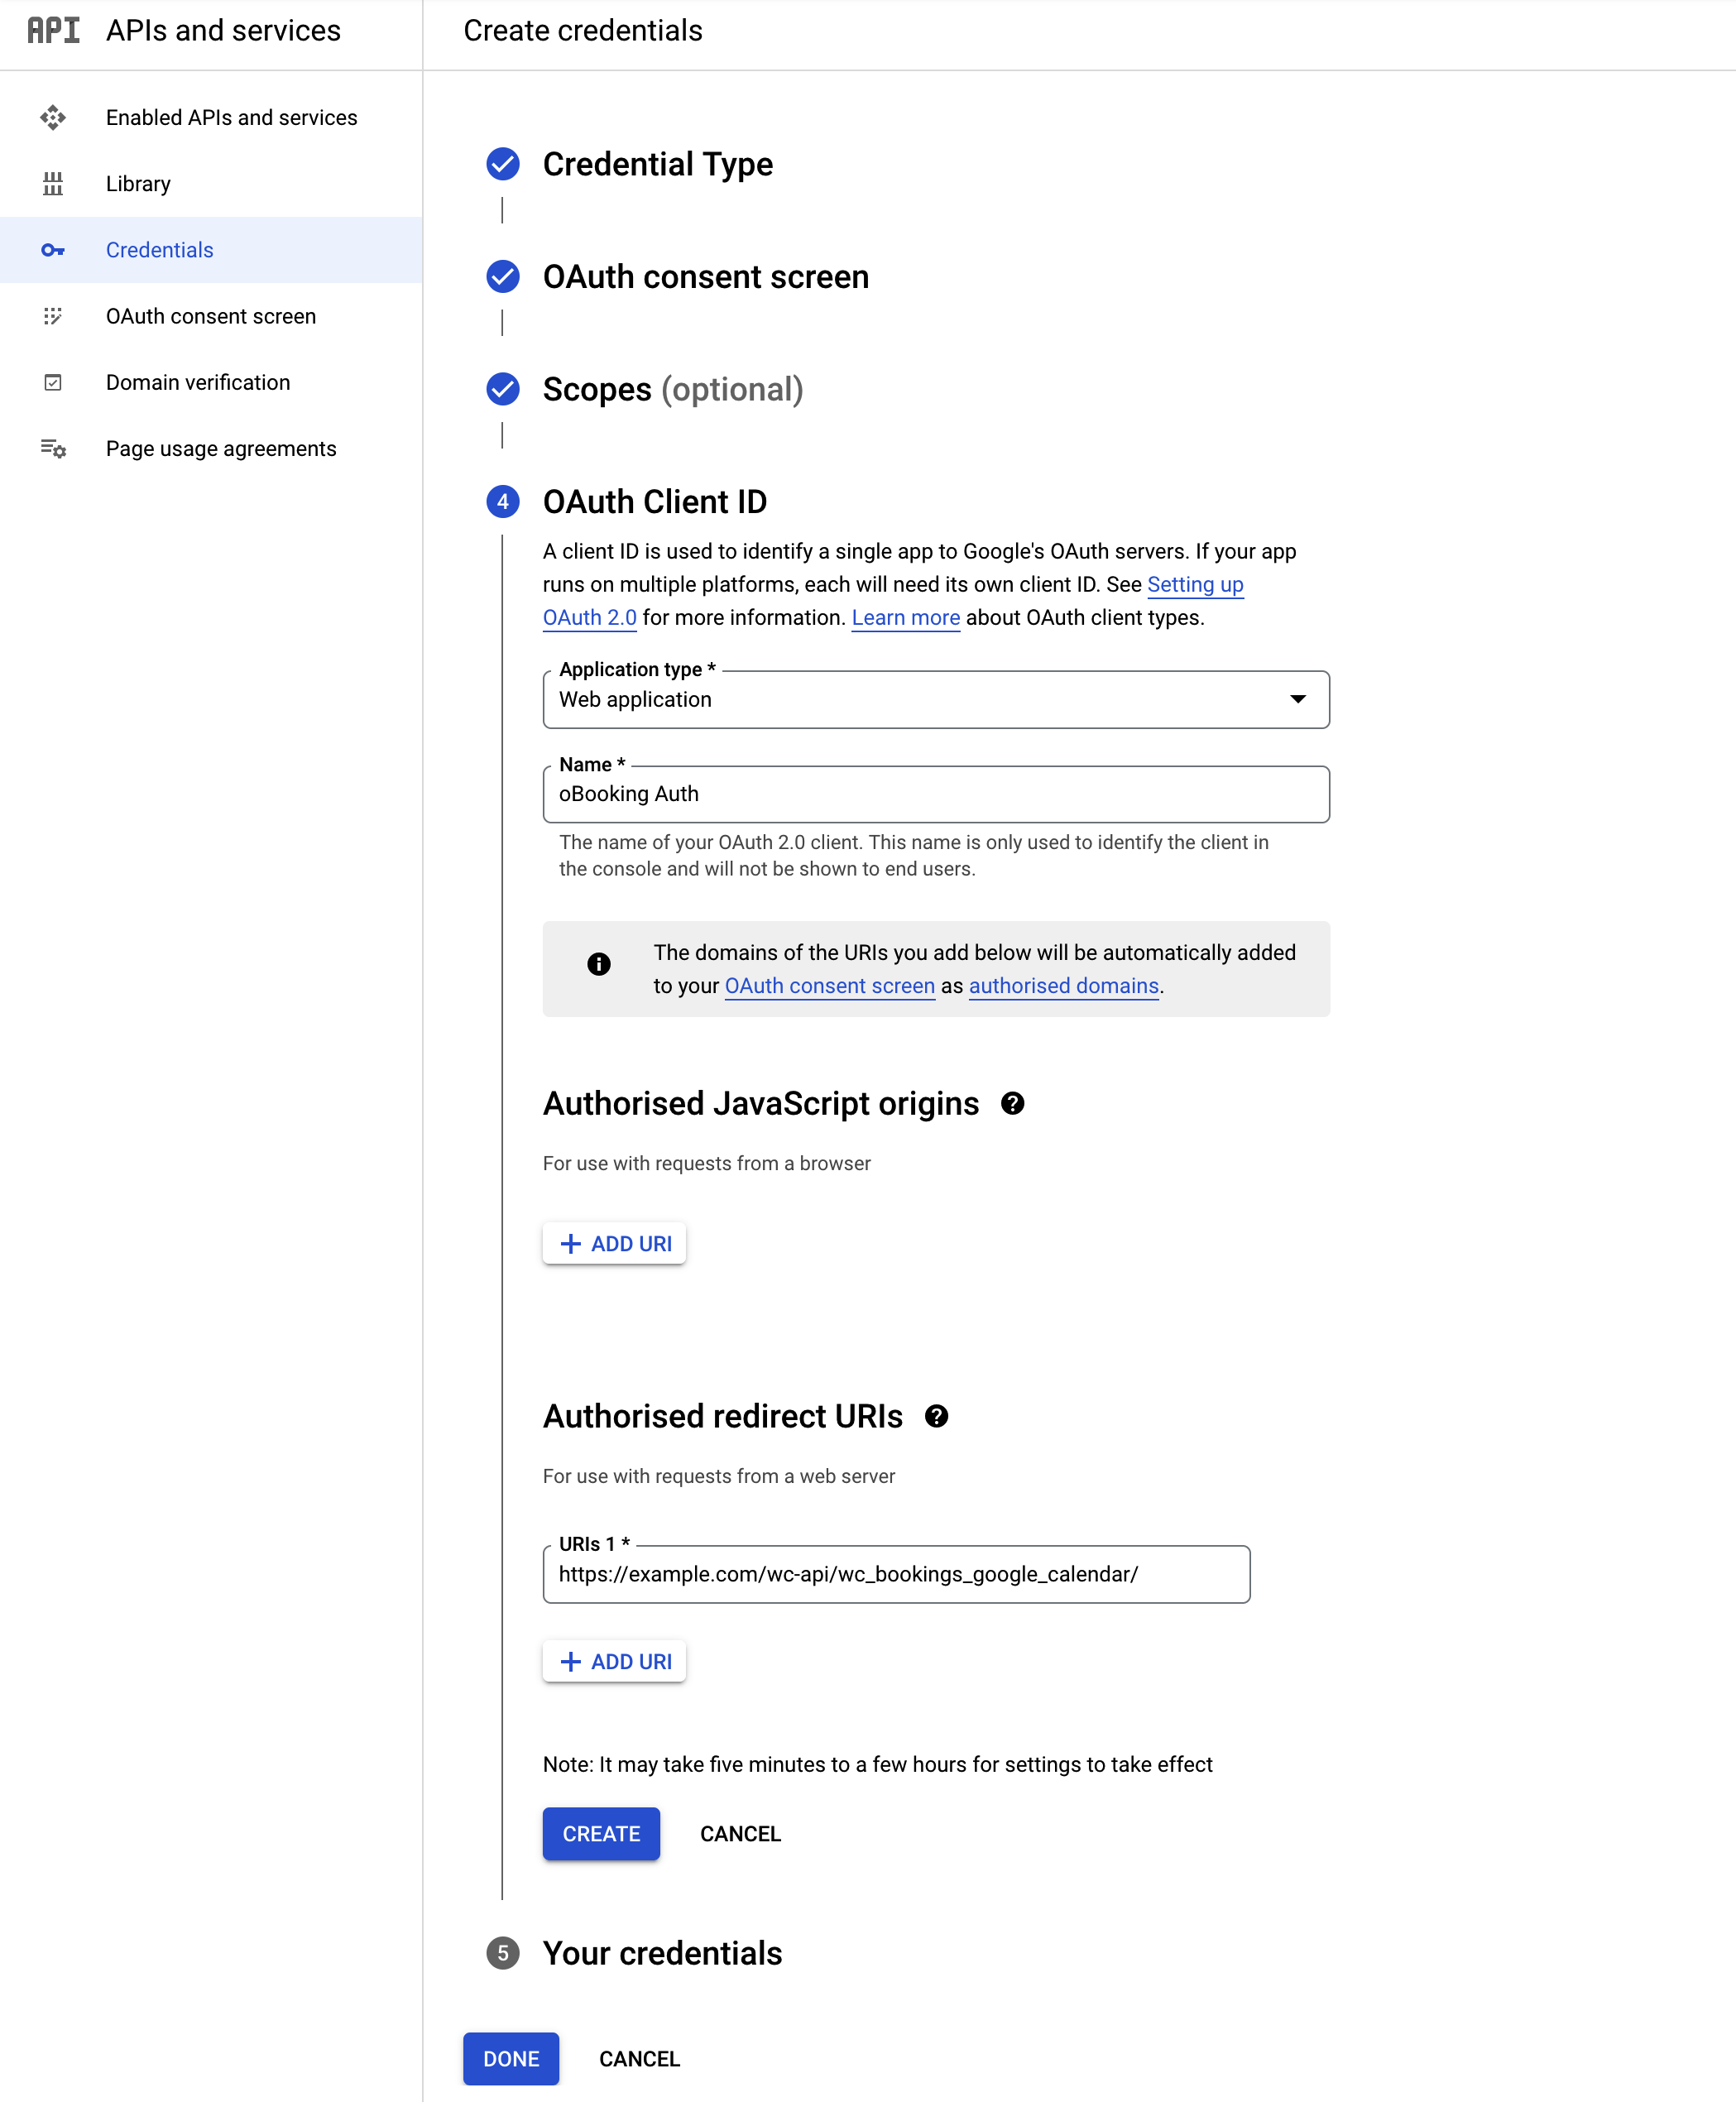
Step 7: OAuth Client ID
↑ Back to topIn the OAuth Clients ID section
- set Application Type to Web Application
- set Name to a reference for yourself (it’s not publicly visible anywhere)
- Leave Authorised JavaScript origins blank
- Set Authorised redirect URIs to
https://example.com/wc-api/wc_bookings_google_calendar/(replace example.com with the URL of your website) - Click Create
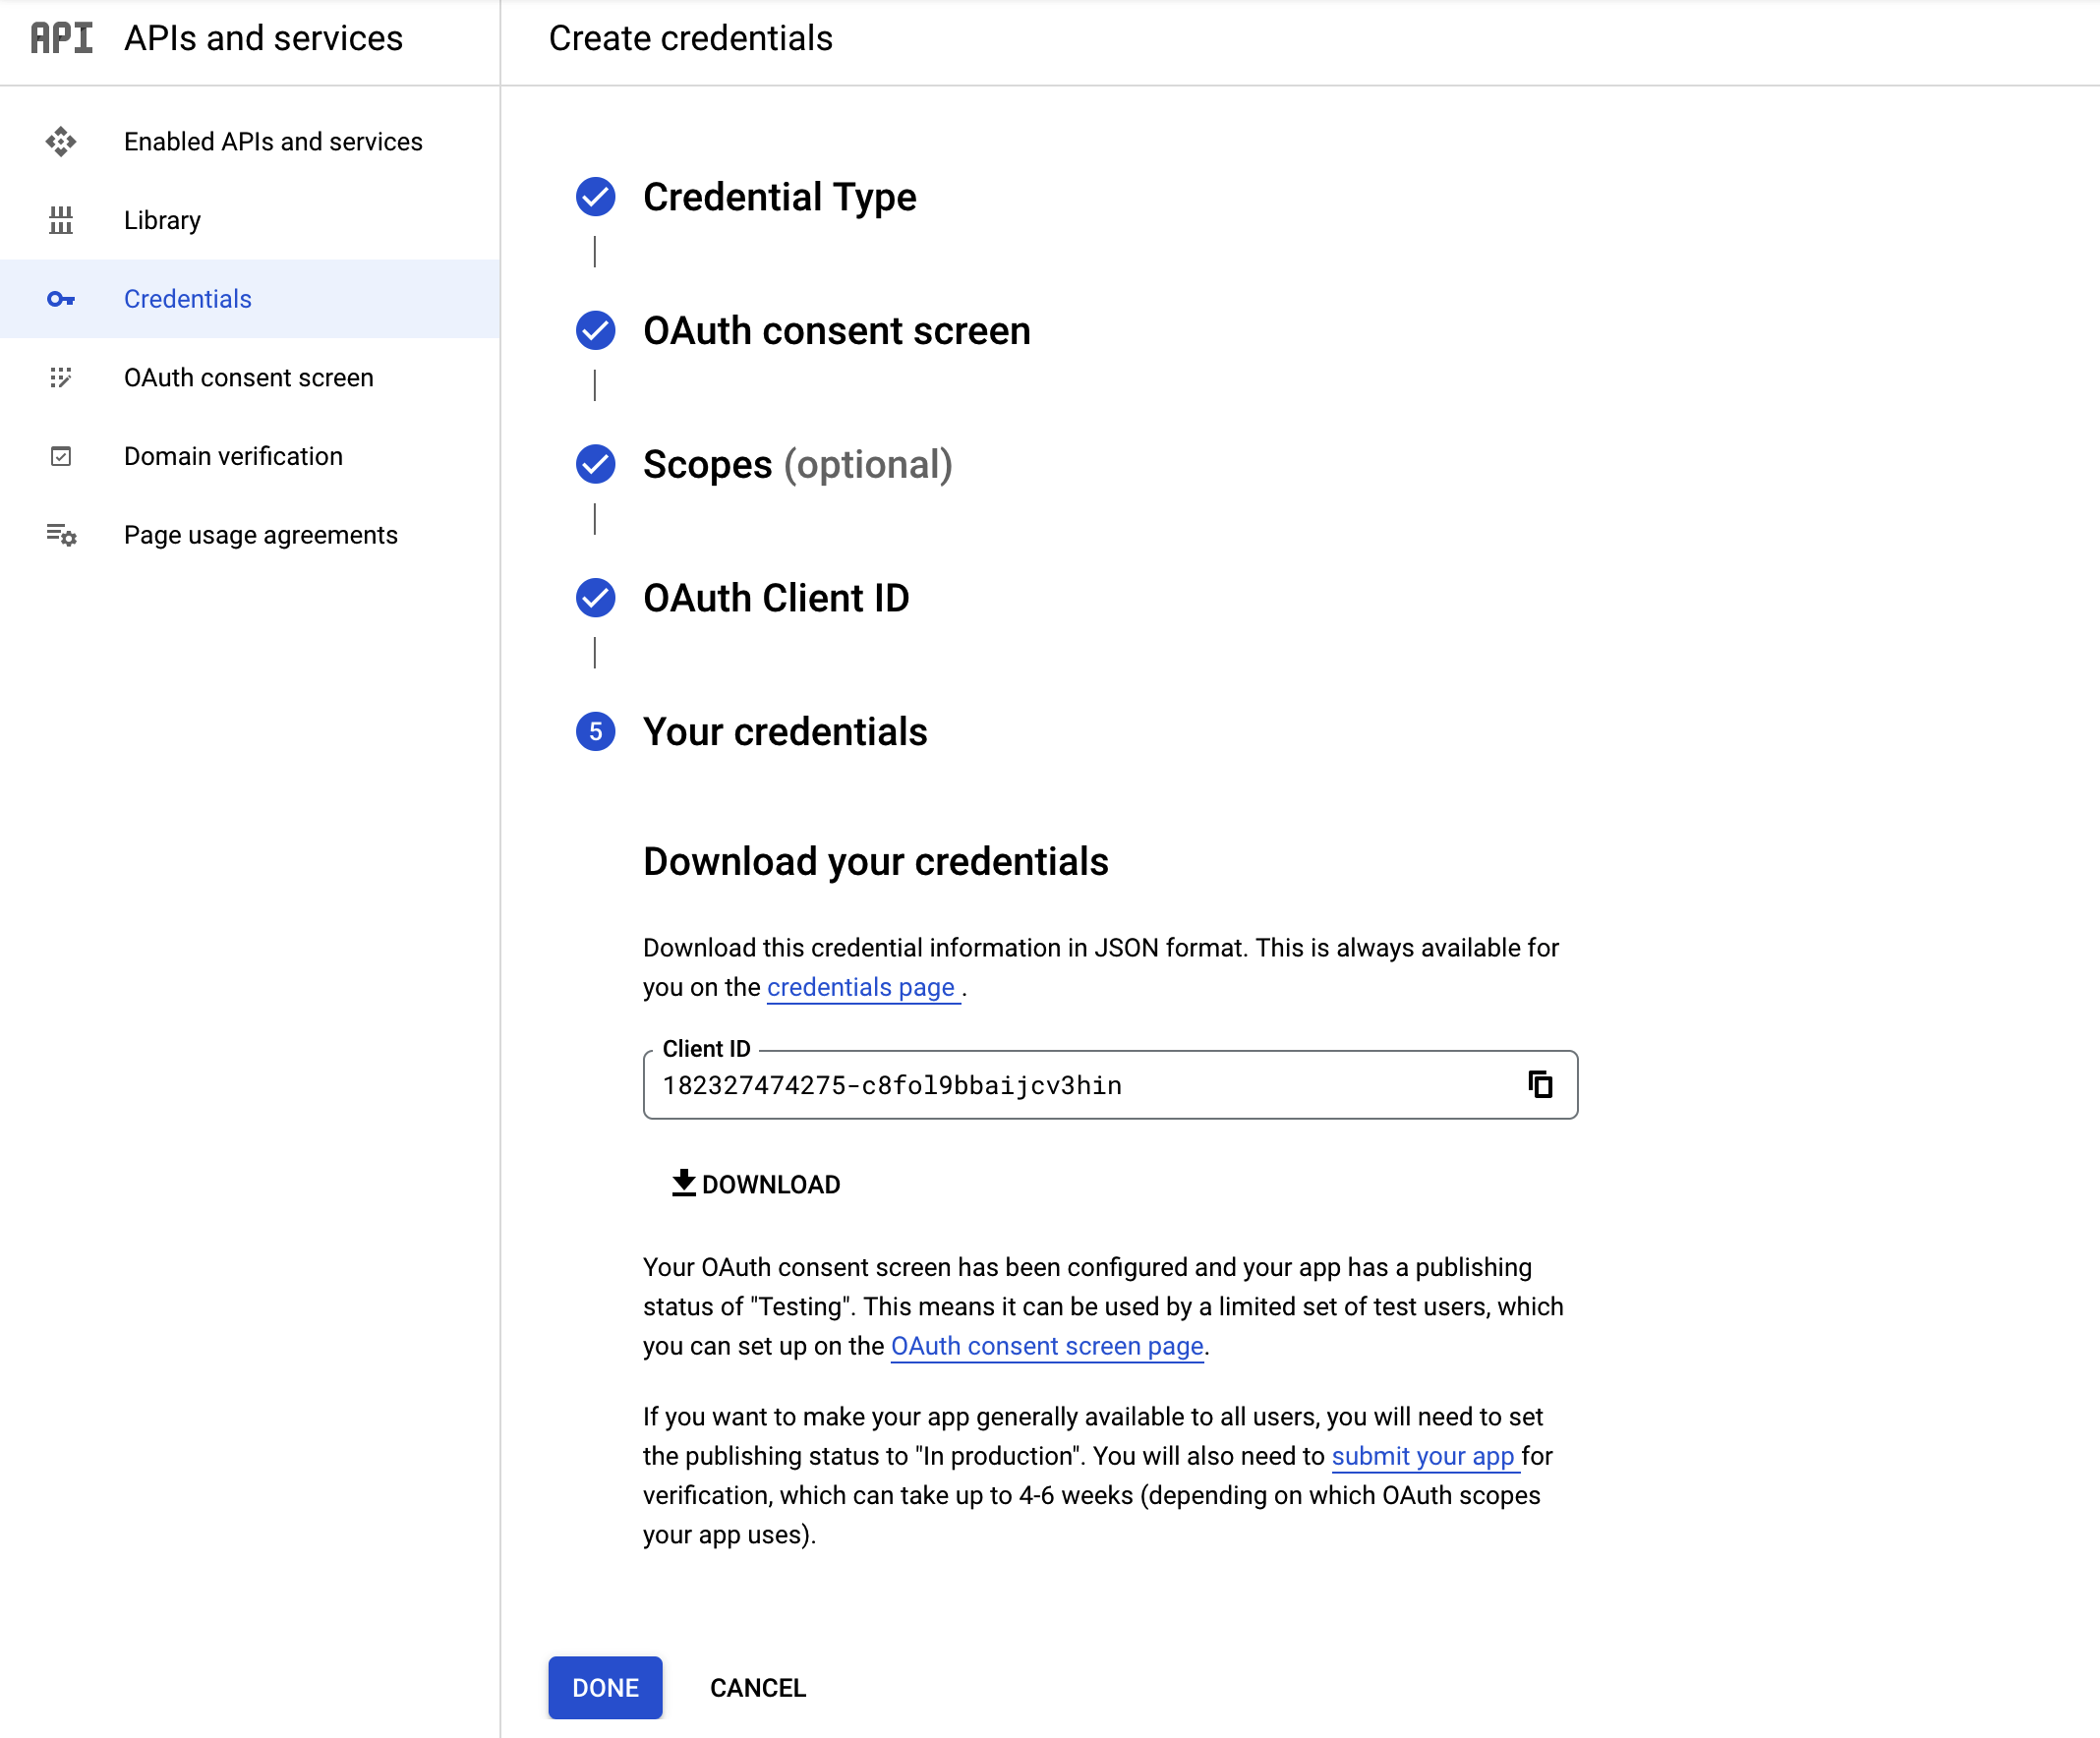
Step 8: Get Your Credentials
↑ Back to topIn this section, you are given an opportunity to copy yur Client ID to the clipboard, or download your credentials as a JSON File (which contains additional info you don’t need, but both the Client ID and Client Secret that you do.
Click Done.
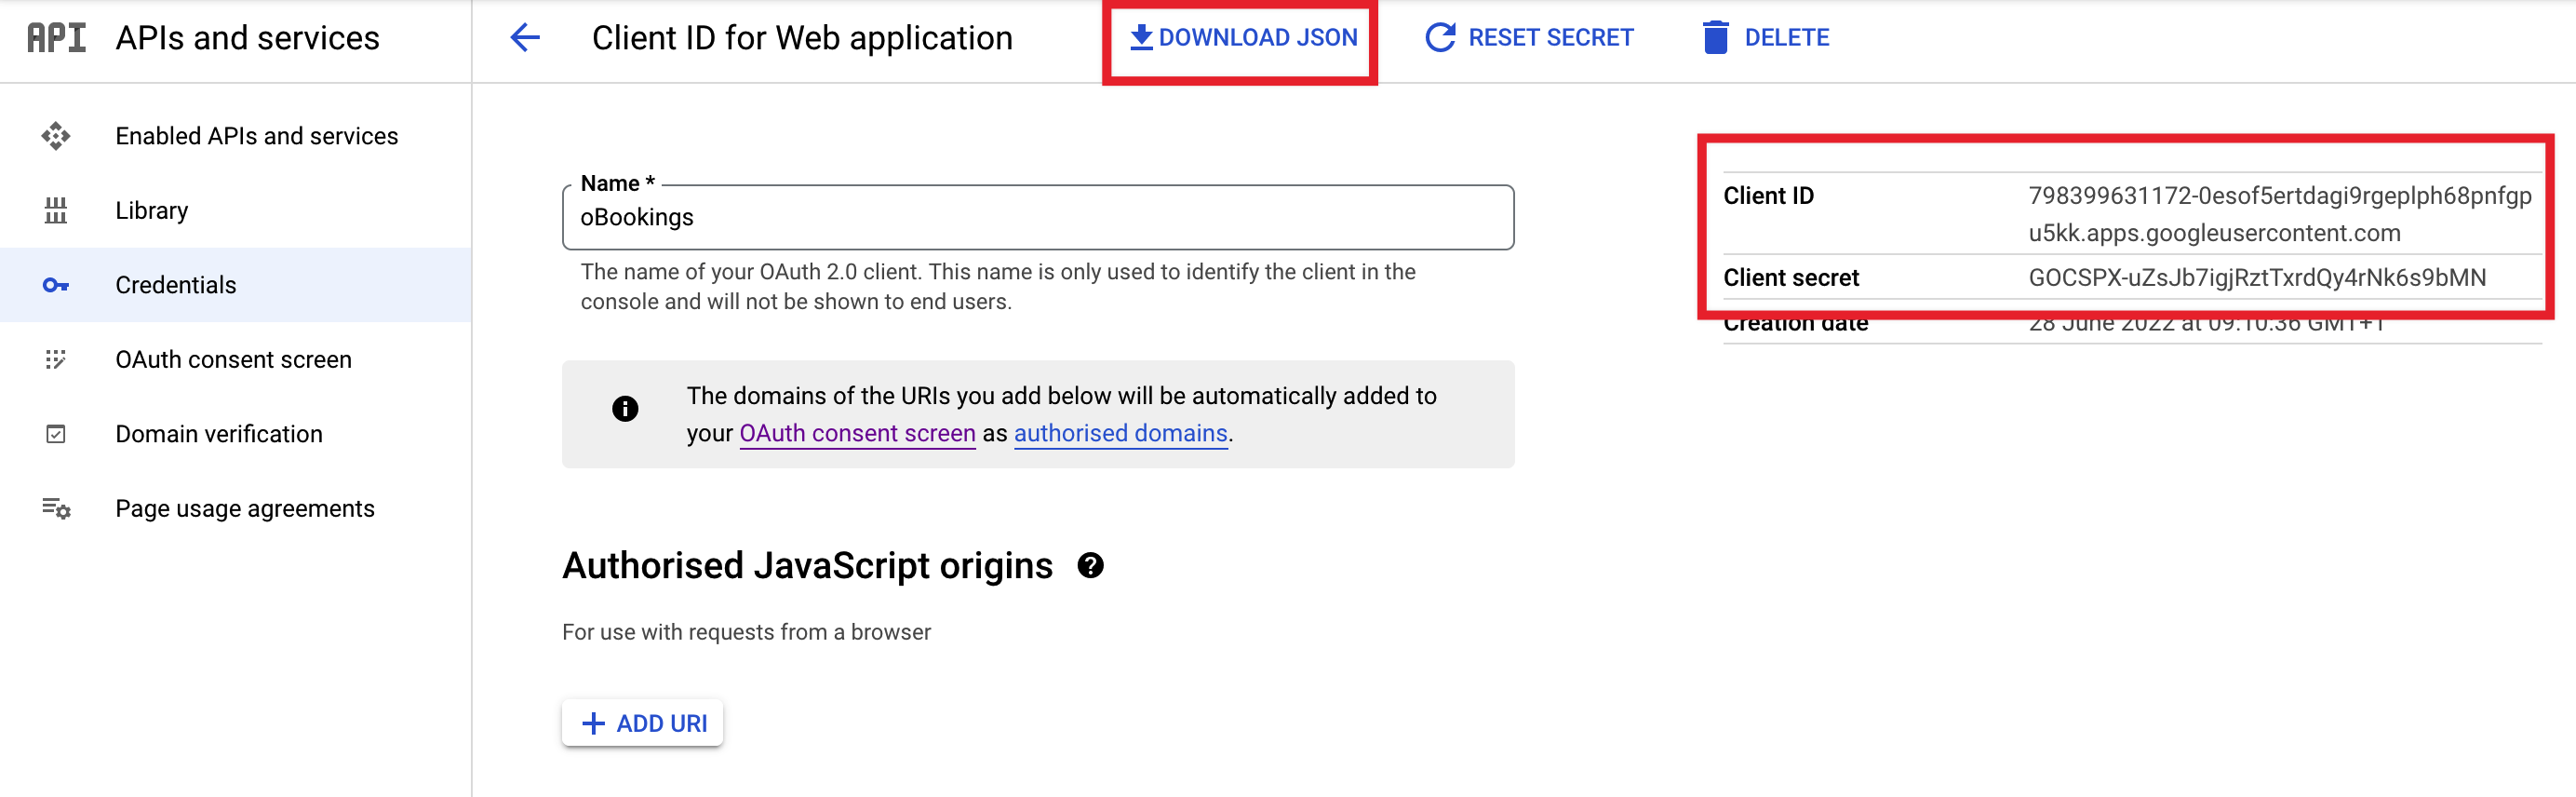
You can access the required credentials anytime by going to APIs and Services > Credentials, and clicking on the relevant OAuth 2.0 Client ID, from where you can copy the credentials from the top-right of the screen.
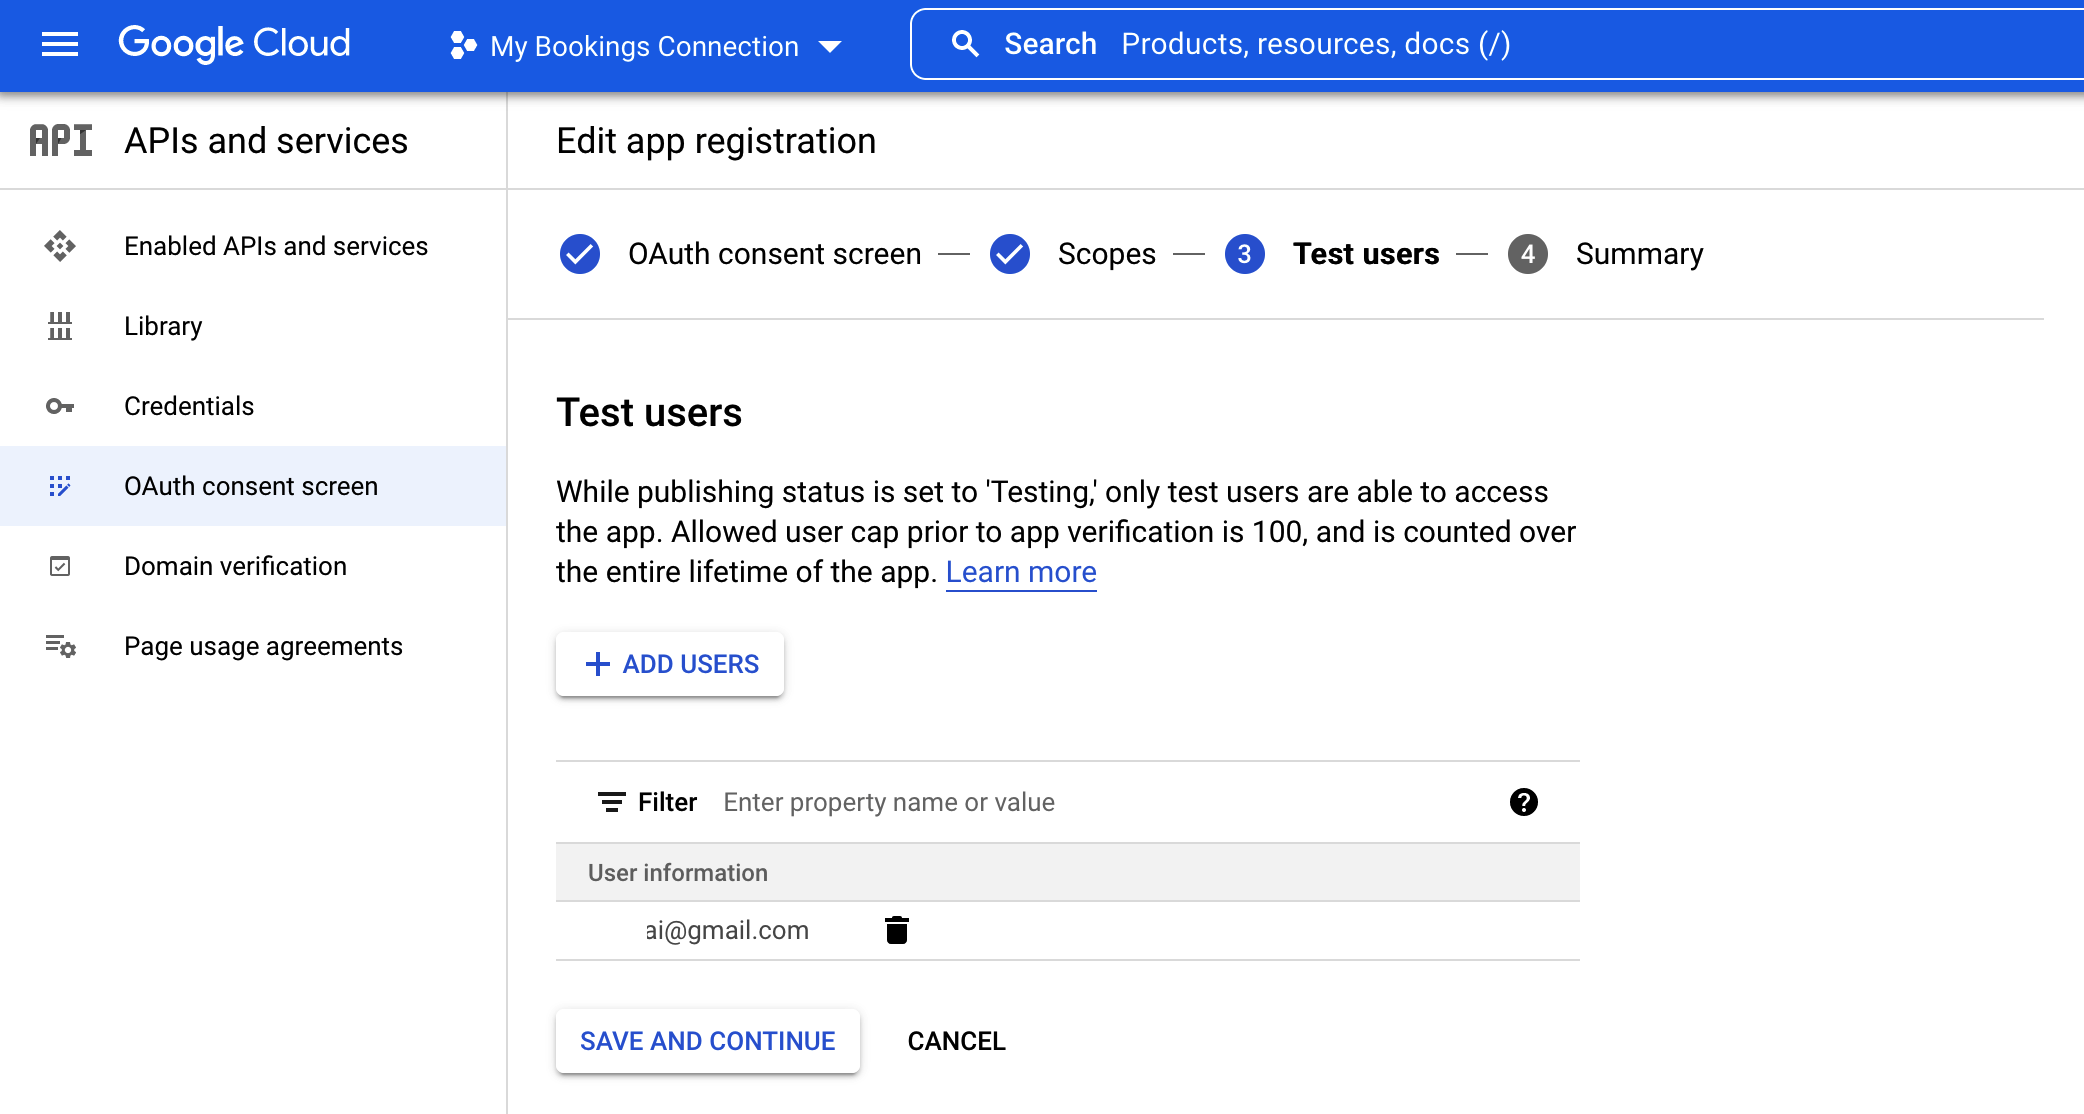
If the publishing status of your app is set to Testing then you’ll need to add Test Users.
- Add at minimum your own email address. You can do so from under OAuth Consent Screen > Test Users.
- Click the Add Users button and type the email address of the account that’s allowed to use this application.
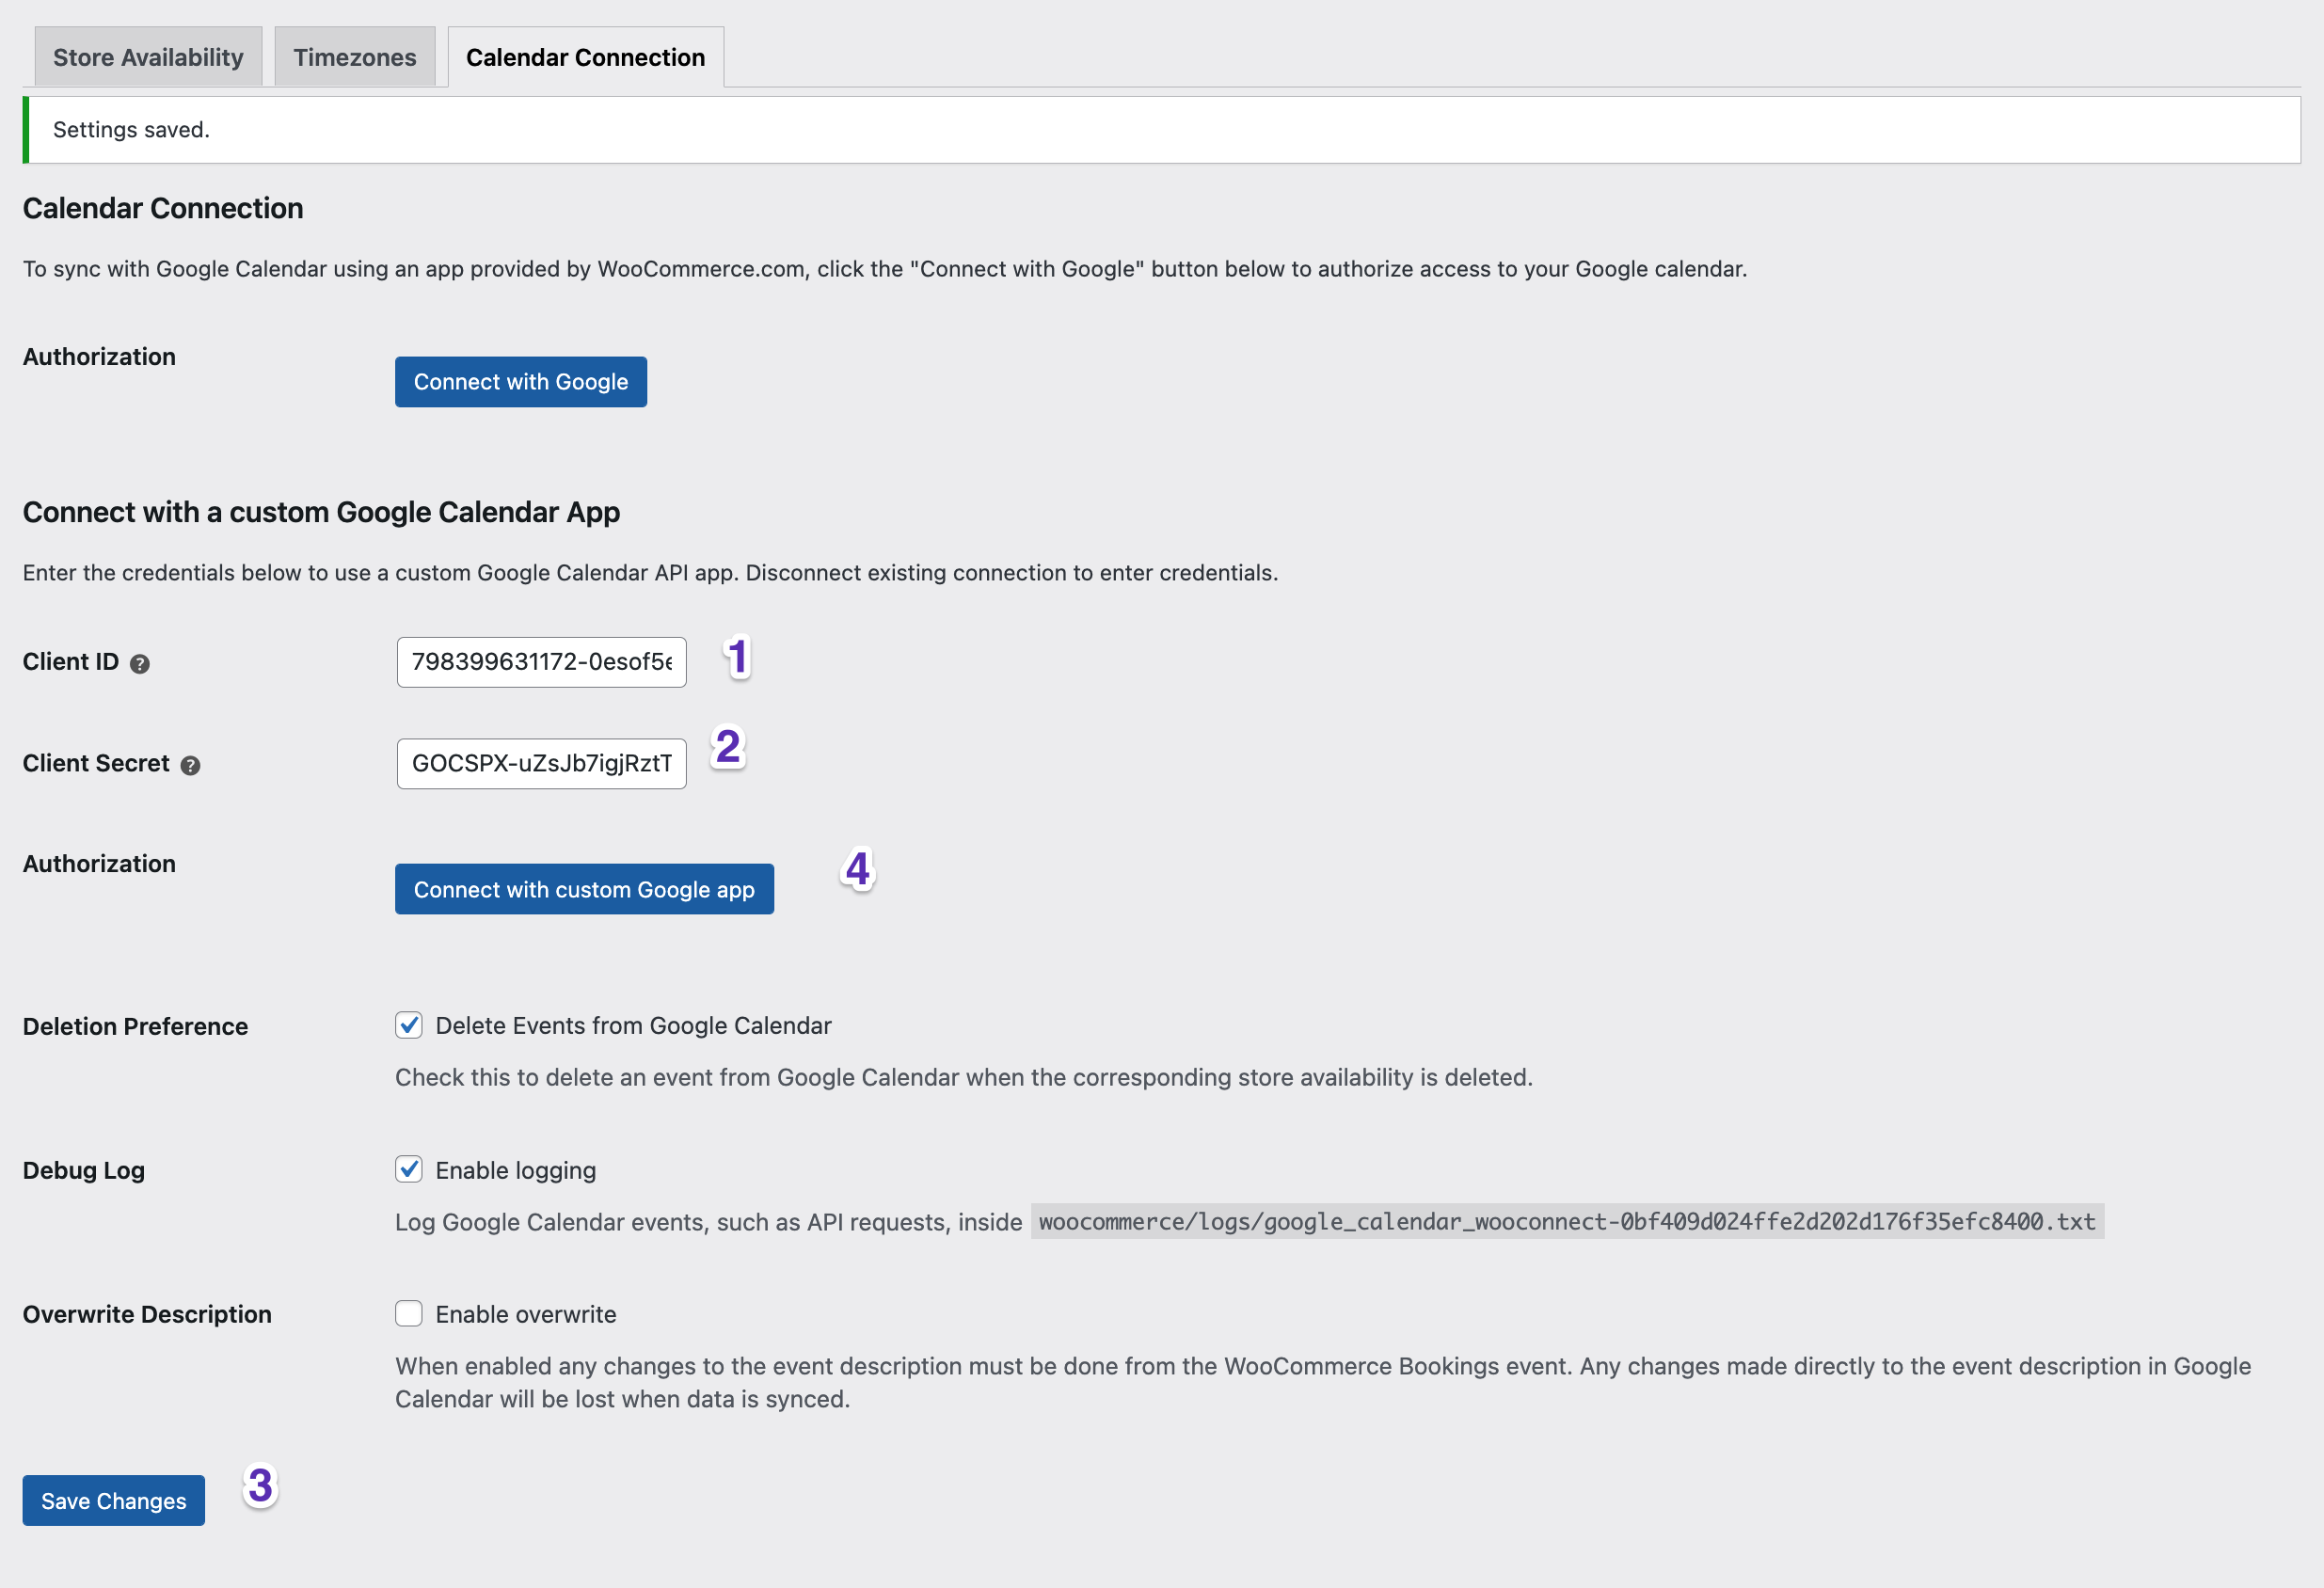
Step 9: Add Credentials to your website
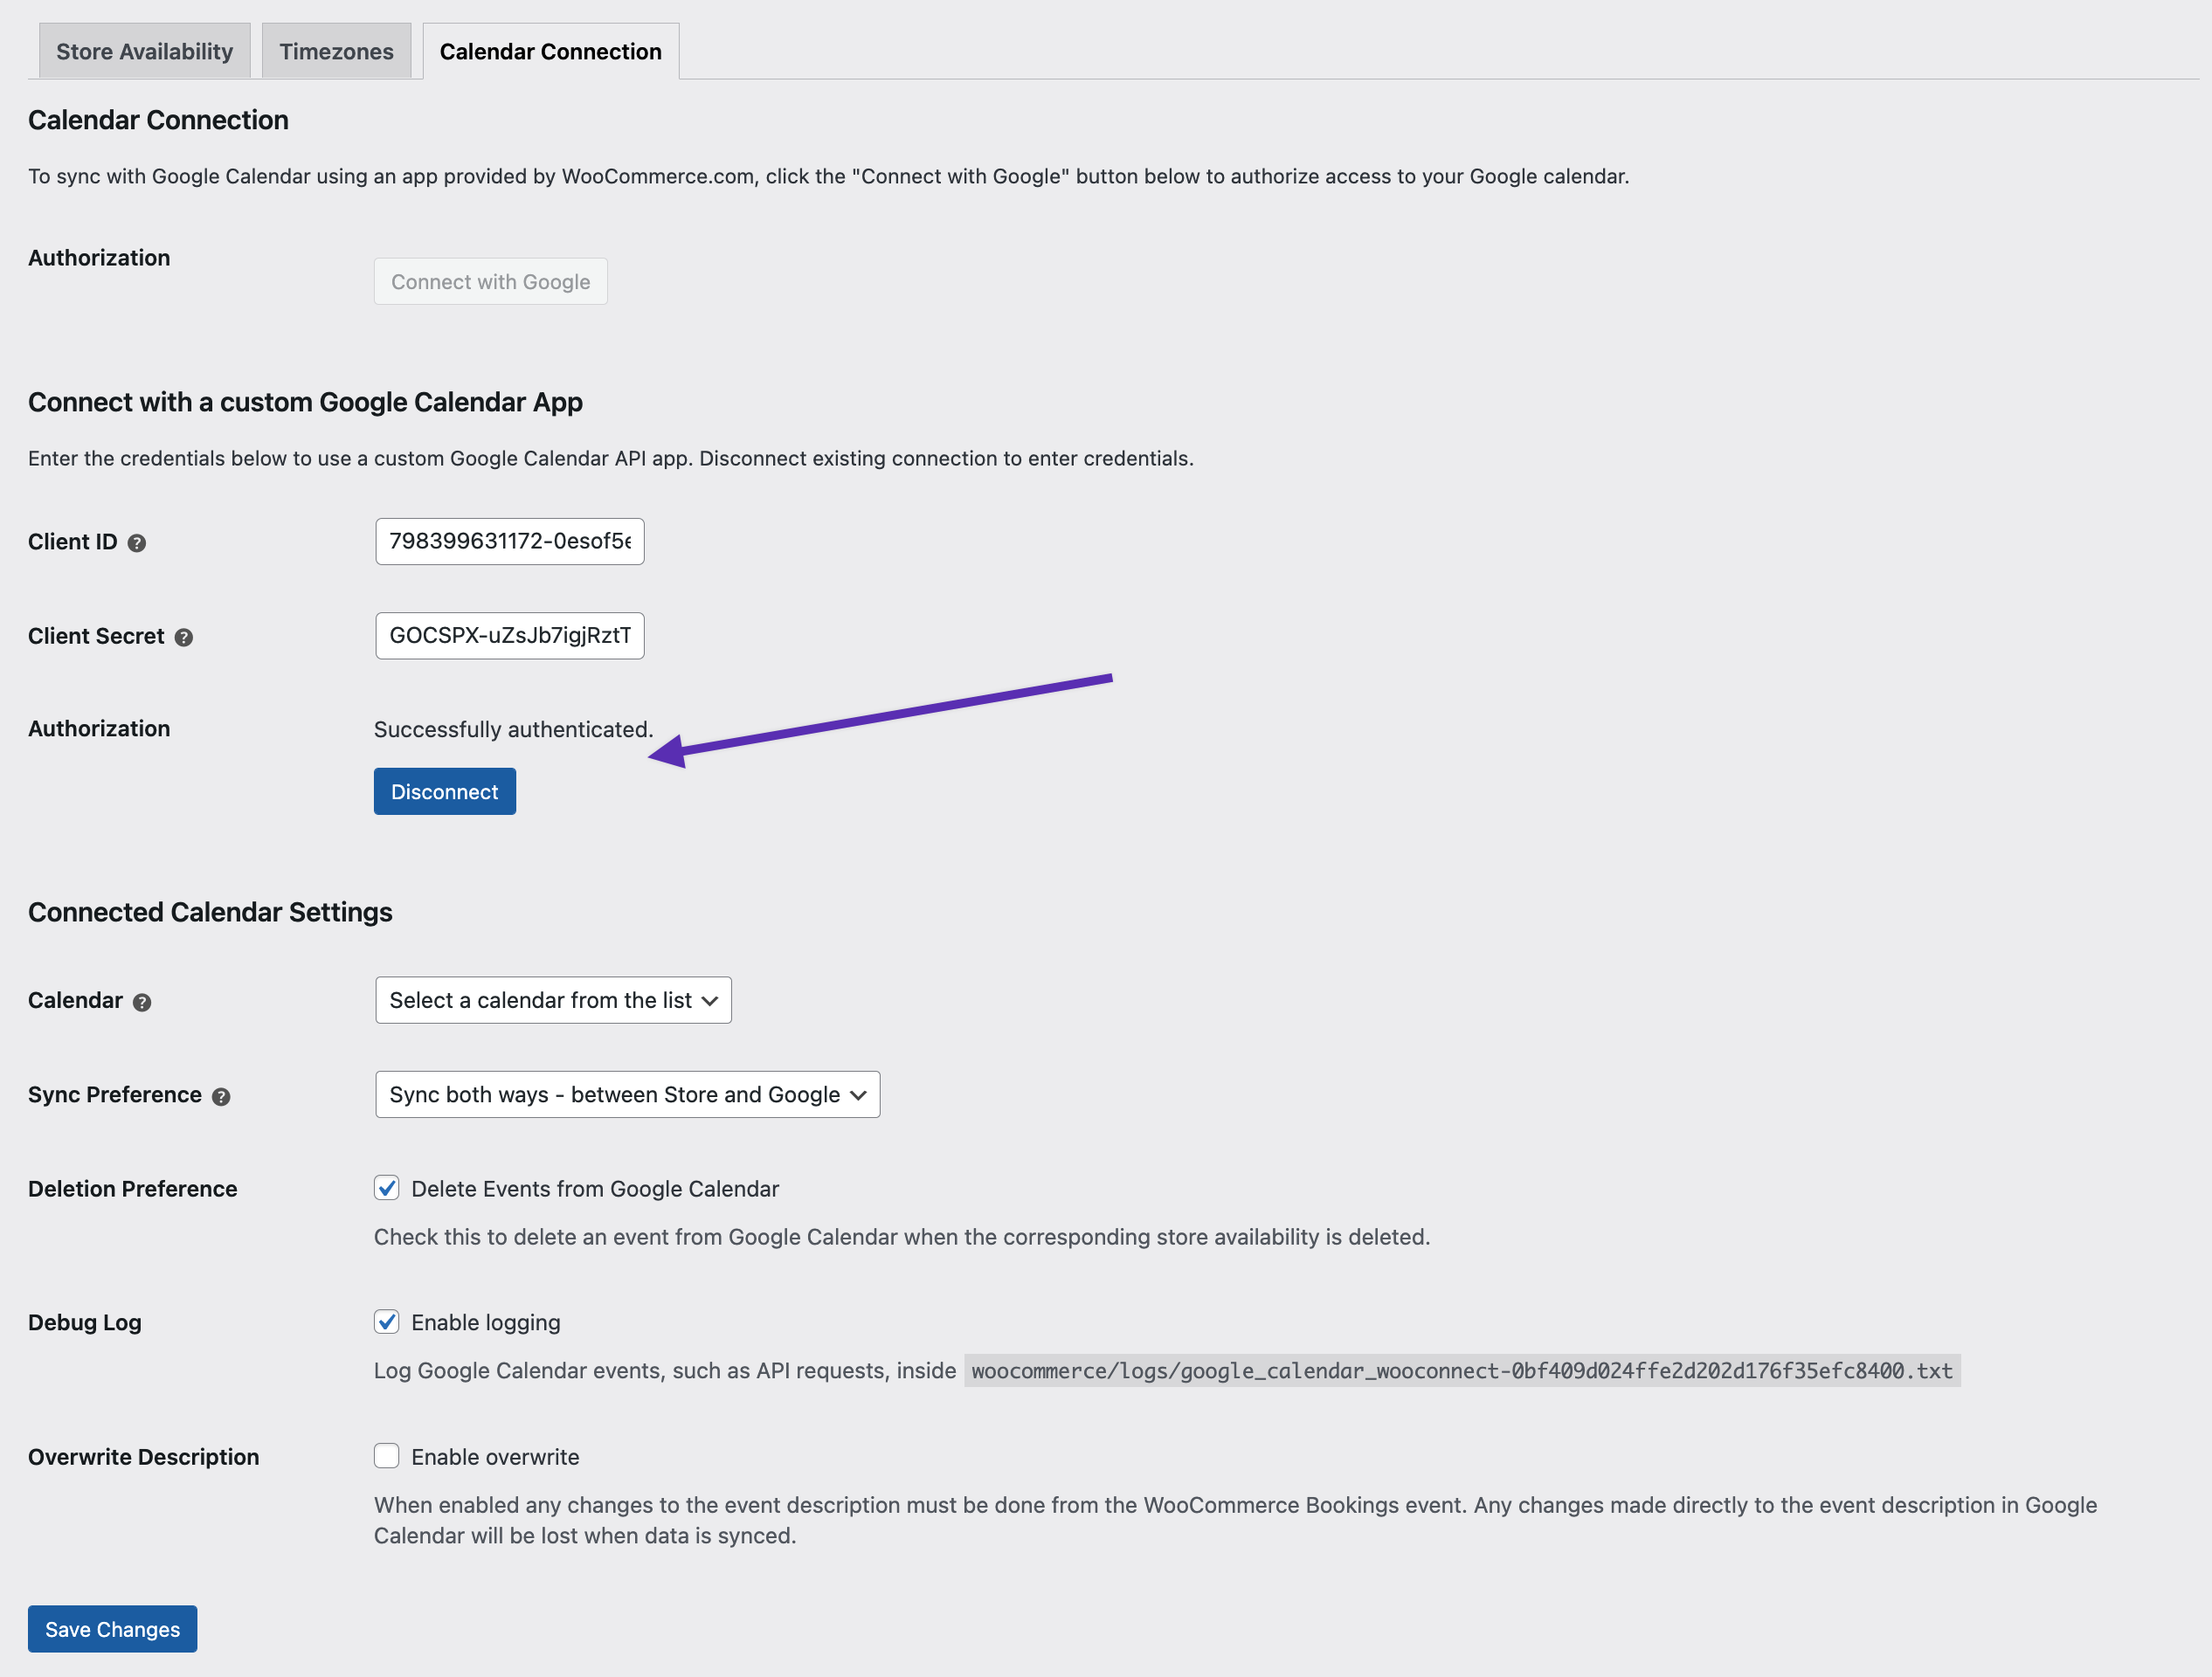
↑ Back to topWith your credentials ready to copy, head to your store at Bookings > Settings > Calendar Connection.
- In the Connect with a custom Google Calendar App section, paste the Client ID and
- the Client Secret in their respective fields
- Next, at the bottom of the page, click the Save Changes button first
- This adds a new Connect with Custom Google App button below the credentials.
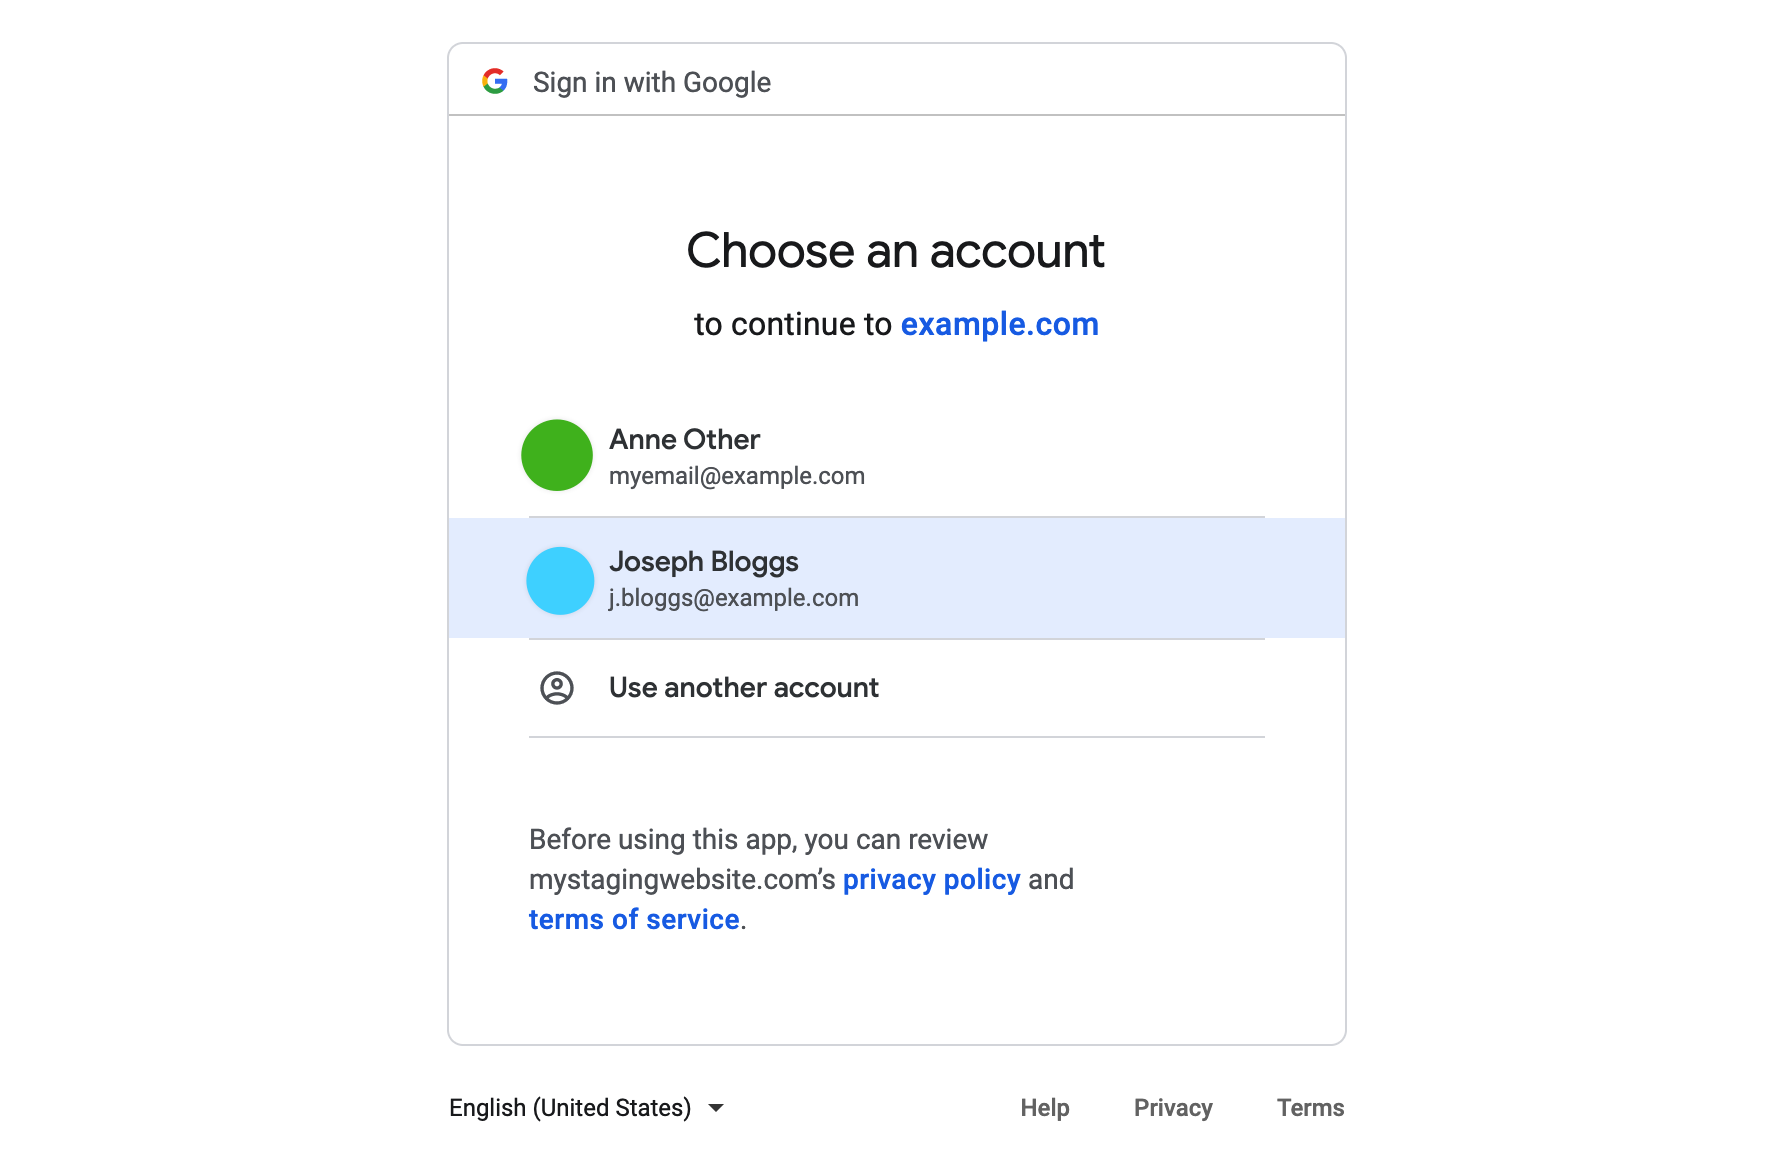
Step 10: Authorize with Google
↑ Back to topClicking Connect with Custom Google App takes you to a different screen to choose a Google account.
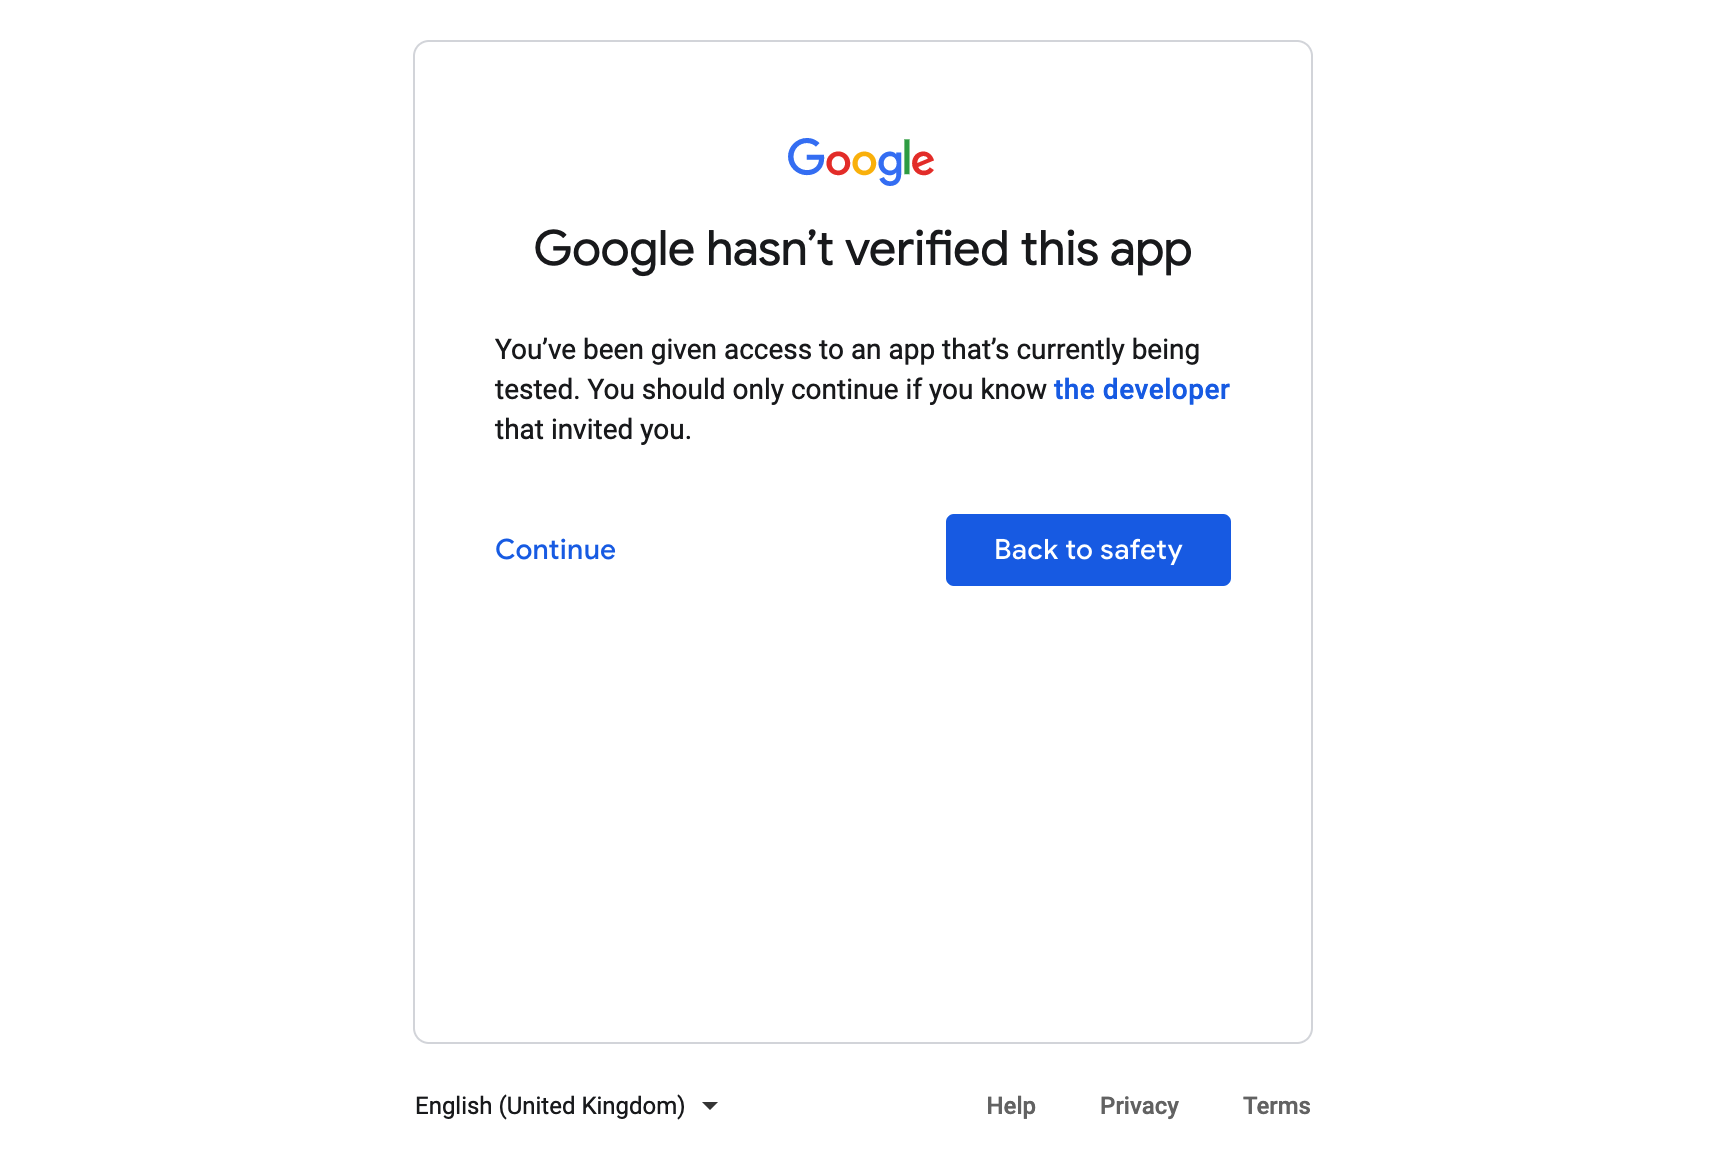
There will be a warning about the app not being verified, you can read more about it here. Click Continue.
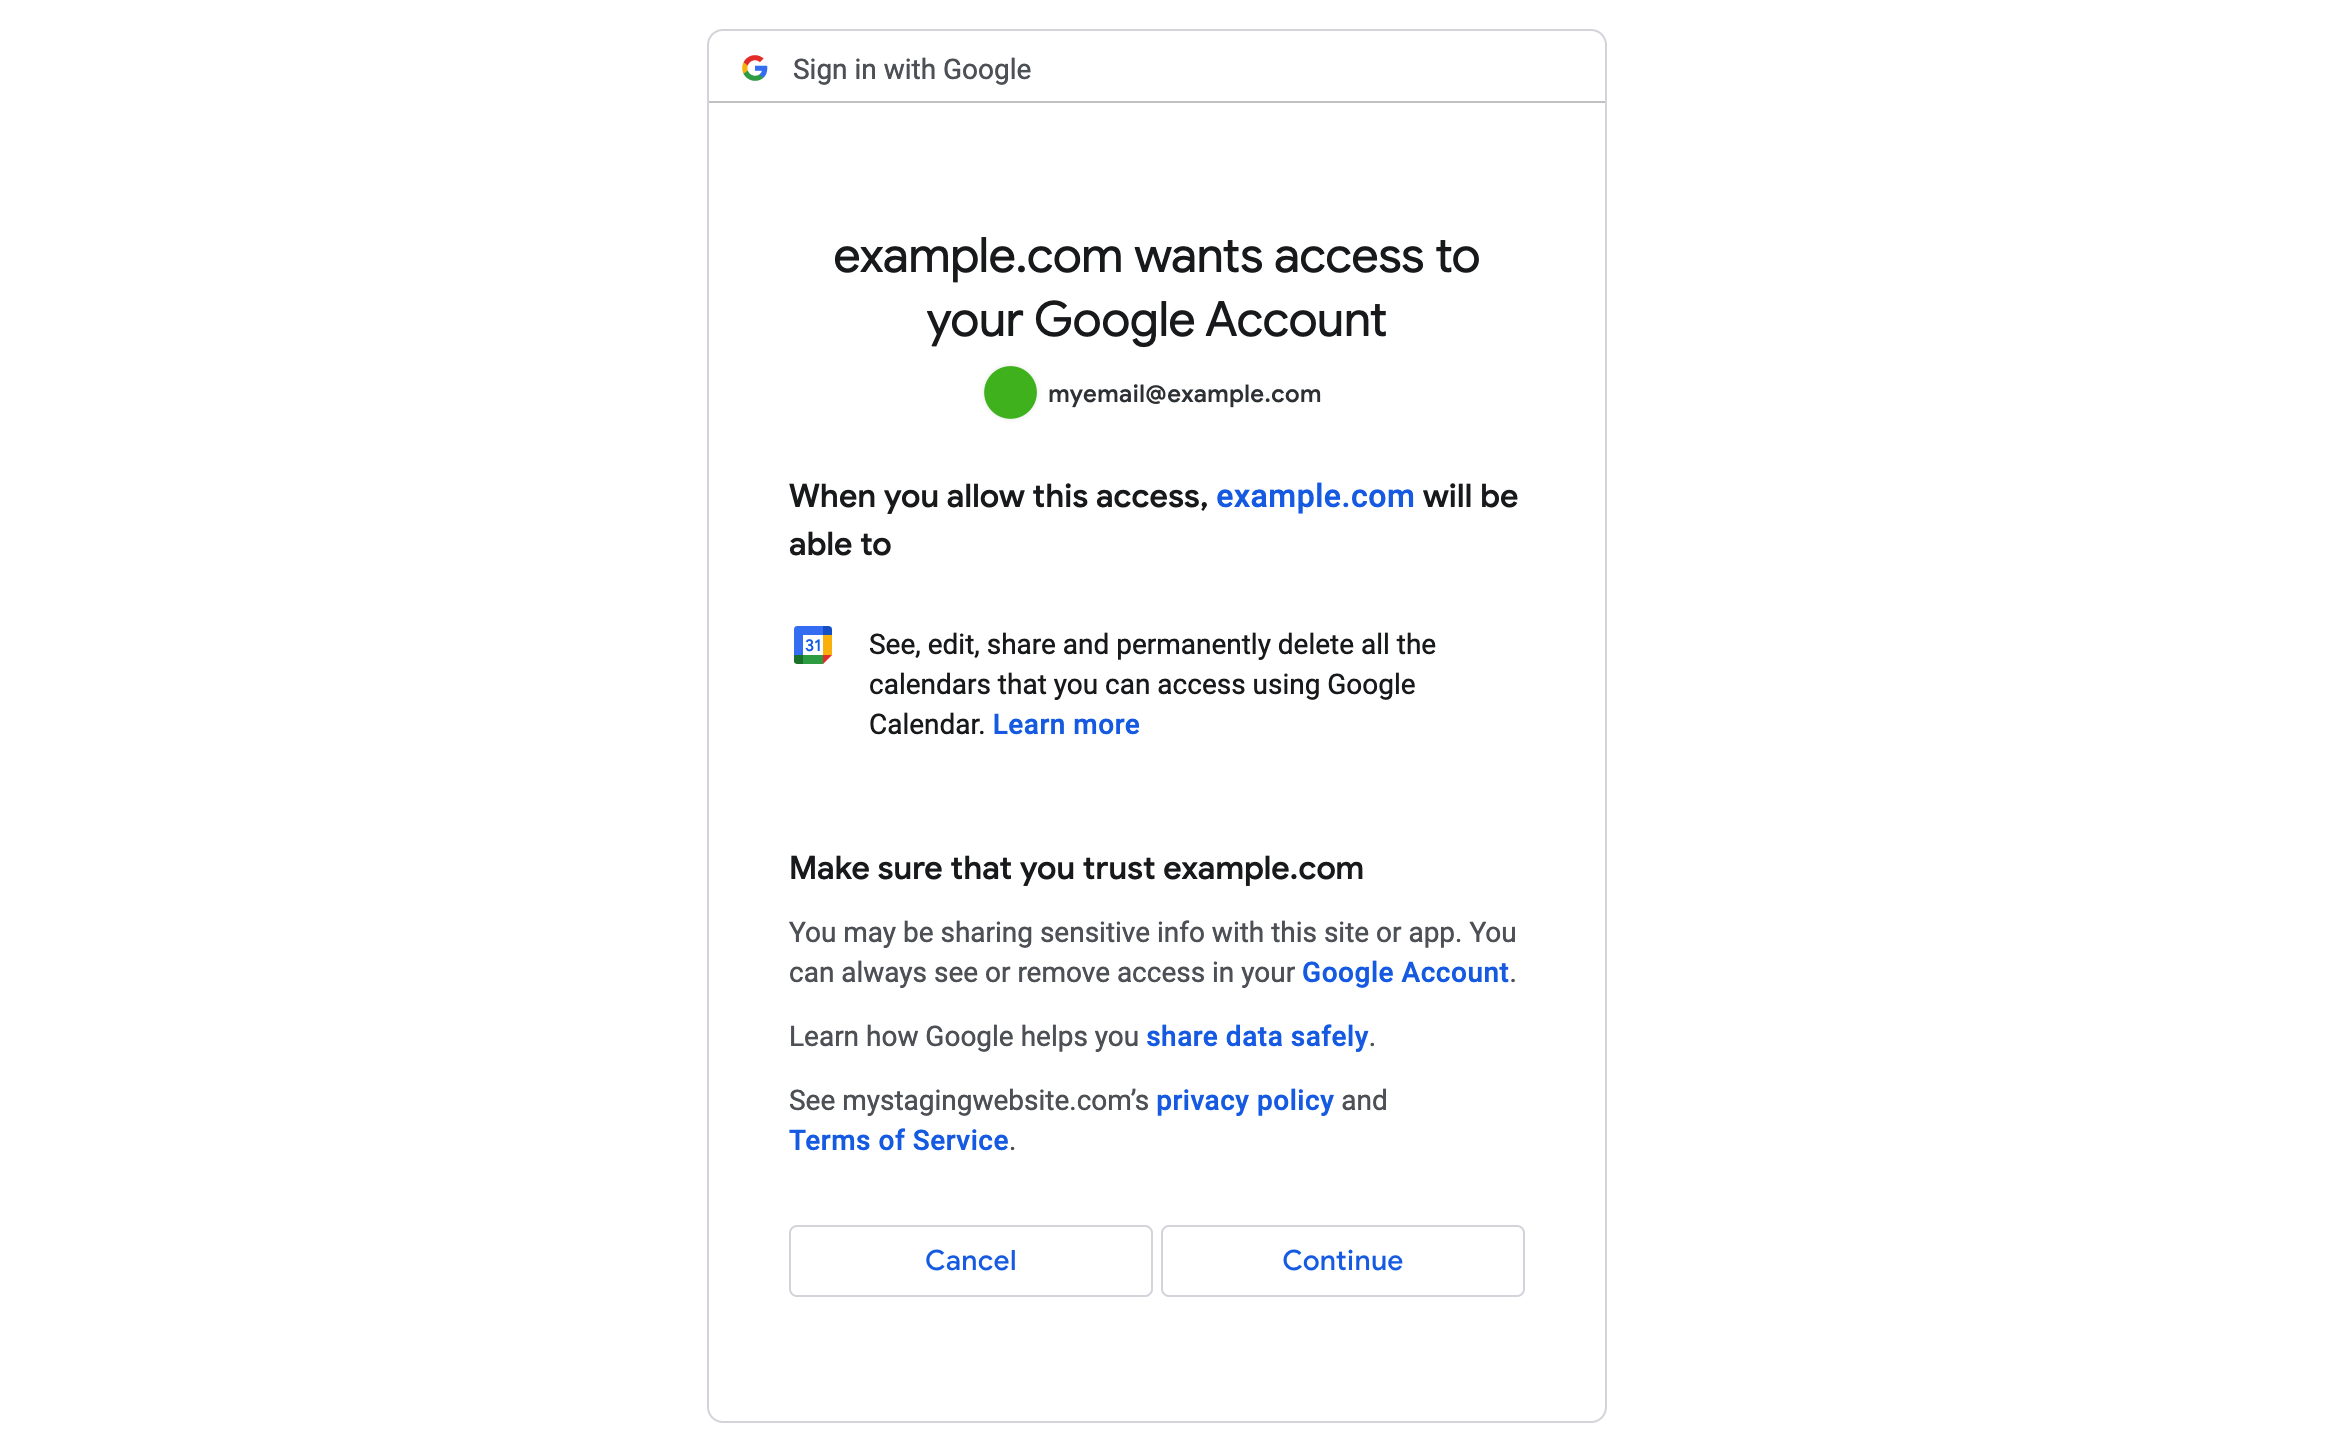
You will see a popup that reflects the information you entered in the Setup OAuth Consent Screen section to grant access to your calendar. Click Continue.
You will then be redirected back to your site and a Successfully authenticated message should be visible above the button that has now changed to Disconnect.
Step 11: Set calendar and Sync Preference
↑ Back to topYou can follow the steps here to finish the setup and learn more about the integration with your Google Calendar.