This scenario will walk you through how to use WooCommerce and WooCommerce Bookings to rent out items of varying quantities and variation, such as the color of the equipment.
Scenario
↑ Back to topA party supply store rents out various equipment for parties. One of the items is chairs. They have chairs in varying colors and varying quantities of each color. They offer customers to select the color and number of chairs that they wish to rent for their event. Each chair is $1.50 each.
For this use-case Persons and Resources can be leveraged in a bit of an unconventional method to accomplish the goals of the party supply store.
Products Used
↑ Back to topSetup and Configuration
↑ Back to topIn this use case, we will first set up the Resources to define each color of the set of chairs, and set the quantity available for each color. For example, 200 black chairs and 200 gold chairs.
Configure the Resources
↑ Back to top- In the sidebar of your WordPress Admin, click on Bookings > Resources.
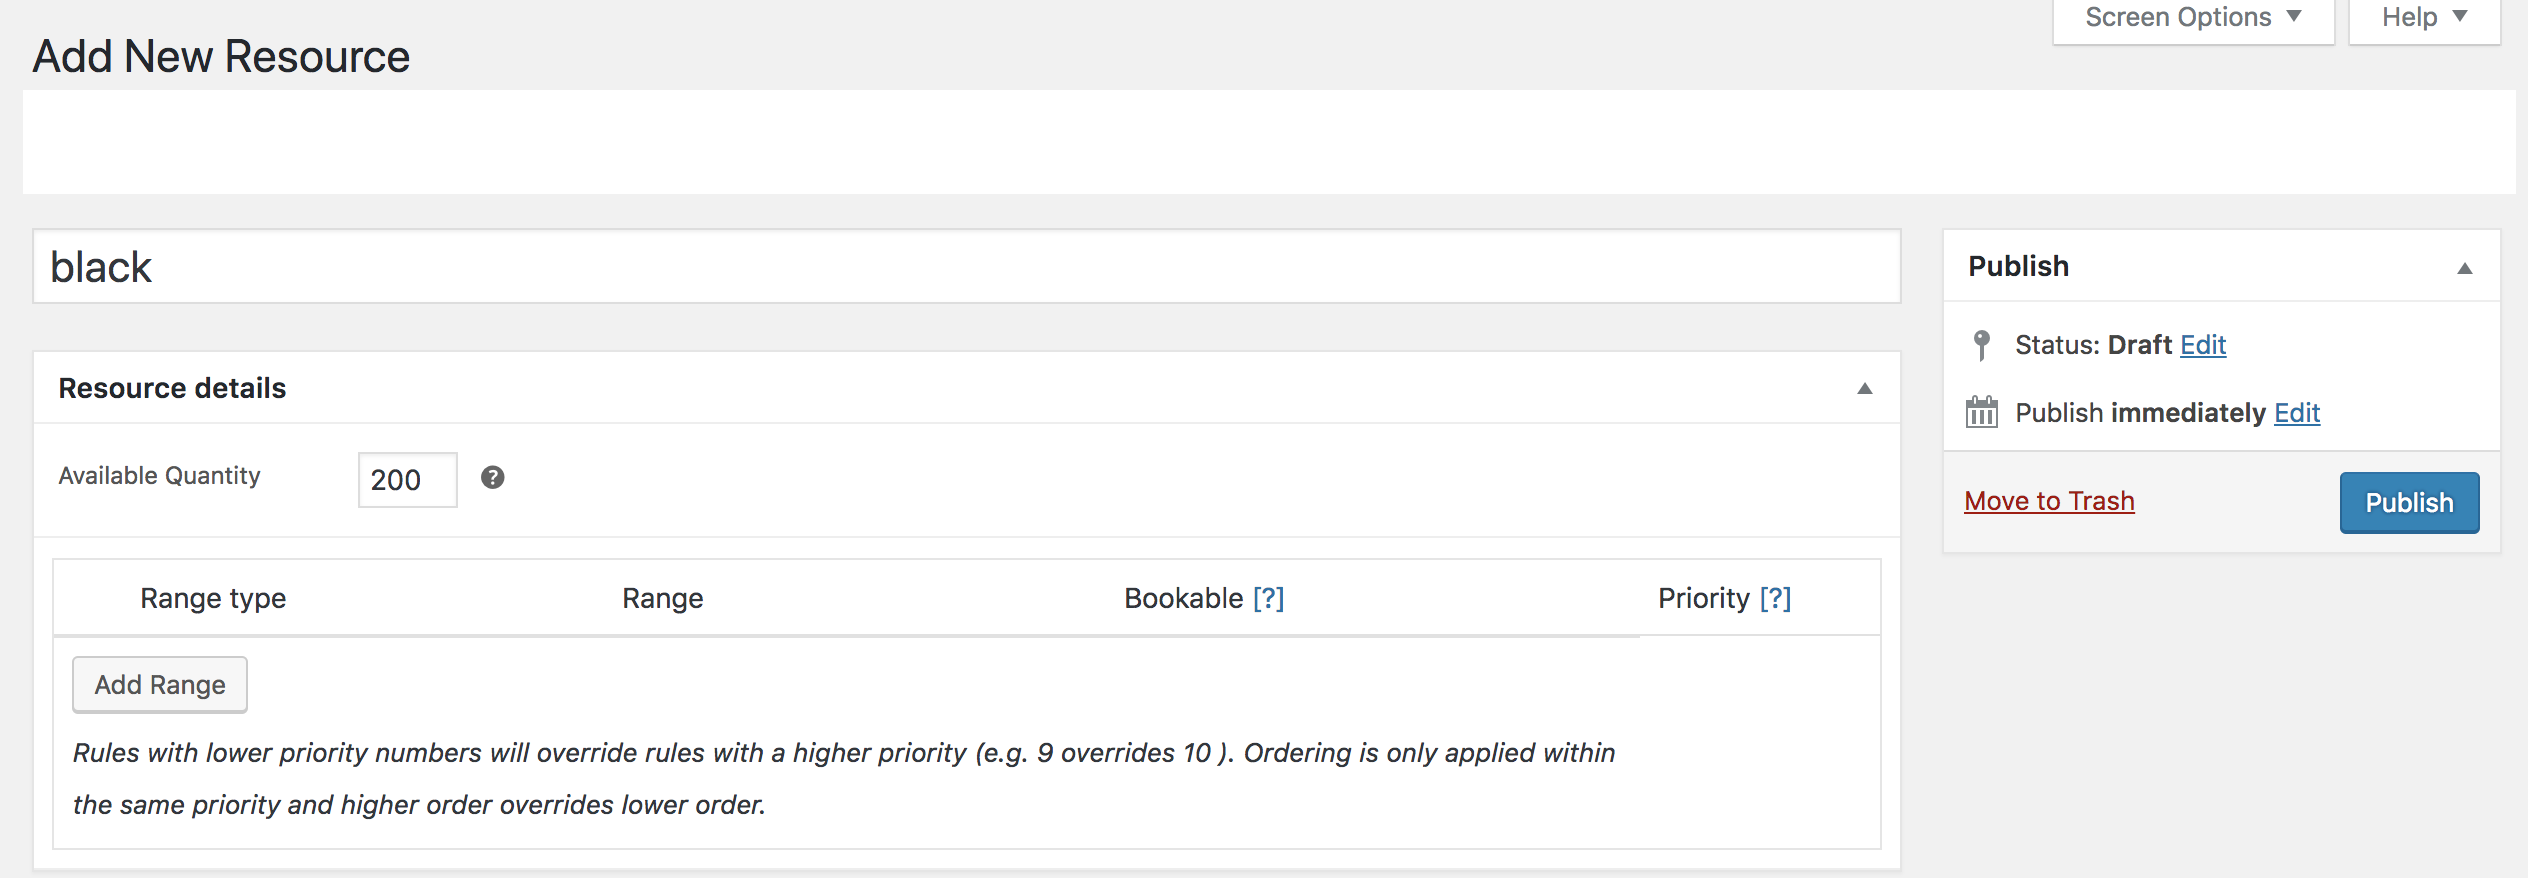
- Click the Add Resource button. This will take you to a Add New Resource page.
- In our example, we will name the resource
Black Chairs. - In our example, we offer 200 black chairs. Add a quantity of
200in the Availability Quantity field. - Click Publish.
- Go through steps 2-5 to add more colored chairs and their quantity, such as 200 gold chairs, 150 white chairs, etc.
Create a Bookable Product
↑ Back to topNow that we have set up our Resources, let’s create the bookable product.
- Go to WooCommerce > Products > Add New.
- Scroll down to Product Data and select Bookable Product from the dropdown.
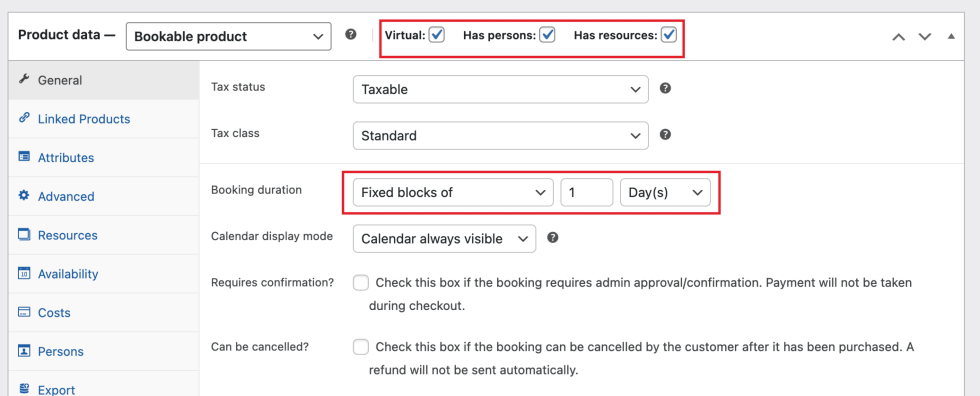
- In our example, the rental company only offers pickup. Tick the box for Virtual since chairs are picked up by customers and require no shipping.
- Tick the box for Has Persons since the number of persons are used to control the number of chairs available.
- Tick the box for Has Resources since resources are used to present color choices to customers.
- In the General tab, set Booking Duration to
Fixed Blocks of 1 Dayfor booking duration, since chairs are rented by the day. - Publish your product to save your work.
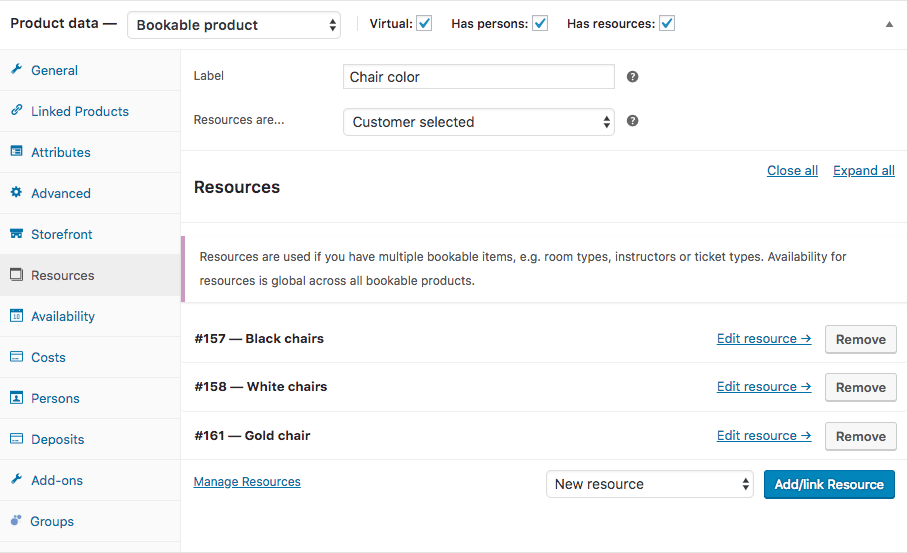
Set up the Resources Tab
↑ Back to top- In the Resources tab, enter an appropriate name under the Label field (such as Chair Color), and set Resources are… to
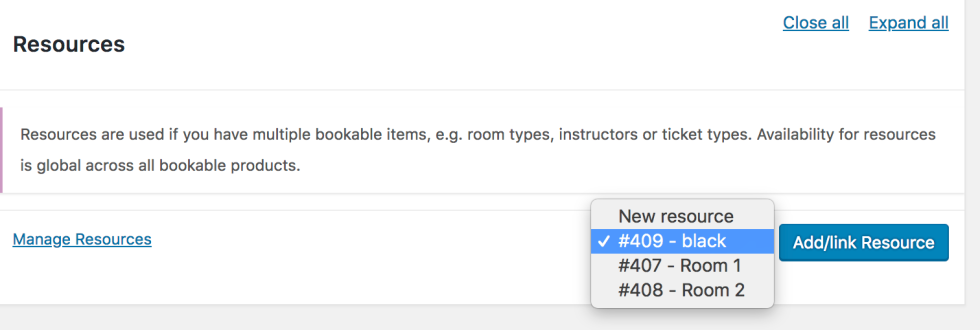
Customer selected. - Scrolling down further on the Resources tab, click the New resource drop drown and select one of your chair resources you created earlier.
- Click the Add/link Resource button. This will connect your resource to this specific bookable product.
- Go through steps 2-3 to add the rest of the chair resources, such as Gold Chairs and White Chairs.
- Click Update button to save your work.
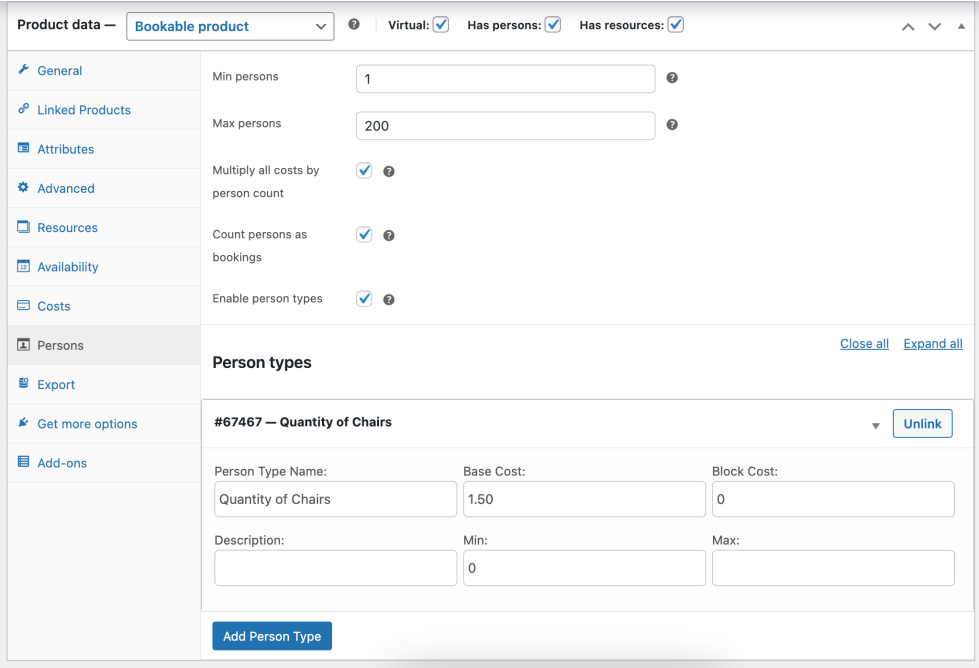
Set up the Persons Tab
↑ Back to top- Next, go to the Persons tab. Even though the product settings say it’s for Persons, we are utilizing this feature as a way to indicate the number of chairs the customer wants to rent out.
- Set the Min and Max persons as needed. Persons is going to be used to allow the customer to define the number of chairs they would like to rent as well as to calculate the price based on the number of chairs booked. In this use case, since the number of chairs that can be booked at once will be limited to the number of chairs available for the chosen color, max persons has been set to 200.
- Tick the box for Multiply all costs by person count to ensure that prices are calculated based on the quantity of chairs.
- Tick the box for Count persons as bookings to control the number of chairs available for any given block of time.
- Tick the box for Enable person types. This will add a section called Person Types underneath.
- In the Person Types section, click the Add Person Type button. This will add a rule for the cost of each chair.
- Under the Person Type Name field, enter a custom label. For this example, we will label it as Quantity of Chairs.
- In this example, we are charging per chair and will include Base Cost as $1.50. With that, $1.50 will be multiplied by the number of chairs selected.
- Click Update button to save your work.
Setting Additional Costs (Optional)
↑ Back to topIf you want to charge an extra price in addition to the price per chair, you can include additional costs under the Costs tab. For example, if you want to add an addition base cost for the whole reservation during your high season months, you can define that by adding a range rule. In the below image, there is an extra $100 blanket cost in addition to the cost per chair during the months of May through August:

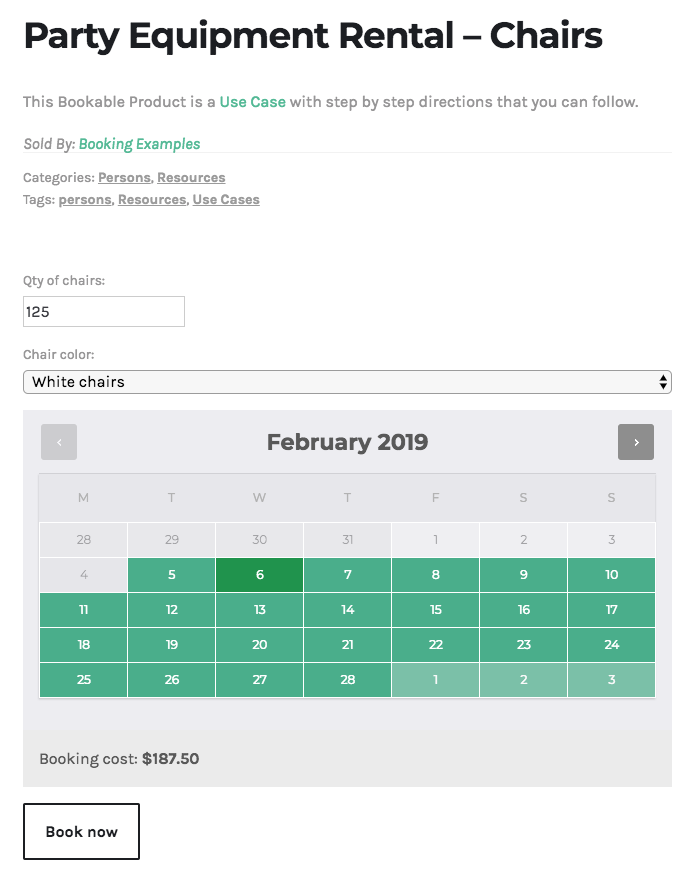
Customer View
↑ Back to topThe below image illustrates the customer experience when renting chairs. They will select the number of chairs they need and the color (Resource).
Questions and Support
↑ Back to topSomething missing from this documentation? Do you still have questions and need assistance?
- Have a question before you buy this extension? Please fill out this pre-sales form – please include the name of this extension in your query.
- Already purchased and need some assistance? Get in touch with a Happiness Engineer via the WooCommerce.com Support page and choose this extension name from the “I need help with” dropdown