Thanks for selecting the Bingo theme. This is a guide to help you get started with Bingo on your WooCommerce online store.
Installation
↑ Back to topBefore installing: Download the theme package from WooCommerce.com > My Account > Downloads.
To install the theme, follow these steps:
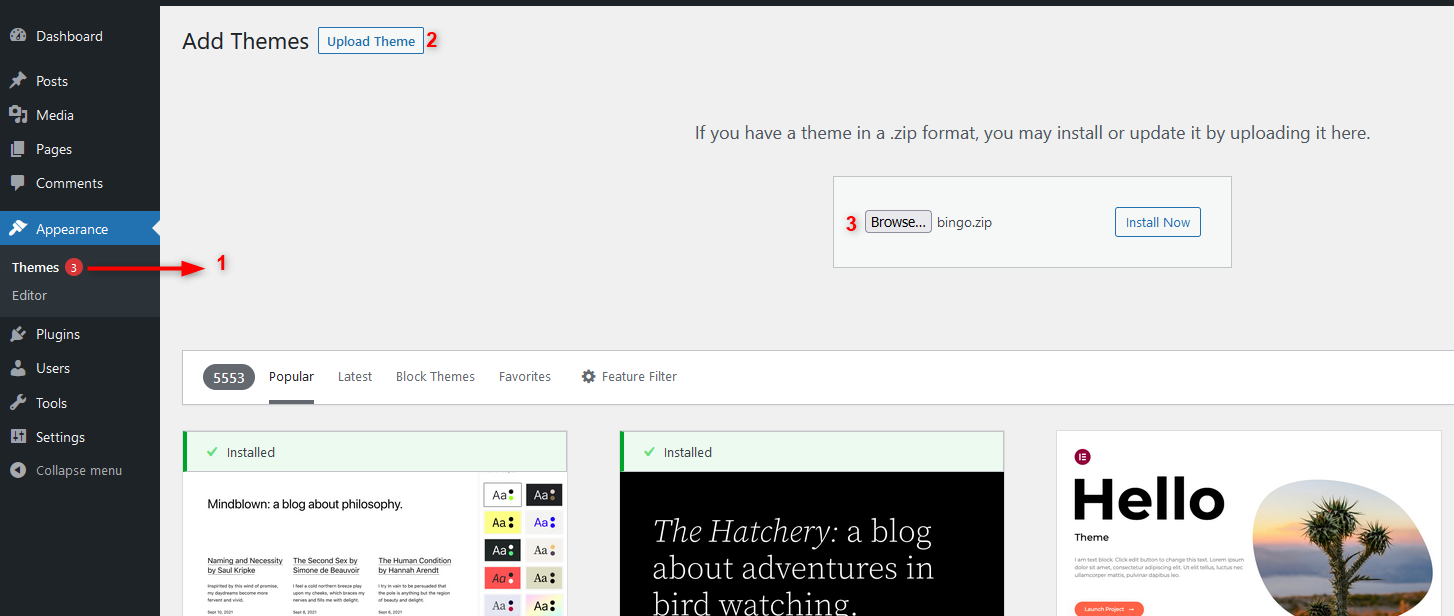
- Login to your WordPress Dashboard and go to Appearance > Themes.
- Click on the “Add New” button on top.
- Click “Upload New” button on top.
- In the new interface click “Choose File” and browse your computer to locate “bingo.zip” file you downloaded.
- Click “Install Now”.
- After installation Activate the theme.
Required Plugins
↑ Back to topThe “Required Plugins” are some tools that you need to use the Bingo theme properly.
- WooCommerce: You need to install the official WooCommerce plugin to display the shopping cart and products on your website. This plugin also has many other blocks that you may find useful.
- Jetpack: Jetpack is another plugin that you need to install. It provides different tools for your WordPress site, such as security, performance, and growth.
Import Demo Site
↑ Back to topMaking the theme look like the demo version of Bingo
First, download the zip file containing the demo content here.
- Install and activate all the recommended plugins listed above.
- In your Dashboard go to Tools > Import.
- Choose WordPress importer from the list. If you have not installed it already, you need to install it first.
- Click Run Importer.
- Click Choose File and browse for the bingo-demo-content.xml file you downloaded and upload it.
- You will then have the choice to import attachments, so check the Download and import file attachments box.
- In your Dashboard go to Settings > Reading and assign the Home page to display in front and Blog page to display the latest posts.

Theme Customization
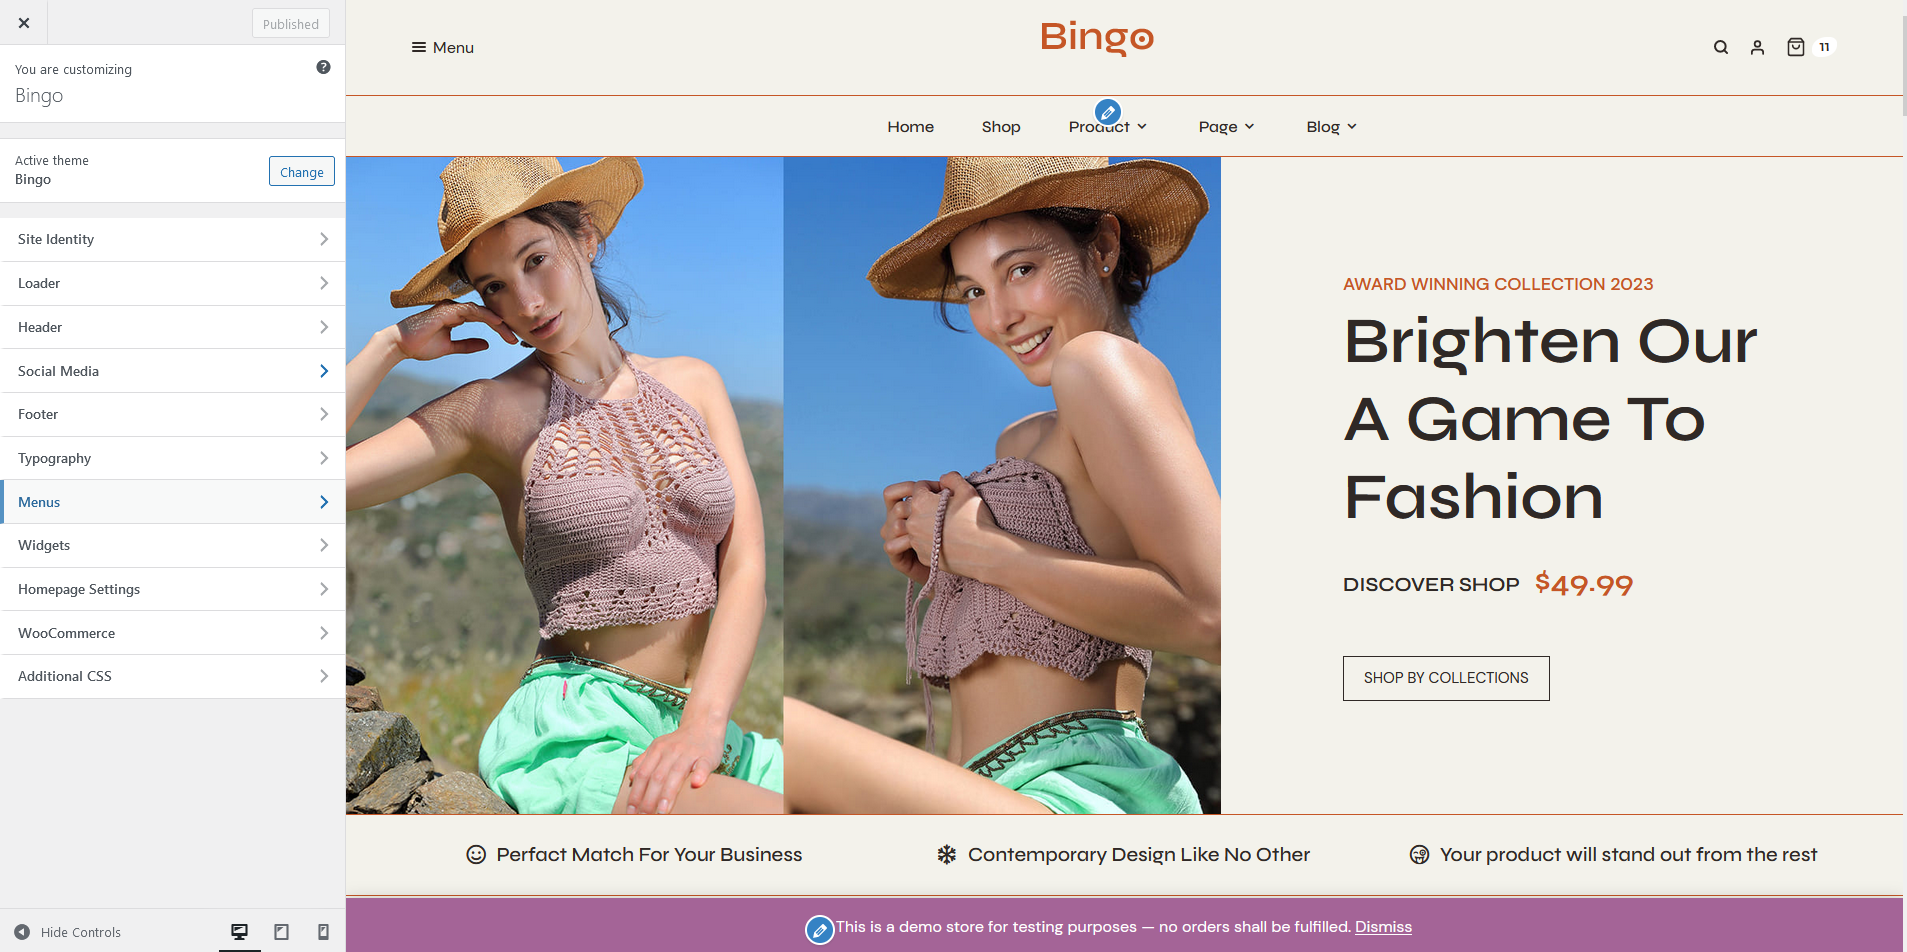
↑ Back to topIf you want to customize the Bingo theme, go to Appearance > Customize > Bingo.
Setting up Menus
You can assign your menus from Appearance > Menus.
There are 2 menu areas in Bingo.

Setting up Menus
↑ Back to top- Primary Menu: Below to the logo
- Humburger Menu: Previous to the logo
Assign your menus to these areas according to your preferences.
Site Logo
↑ Back to topSite Logo
↑ Back to topTo customize logo in Bingo theme, follow this step
- Go to Appearance > Customize > Site Identity.
- Here, Click on Select logo and upload your logo
- Here, you can update Site Icon
Store Settings
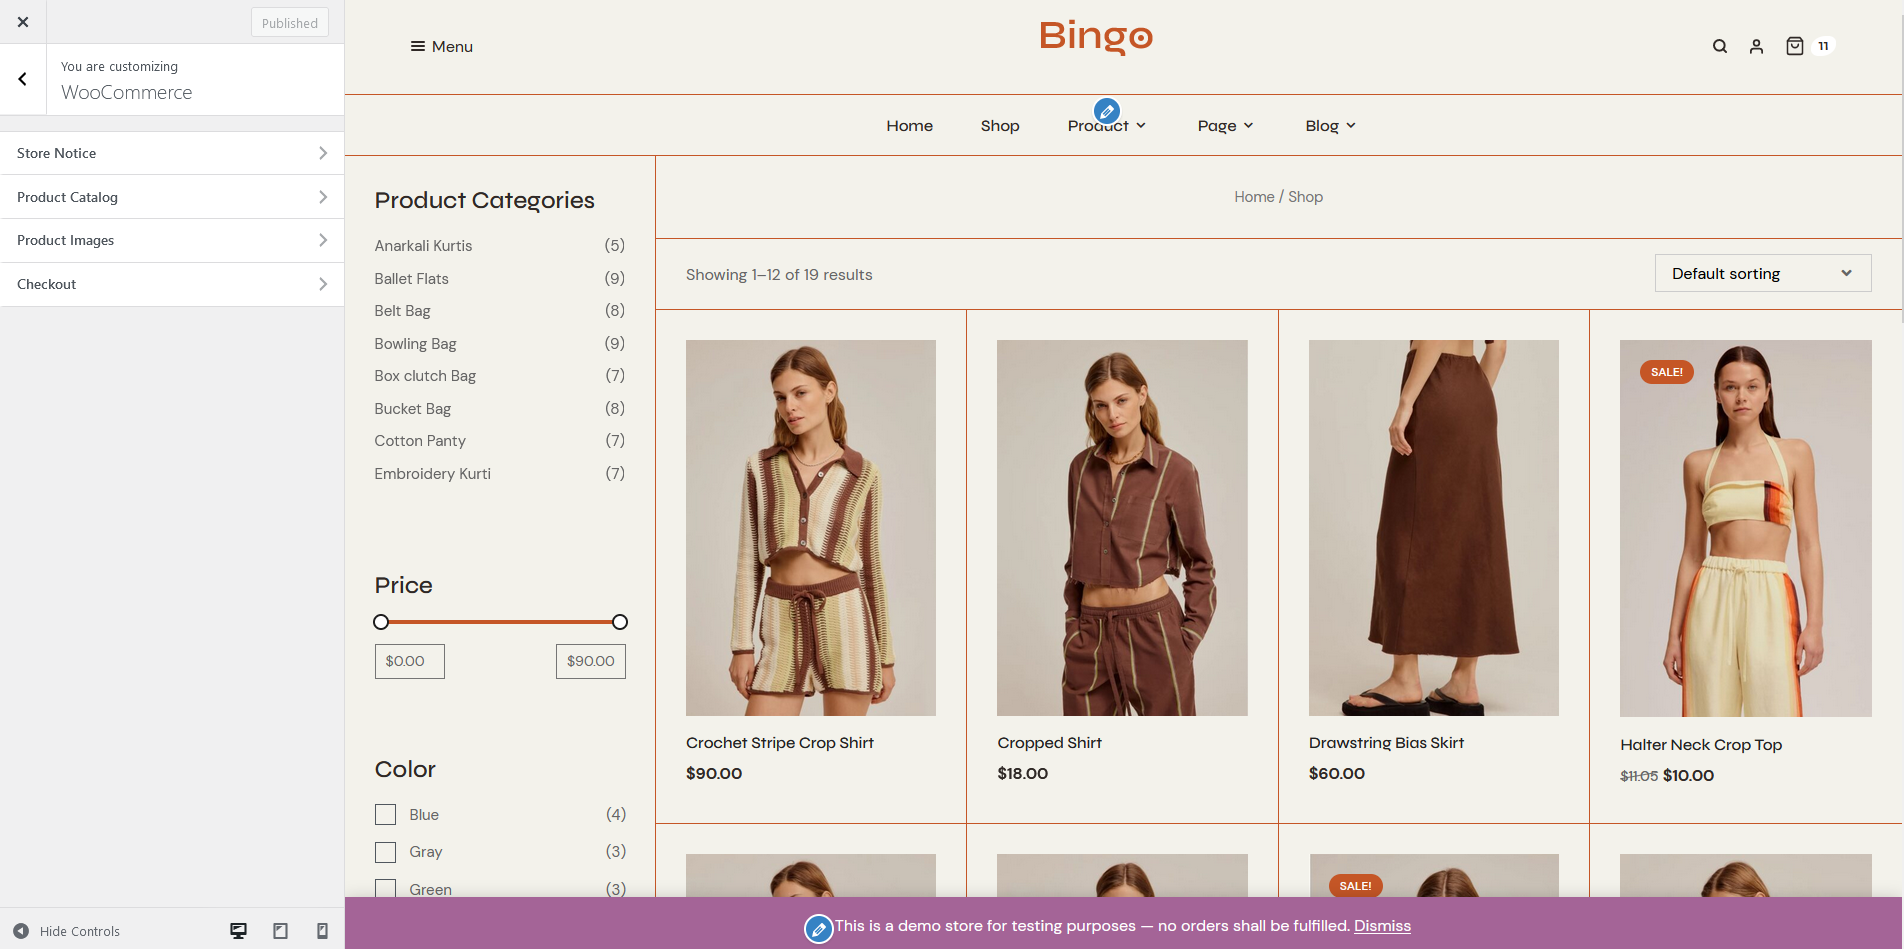
↑ Back to topTo customize your WooCommerce store in the Bingo theme, follow these steps:
- Go to Appearance > Customize > WooCommerce.
- Here, you can configure and adjust various elements of your store, such as product pages, catalogs, product images, and more.
- Once you’re done customizing, click “Publish” to save the changes to your store.
Social Icons
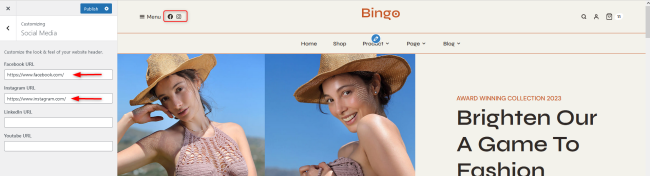
↑ Back to topTo add social icon in header, you can follow this steps
- Go to Appearance > Customize > Social media.
- Here, you can add social media link.
CSS Customization
↑ Back to topTo further customize the appearance and layout of your site in the Bingo theme, you can use CSS code. Here’s how:
- Go to Appearance > Customize > Additional CSS.
- Here, you can add your own CSS code to customize your site.
- You can make changes to various aspects of your site’s appearance, such as fonts, colors, layout, etc.
- Once you’re done adding your CSS code, click “Publish” to save the changes to your site.