Deals for WooCommerce
by
Flintop
Offer your customers time-limited deals on products and payment gateways via a dedicated deals page.
Deals for WooCommerce allows you to showcase deals for your customers. It has a dedicated page with two sections: one for displaying product deals and the other for displaying payment gateway deals. Each of these sections has three sub-sections:
1. Current Deals
2. Upcoming Deals
3. Missed Deals
Features in Deals for WooCommerce
- Works for members and guests
- You can place restrictions on your inventory so that only limited quantities of a product carry a deal price.
- The maximum product quantity that a customer can purchase at a deal price is restricted to one per order. If a customer chooses to pay the original price instead, they can choose any product quantity.
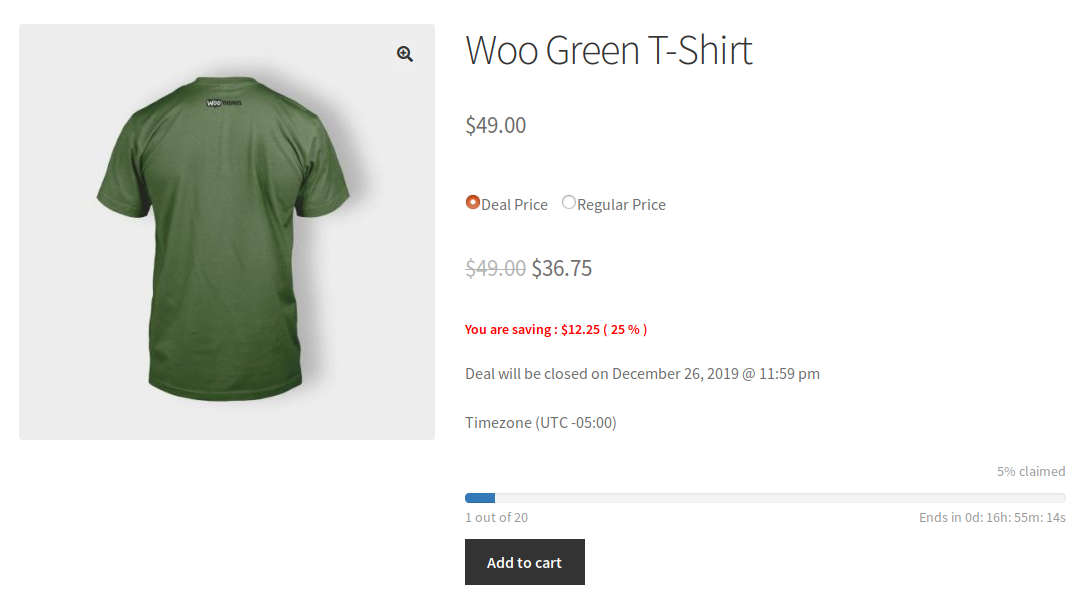
- A progress bar tracks the deal inventory on the dedicated deals page and on the single product page.
- A countdown timer displays a deal’s start time and end time.
- Customers see the original price, struck to display the deal price, as well as both the amount and the percentage of savings.
- Admins on the site can monitor the performance of their deal campaigns from a separate table.
- An option for the admin to hide the offer details for upcoming deals in Payment Gateway Deals.
- An option for the admin to display the deal price in shop and category pages.
- An option for the user to update the quantity of deal priced products.
- Shortcode to display the Product & Payment Gateway Deals.
- An option for the site admin to set the pagination size on the deals page.
Workflow of Deals for WooCommerce
Product Deals
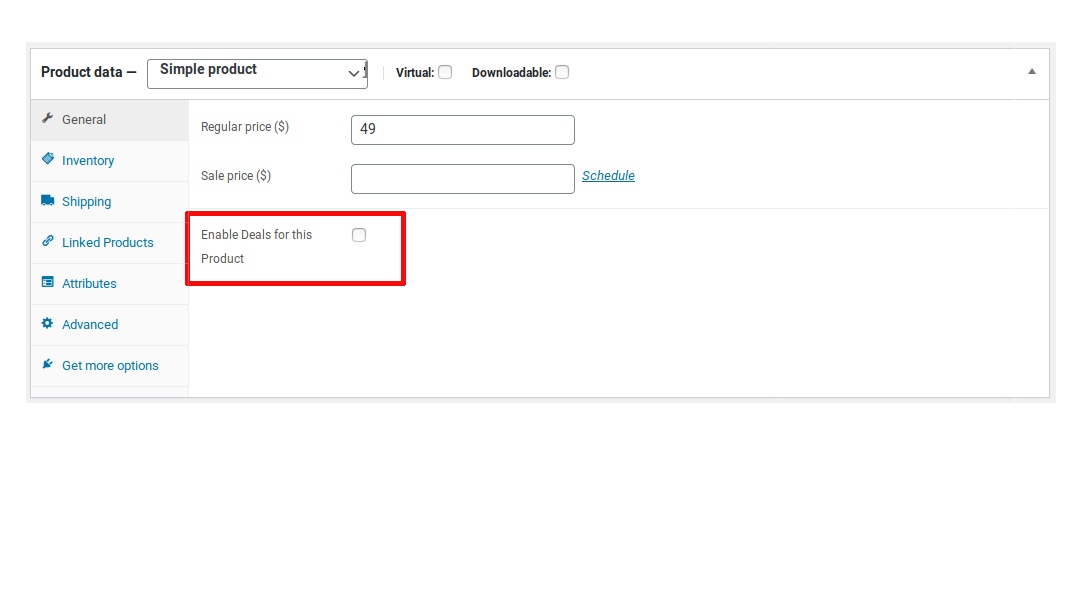
– Once you complete the initial configuration, create a new product/edit an existing one.
– Click the “Enable Deals for this Product” checkbox.
– To set a deal price, click the “Add Rule” button.
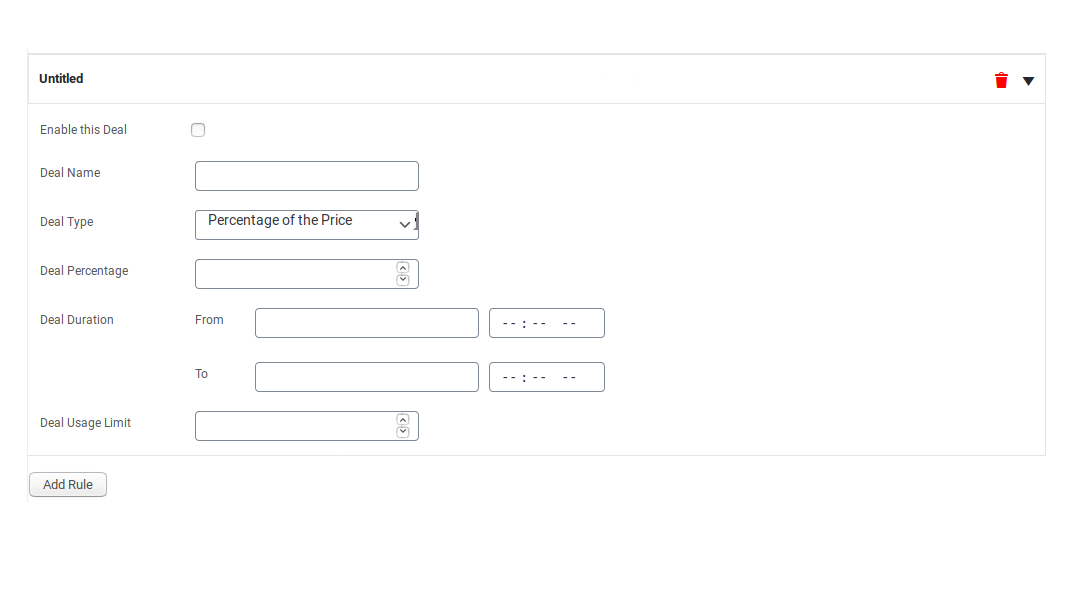
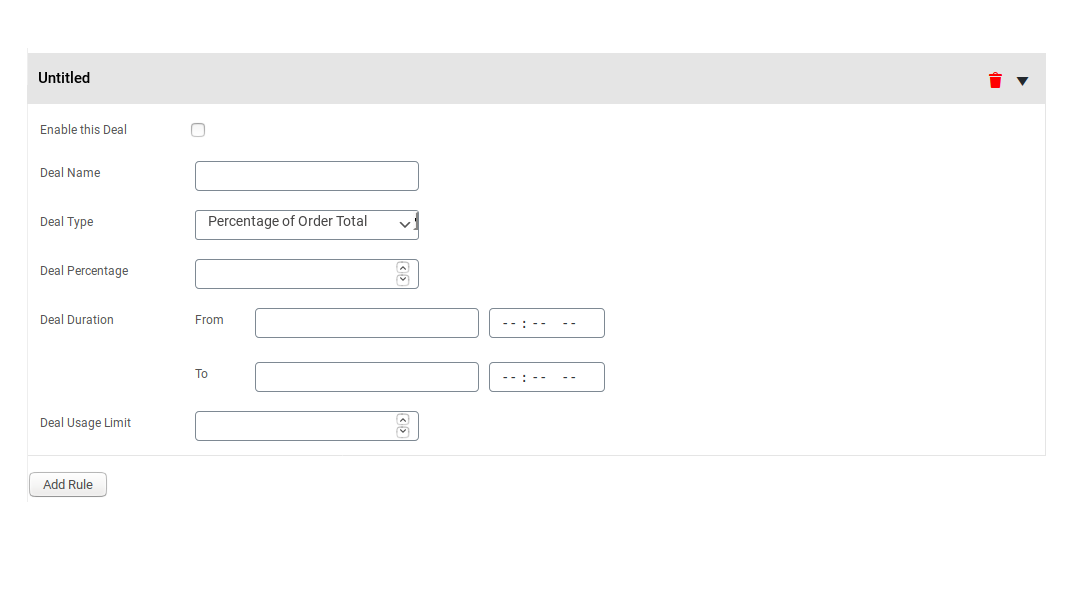
– Click the “Enable this Deal” checkbox and fill in all the required fields.
– Save the changes.
– The deal-configured product will now be visible on the deals page.

– Your customers can now directly add the product to their carts from the deals page.
– When your customers access the single product page, they will have the option to purchase the product at either the deal price or the regular one.
– When your customers choose to pay the deal price, they will not have the option to increase the product quantity.
Payment Gateway Deals
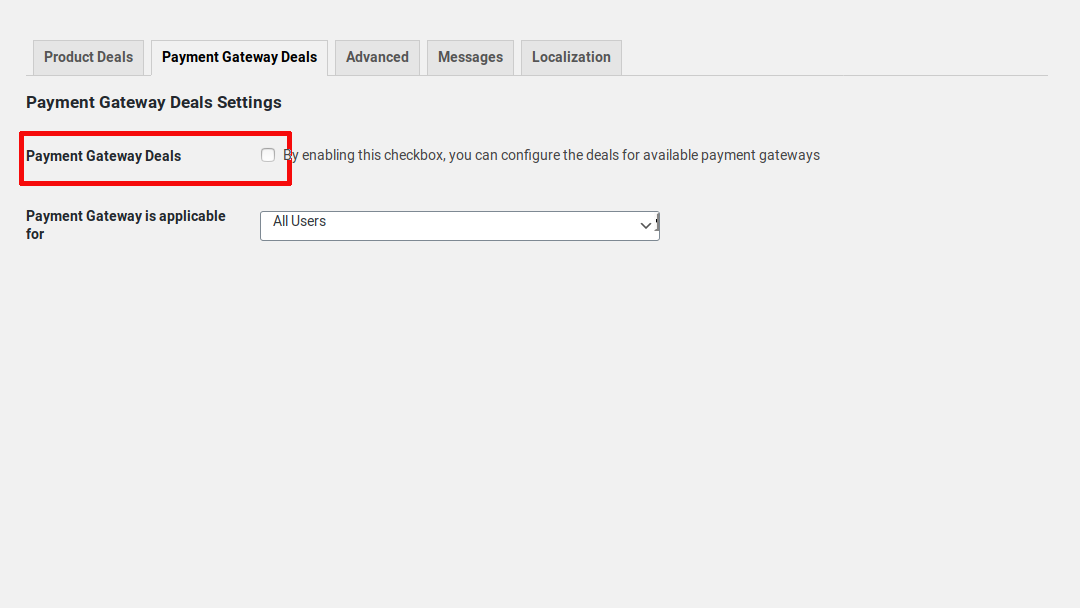
– Navigate from “Deals > Payment Gateway Deals” and click the “Payment Gateway Deals” checkbox.
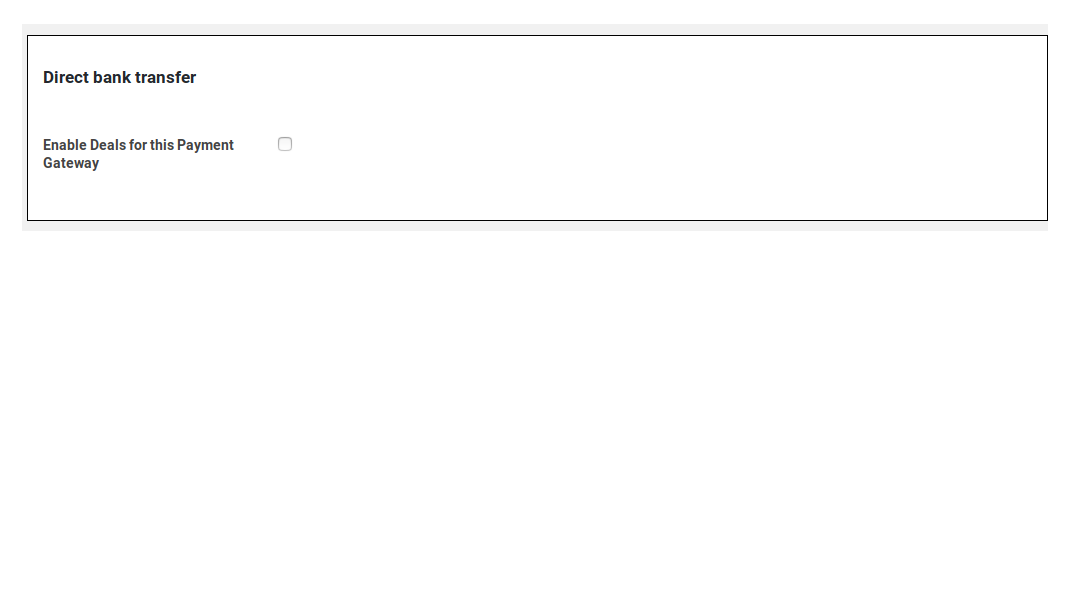
– Click the “Enable Deals for this Payment Gateway” checkbox next to the gateway for which you want to offer a deal.
– To configure the deal, click the “Add Rule” button.
– Save the changes.
– The configured deal will now be visible on the deals page.

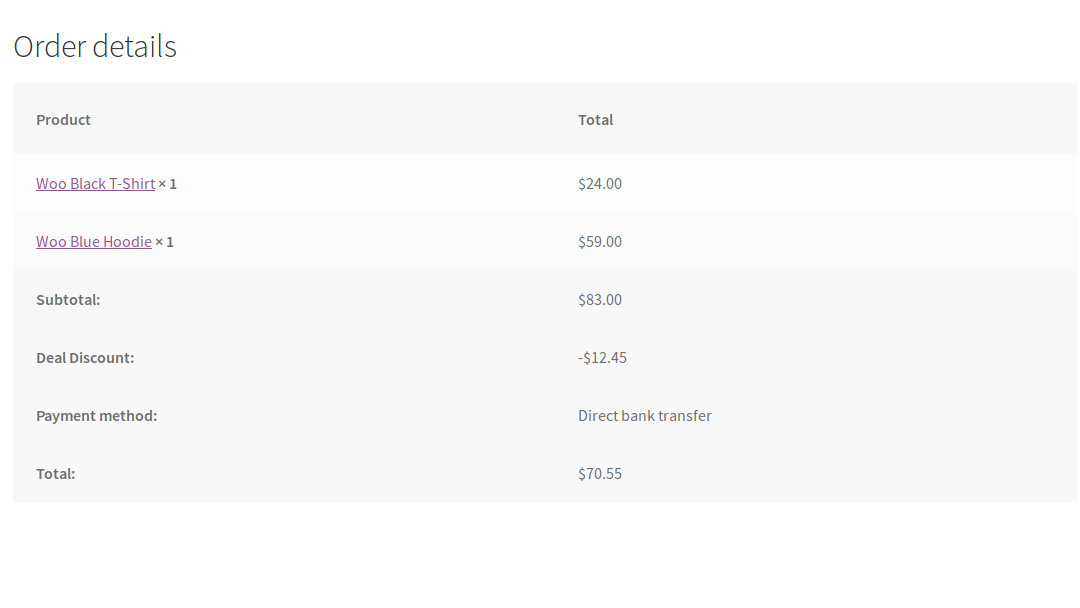
– To use the deal, your customers must first add a product to their cart. Then, on the checkout page, they will have to choose the payment gateway that carries the deal.

– Once your customers choose the payment gateway, a discount will automatically apply to their cart.